| SJ23 Tech Tip C14, (Updated 2021-08-30) Paul, Bob, Jimmy, Ron, David, Dennis. | |
|
Companionway Boom Tent and Bimini. |
|
| A good awning or bimini is essential if you are going to survive a
cockpit party in the hot sun or in liquid sunshine! Whatever your situation, the cover should be convenient to put
up, especially if a storm approaches, and slick to fold for storage.
If you seal the sides of an awning tight to the deck, it can add living space during
inclement weather. This is great in northern climates in which case I would use light
coloured fabric to
also let light
in. If the cover goes to the aft end of the cockpit a zipper door for stepping off the boat would be nice. GENERAL DESIGN CONSIDERATIONS - First you have to decide if your awning or bimini is to keep the sun off your head or to keep the rain out. It all depends on your local climate. Of course you can always make it dual purpose, which is my preference.
|
|
|
Setup & Assembly -
Assemble the
ribs by
inserting the 1/2" coupling into the 3/4" tube. This
combination maintains good flexibility to the rib. Secure
the tarp to
the frame with short lengths of line looped through the grommets of the
tent and the PVC frame work. You could
also sew a wide hem in the tarp for each rib and slip the tube
inside. Fasten the middle of the aft rib to the
boom topping lift. Then pull the middle of the forward rib to the mast with a
long cord to stretch the tent forward. Use a bungee cord at each T-fitting to
pull the frame down to the toe rail. It takes about 10 minutes to set
it up. The whole thing cost only $25 US and has served me well for several summers. Paul
Bailey TOP |
|
|
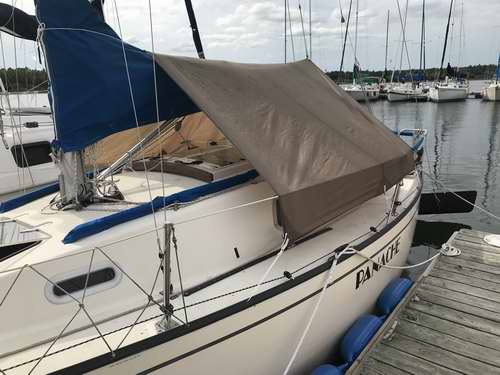
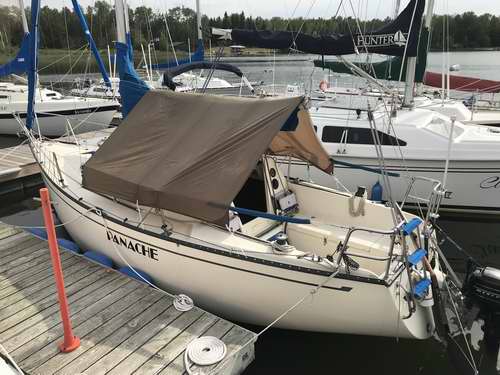
A NYLON BOOM TENT for Panache (2021) - With the really hot weather here it reminded me of an old project I've wanted to do. I have long needed a boom tent for shade or rain while at anchor so I blew the dust off a bag of double rip stop nylon that was in storage in the basement for many years. This was an old tent fly that was perfect for Panache's new boom tent. It started life about 30 years ago as a tent fly for the Scout troop I was a leader of. I spent many nights under it, thankfully dry ones, so I knew the fabric was still good. Thankfully cool dark storage protected the nylon during all those years.
There is a fair amount of room under the tent and it creates nice weather protected standing head room in the companionway, always appreciated for activities on board. While it is surprisingly easy to "walk" under the tent to go to the bow, my back does rub against the nylon which might be an issue if the nylon is wet. In Panache's case I can drop a lifeline gate without disturbing the boom tent. This will make boarding convenient. Another surprise is that it felt slightly cooler under the tent despite the brown colour. The breeze through it was pleasant. The only down side of this tent is that it blocks the sun to my solar panels! But then there's no sun when it rains! Oh well. I
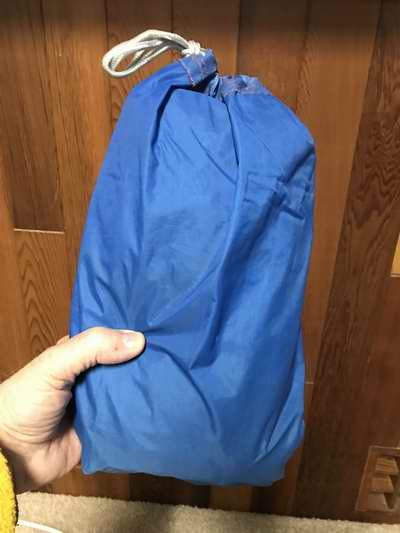
will store this tent in this nylon bag after it dries. The advantage of nylon is that it dries in a matter of minutes when the sun comes out. Nylon is easy to roll up and stuff in a wide open bag, the fabric breathes, and has a draw cord
to hang it from. It's small size lends to easy storage in a small place. There is no point in reinventing the wheel. Bob Schimmel TOP |
|
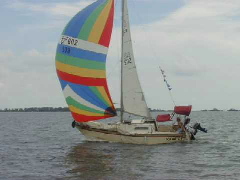
 BIMINI
-
While a cockpit awning is great at anchor, it doesn't work
while sailing. For this you need a bimini. Shown at right is a
terrific bimini
that Jimmy Harrell made for his SJ23. BIMINI
-
While a cockpit awning is great at anchor, it doesn't work
while sailing. For this you need a bimini. Shown at right is a
terrific bimini
that Jimmy Harrell made for his SJ23."I threw the first version together last year, a few days before a planned weekend trip to Lake Martin in Alabama. I used what material I had, including a PVC framed Bimini from another boat. The top is about (5 x 4)' and I thought at first that it would be too narrow (port/starboard) and not long enough (fore/aft) to be of much use. I was also worried about not being able to see around the bimini to trim the sails or that the boom could not clear it. After using it for the weekend, I now think that this size is a good compromise. There is sufficient shade for the two of us, provided we move occasionally, and it is small enough that I can see around it to trim the sails. The low height doesn't seem to be a problem since I can stand up in the cockpit behind the Bimini.
|
|
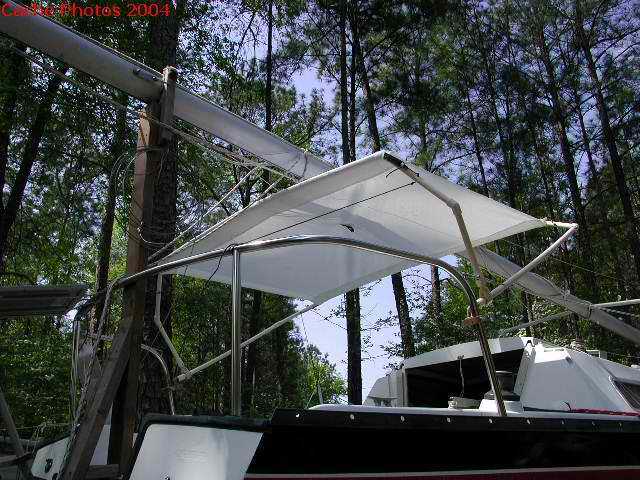
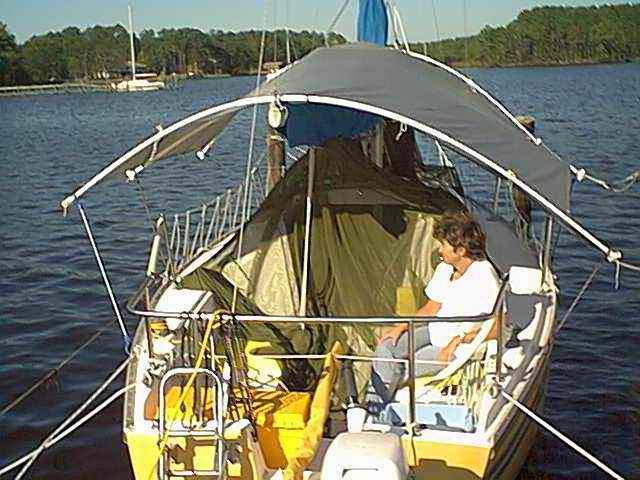
 2 TIER BIMINI - The
frame work consists of four ribs, two high & two low with a zip out window
joining the two. The difficult part is to make the top section. I designed
the top so that it will be fully functional while under full
sail. This means you can stand up under it. As you know an SJ23 boom is pretty low, the cockpit is small and a regular top
won't work well. In this design the top section extends over the stern about 18" and is high enough to stand
under. This provides shade in the back of the boat. The front section fits under the boom and
extends forward to the cockpit mounted traveller. The drop in the middle (about 12") is where I
installed the window
(similar to a dodger). 2 TIER BIMINI - The
frame work consists of four ribs, two high & two low with a zip out window
joining the two. The difficult part is to make the top section. I designed
the top so that it will be fully functional while under full
sail. This means you can stand up under it. As you know an SJ23 boom is pretty low, the cockpit is small and a regular top
won't work well. In this design the top section extends over the stern about 18" and is high enough to stand
under. This provides shade in the back of the boat. The front section fits under the boom and
extends forward to the cockpit mounted traveller. The drop in the middle (about 12") is where I
installed the window
(similar to a dodger).
This bimini design is a blessing when you are out in the middle of nowhere
and looking for a little shade to keep from poaching your brain. I can
fabricate the metal bows and my guy can make the cloth cover for you using mine
as a model. (the first one was the hard one).
Ron Katz. TOP |
|
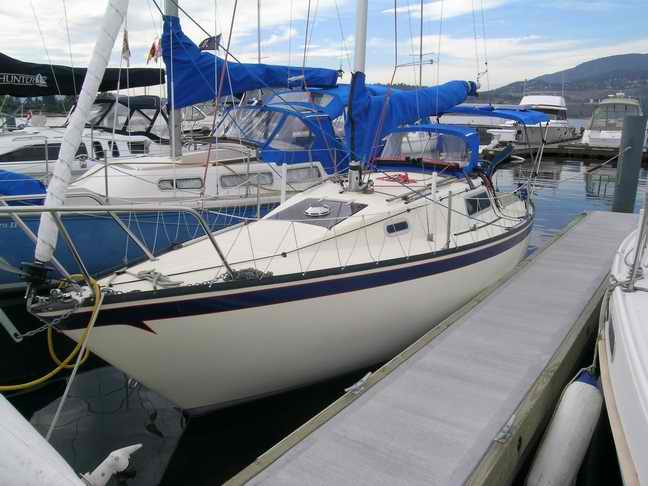
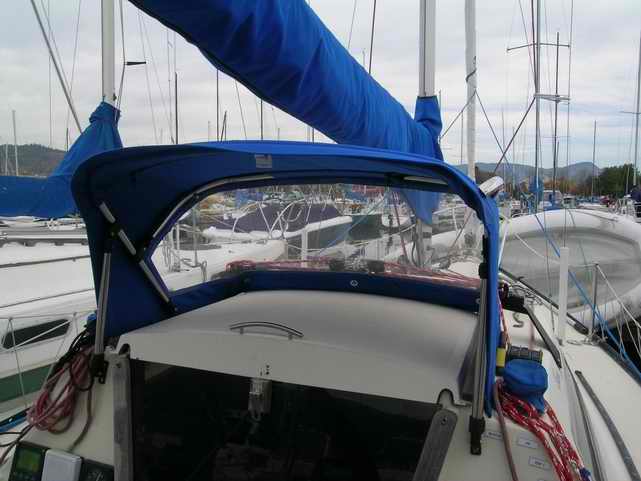 TWO TIER BIMINI - Continuing with the two tier concept is this excellent design
made by David Langton in Kelowna. This dodger has a really
robust frame that can stand up independent of the fabric. The outside grab handles
are functional and the visibility through the vinyl is
excellent. The hatch can slide
under the fabric to stay sealed to the weather. Notice the storage area on
top;
provided you don't push the hatch in all the way so everything falls on
the cabin floor! The mainsail track has been moved to the coach
roof, ahead of the dodger. This clears the cockpit and allows the dodger
to be carried further aft, proving more protection. TWO TIER BIMINI - Continuing with the two tier concept is this excellent design
made by David Langton in Kelowna. This dodger has a really
robust frame that can stand up independent of the fabric. The outside grab handles
are functional and the visibility through the vinyl is
excellent. The hatch can slide
under the fabric to stay sealed to the weather. Notice the storage area on
top;
provided you don't push the hatch in all the way so everything falls on
the cabin floor! The mainsail track has been moved to the coach
roof, ahead of the dodger. This clears the cockpit and allows the dodger
to be carried further aft, proving more protection. While I dislike the
restricted access to the winches and line lockers,
I can sure get used to a dodger when the sun is beating down on you or the
clouds dump rain on you. In cold wind it gives great protection.
One time I sat in my shorts under the dodger while the crew wore a ski
jacket at the helm. Despite all this protection I would still like
the option of rolling the vinyl
window down for reduced windage and extra ventilation when needed. I consider myself an occasional round the buoys racer
but prefer long
distance racing which is closer to fast cruising.
I like the BBQ support bar and remote control lines to the outboard.
Frames only.
Also take note of the solar panel and the roll up panel to reveal a window on top of the bimini. This is well thought out. David Langton
|
|
|
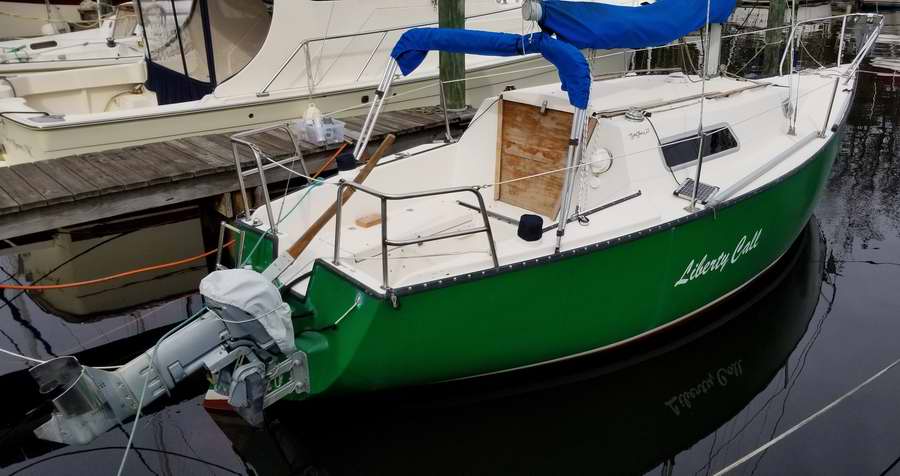
LIBERTY BELL 2019 - This bimini was ordered online from a chandler. It fits under the boom and has plenty of headroom when sitting or crouching in the cockpit. All the chandler needs are boat dimensions. The cover has been renewed once and the spare cloth was used to make the boot for storage. The only change I would make is to sew a window in the top so I can check mainsail trim while sitting. Currently I have to hang my head over the side, which is an awkward position to say the least! Maybe next season. Dennis Wolfe.
|
|
|
Return to Tech Tip Index. . . . . . . . . . . . . . . Have a Question? |
|
 RIBBED BOOM TENT for Mellow Yellow - Mellow Yellow's cockpit boom tent frame is made of (8 x 10)' vinyl
stretched between 3 white PVC ribs. The material is laid across
the boom on the 8' width.
RIBBED BOOM TENT for Mellow Yellow - Mellow Yellow's cockpit boom tent frame is made of (8 x 10)' vinyl
stretched between 3 white PVC ribs. The material is laid across
the boom on the 8' width. 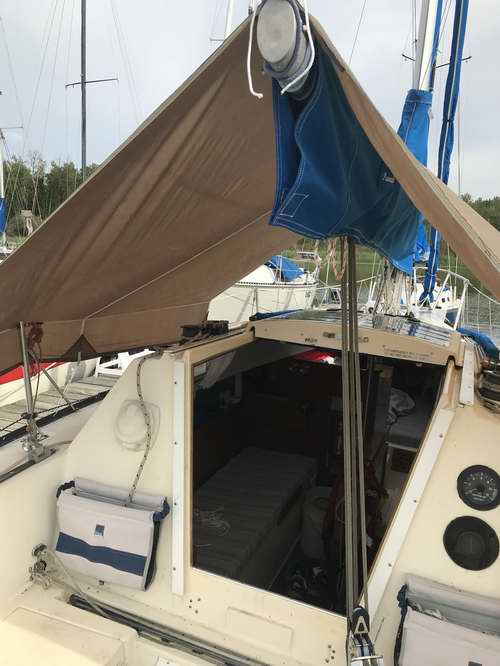 The dimensions are (10x8)' where
the 10' dimension across the deck is perfect to just slide over each lifeline to be tied to the toe rail. This should ensure that rain drips are kept out of the cockpit and it stays in place during a blow. The boom tent has 3 guy lines per side plus a line around the mast and another to the end of the boom to keep the ridge tensioned. A such it is the simplest version boom tent that can be tucked in a small bag.
The dimensions are (10x8)' where
the 10' dimension across the deck is perfect to just slide over each lifeline to be tied to the toe rail. This should ensure that rain drips are kept out of the cockpit and it stays in place during a blow. The boom tent has 3 guy lines per side plus a line around the mast and another to the end of the boom to keep the ridge tensioned. A such it is the simplest version boom tent that can be tucked in a small bag. 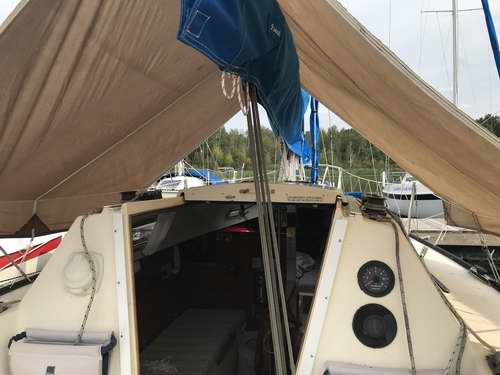
 I haven't used the tent on a float yet to realize the pros and cons so for now I will keep it like this. In the future I may slide it further aft in which case I'll need to add an 18" long zipper or a slot in the aft end to pass the boom topping lift through. Sliding it aft covers more of the cockpit for shade or rain. Although, moving it more than 18" could expose the forward end of the companionway to liquid sunshine. The sides of the slot would have to be reinforced and the outbound corners would each have an eye to tie the line to. A flap secured with Velcro over the slot will ensure it stays dry below. On the other hand I could just zip an extension to the aft end. Either of these is a lot easier than unclipping the topping lift.
 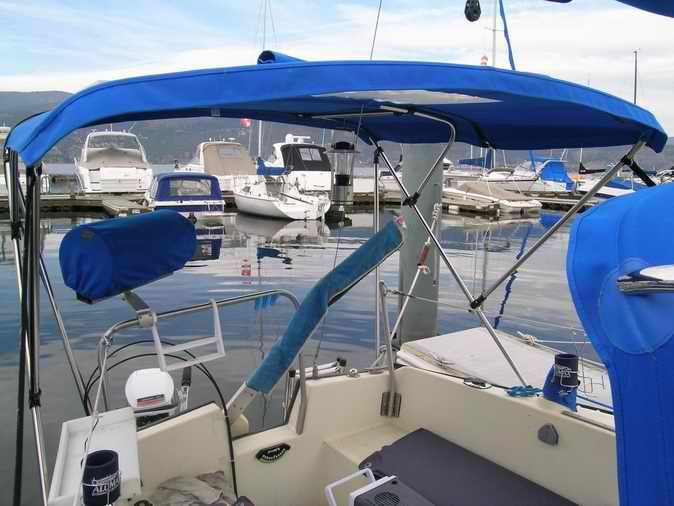 The bimini is also built with a free standing frame and a large
"window" in the top
to see the mainsail trim.
The bimini is also built with a free standing frame and a large
"window" in the top
to see the mainsail trim.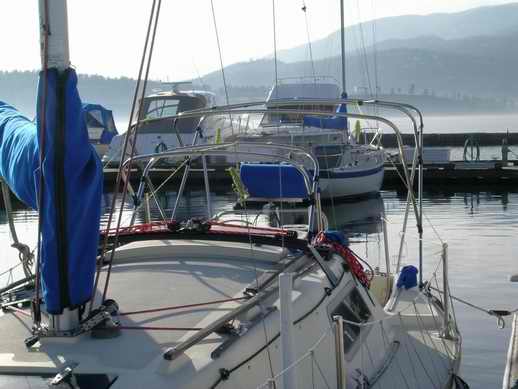
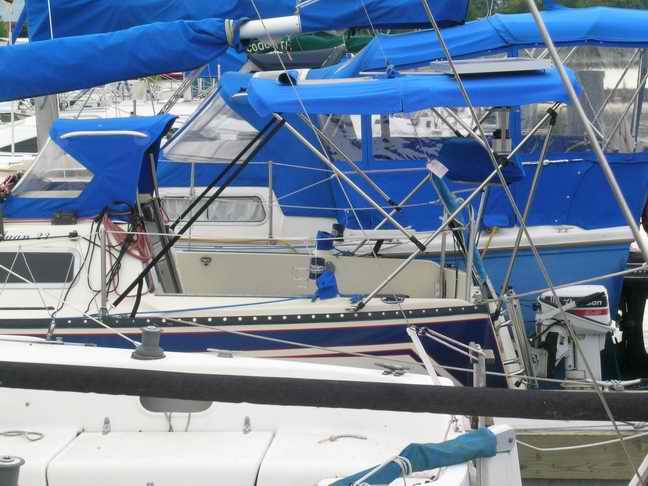 All
the blue fabric in this photo makes it difficult to pick out David's
bimini but take a close look at the
zipper across the middle. This would allow you to
change the size of the bimini to adjust the amount of shade. My guess is
that with the fabric removed, it might clear the cockpit for some
"active" sailing. And yet I can't help but feel that David has a section of fabric to
close the top completely, just like his neighbour. It would be
very comfortable at anchor in a drizzle. I wonder who copied who?
All
the blue fabric in this photo makes it difficult to pick out David's
bimini but take a close look at the
zipper across the middle. This would allow you to
change the size of the bimini to adjust the amount of shade. My guess is
that with the fabric removed, it might clear the cockpit for some
"active" sailing. And yet I can't help but feel that David has a section of fabric to
close the top completely, just like his neighbour. It would be
very comfortable at anchor in a drizzle. I wonder who copied who?