| SJ23 Tech Tip F07, (Updated 2017-12-22) Bob Schimmel | |
|
Mast Gate and Mainsail Slugs. |
|
 The
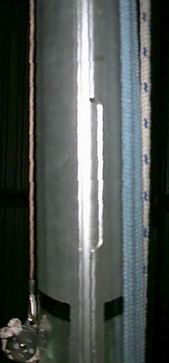
factory configuration for attaching the mainsail (shown at right) has
the starboard side of the kerf (mainsail track)
cut out to insert the mainsail slugs. A retaining pin is installed across the kerf, just above the cut out,
to keep the slugs on the mast. The problem with this configuration
is that your slugs cannot be
stowed right down to the goose neck for storage or reefing. There's also the potential for the
sail cloth to
snag on the end of the protruding pin, resulting in a nasty
tear. OUCH! The other problem with a
mainsail that stacks up fairly high from the boom is that a standard size sail
cover might not be able to cover it all. Panache's just barely covered
it. The
factory configuration for attaching the mainsail (shown at right) has
the starboard side of the kerf (mainsail track)
cut out to insert the mainsail slugs. A retaining pin is installed across the kerf, just above the cut out,
to keep the slugs on the mast. The problem with this configuration
is that your slugs cannot be
stowed right down to the goose neck for storage or reefing. There's also the potential for the
sail cloth to
snag on the end of the protruding pin, resulting in a nasty
tear. OUCH! The other problem with a
mainsail that stacks up fairly high from the boom is that a standard size sail
cover might not be able to cover it all. Panache's just barely covered
it.
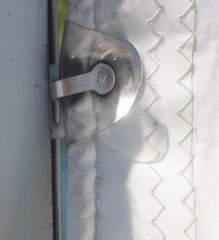
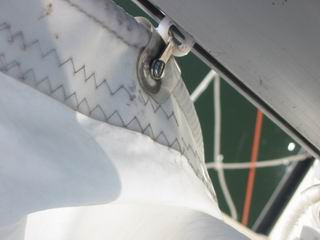
An alternative to using a pin to retain the slugs is to use two sail stops installed in the kerf, above and below the cut out. A stop consists of a sail slug with a knurled locking knob attached to the aft side. You simply snug up the knob to lock the stop at the kerf position where it is needed. Place one stop just above the gate to keep the slugs in the slot above it. Place the other stop just below the gate to keep the boom in the slot. I set Panache's boom at the bottom sail mark and never move it. Panache's sail cover is large enough to do the job. If your cover isn't large enough you could raise the boom (release the downhaul) to the lower stop. This makes a slightly more compact sail and boom profile. These stops have the advantage of not snagging on the sail cloth, but they sometimes slip. I find that adjusting the boom is a nuisance (PITA).
USE - If the boom isn't already on the mast, insert the goose neck first, letting it rest on top of a stopper. Support the outboard end of the boom with the topping lift. To insert the mainsail slugs, back off the gate screws about 1/2", spread the clam shells apart and then insert each slug, starting with the top one, pushing it up the mast, followed by the remaining slugs, working your way down to the three bottom ones that can be pushed down. The last few are dropped down because the mainsail is awkward to support and I don't want them popping off the mast. After all the slugs are in, snug up the clam shell screws and you are ready to hoist the mainsail. Don't strip the threads in the mast by over tightening. In 30 years of using the system, the screws have never come loose. So now the mainsail tack can be lowered to the boom for effective reefing. When I fabricated this gate in the early 90s a manufactured unit was not available. But necessity being the mother of invention, away I went. A friend was frustrated trying to copy my design and installed a MastGate instead. I tried his MastGate and concluded that if I had to do this job again, I would install one and fasten the gooseneck permanently. The boom stays in a fixed position anyway and I have no intention of moving it.
A slug with a 3/8" or 5/16" diameter barrel (usually nylon or Delrin) will easily fit inside the kerf. The inside of the kerf is actually big enough to accept a 1/2" barrel. What is really important is the thickness of the shoulder that fits between the lips of the (3/16)" wide kerf. The slug must slide easily. The replacement slugs I use have a 1/8" thick shoulder and a 5/16" barrel that slides easily. If the diameter of the barrel matches the bore of the mast kerf, it should slide easily without binding in the track. Measure your mast, as it may not be built from the same extrusion as Panache.
(Insert diameter of slug here. I never recorded this since it was an experiment) CLEANING the MAINSAIL KERF (TRACK) - It's also worth noting that the kerf and slugs should be cleaned and lubricated (in that order) on an annual basis so the slugs will slide easily under load, without biding. To clean the kerf you could make a "cleaning brush" from a foot long piece of indoor/outdoor rug rolled over on itself (bristles sticking out) and add some upper and lower cringles. Slip the "brush" in the kerf at the mast gate and pull it up the mast with a halyard and down with another line. You'll be surprised at how much debris comes out after a couple of trips up and down the mast. Don't be afraid to use soap and water as a cleaning solution. After the mast is dry, lubricate the kerf with silicon spray, Teflon spray, McLube or Fastrac. If the mast is standing make another "brush" for applying lubricant. Don't breathe Teflon spray. The stuff is lethal. But then silicon spray isn't much better either. It seems to me that a very light coat of white grease, as used in automotive applications, could also be used. Keep in mind that the lubricant shouldn't dissolve in water and you should apply it sparingly to prevent smearing on the sail cloth. Fastrac Sail Track Lubricant is a grease specifically designed for this function. The manufacturer claims it lasts longer than either of the sprays and dust doesn't stick to it. I have used it on Panache for several years now and one applications lasts about six months. For me, that's a season. It stays stuck to the metal over winter. Fastrac Sail Track Lubricant |
|
|
Return to Tech Tip Index. . . . . . . . . . . . . . Have a Question? |
|
 SOLUTION
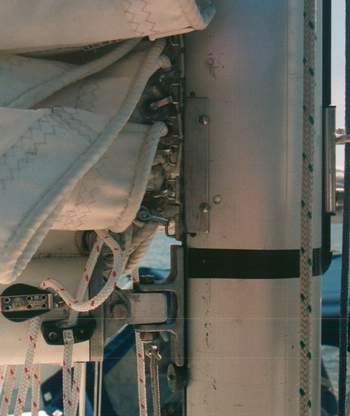
- On Panache I fabricated two opposing clam shell gates from sheet aluminum
to keep the slugs in the kerf. This way the slugs can slide down to the to the goose neck creating compact storage. The image at left shows the starboard gate. The port
gate is identical. Each gate is held in place with two 3/4" long
stainless steel screws threaded into the mast. My reasoning in creating two
gates was to open the gate wide enough to insert the slugs without
removing the screws. This way the WHOLE WORKS DOESN'T DROP OVERBOARD! The
screws are not long enough to interfere with the internal
halyards.
