| SJ23 Tech Tip F22, (Updated 2019-02-13) Bob Schimmel | |
|
Mainsail Lazy Jacks and Storage Straps. |
|
Call
me lazy or whatever, but adjustable lazy jacks sure come in handy when you're
ghosting along in hot weather and all I want to do is get out of
the blazing sun, NOW! OK they also work in a nasty blow but you get the
idea that they simplify packing the mainsail by becoming the extra pair of
"hands" you need. Without them, the cloth is dumped all over the
deck, creating a slipping and tripping hazard. I prefer a clean
"sticky" deck to keep me from taking a dive into the murky depths, thank
you very much. Prior to my lazy jack system I've come way too close in
fulfilling this disaster! But that's another story.
 The solution is pretty simple as shown at
right. I've used it for many years and the only complaint
I have is occasionally snagging a batten when hoisting the main sail. It's
usually a matter of feathering the mainsail into the wind between the jack line, then a quick pull on the halyard as the batten passes a jack line. Sometimes easier said than
done! The solution is pretty simple as shown at
right. I've used it for many years and the only complaint
I have is occasionally snagging a batten when hoisting the main sail. It's
usually a matter of feathering the mainsail into the wind between the jack line, then a quick pull on the halyard as the batten passes a jack line. Sometimes easier said than
done!
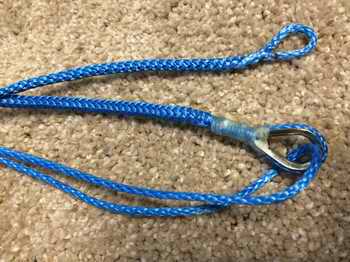
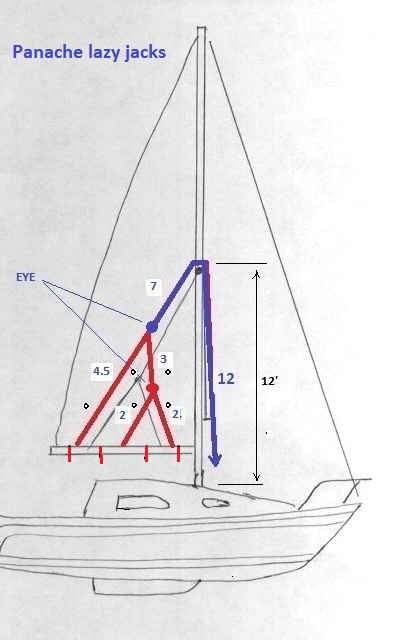
CONSTRUCTION - Panache's
upgraded lazy jacks (2019) are made from slippery Amsteel
Blue Dyneema. 1/8" for the jack lines
and
3/16"
for the halyard portion as shown in the
diagram. Three jack lines provide more support than my previous two shown in black. The loose end of the jack lines is secured to a cleat mounted on the front of the mast. Position the height of this cleat above the clew of the jib so the sheet can't snag on it. While this snag occurs more often in light air tacking, is it ever a nuisance when sailing in close to other boats. A snag happens less often in anything more than a moderate wind.
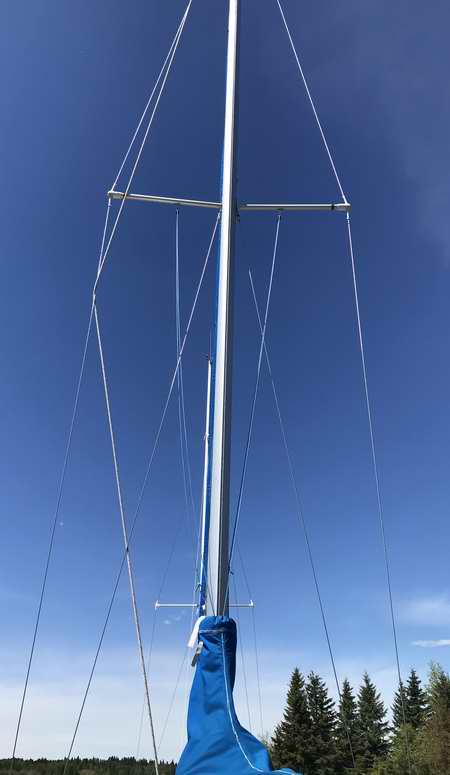
New lazy jacks in place and ooooh does the sail drop nicely to stay on the boom. At right the lazy jack halyards through the blocks at mid spreader.
CONSIDERATIONS
JACK LINES - 32' of 1/8" Dyneema with 2 matching SS thimbles, 8 eye straps.
LAUNCH - Install the boom on the mast. Tape the end of the halyard to the messenger line and pull through the spreader block. I loosely tie both halyards to the cleat on the front of the mast.
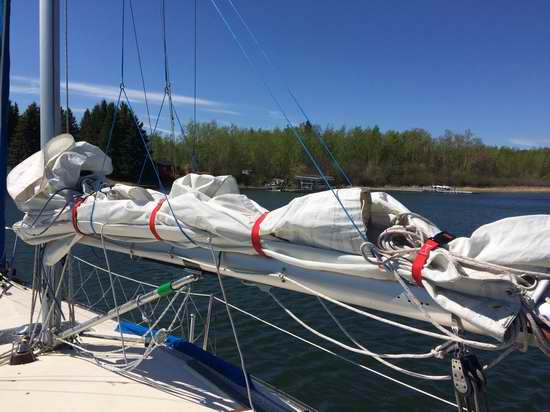
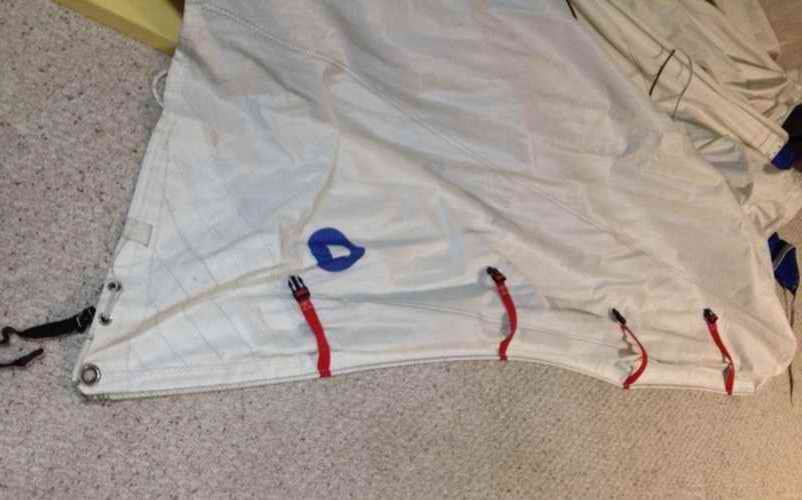
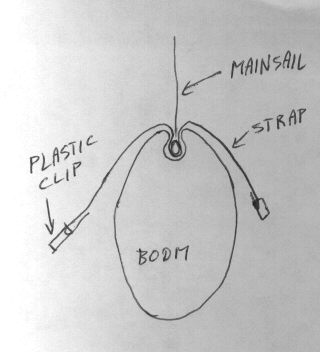
The straps are permanently sewn around the foot of the sail so I never have to look for them. The length of each strap is cut to fit loosely around the sail. Sometimes I clip them to each other under the boom. The black plastic clips can be found in a camping supply store. See Tech Tip F05 for Reefing Line Systems.
____________________________ PREVIOUS SYSTEM ________________________________
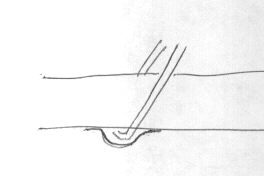
Each
jack line went through an eye strap
under the boom
to keep it in place and was pulled up on either side to be
divided into two equal loops (port/starboard). It is important
to run these lines against the boom, inside the reefing
lines, so as not to affect the 1/4" reefing lines along the
boom. The eye straps were positioned
at the 1/3 points along the boom. Your mainsail may have different requirements
so be your own judge in this.
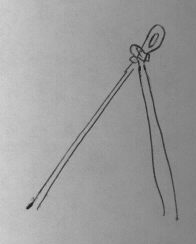
I tied the end of the halyard to the junction point of the jack lines where it bisected the angle of them. While this supported the mainsail for many years, when relaxed they hung just low enough to slip the sail cover over the boom. This was more luck than by design because I forgot to consider the sail cover in my design. Anyway, if you have this problem it can be alleviated by using a tiny block at the junction point so the halyard can center itself along the jack lines and hang lower. Alternatively, tie a loop at the end of the halyard and slip the jack line through it. The free end of the halyard
was tied to the spinnaker pole ring on the mast as shown above.
Just before I put my mainsail cover on, I slid the ring to the top of the
track, which creates just enough slack to fit the sail cover on.
If you don't have a spinnaker ring on a track, devise an alternate
method to secure and loosen the halyard. When sailing, the ring was
positioned with just a slight amount of slack in
the lazy jacks. This way the mainsail shape is not distorted and
can generate the most pull. In this position it contained the mainsail
and the whisker pole was quite
happy with it. |
|
|
Return to Tech Tip Index. . . . . . . . . . . . . . . Have a Question? |
|