| Whenever a bunch of us have a discussion on boat maintenance, the
subject of finish coatings usually arises and there is no limit on the
opinions. One underlying fact of a coating is that it must protect the
wood, a fact that is sometimes overlooked in the "opinion
war." We had a Sikkens factory technical representative demonstrate Cetol Marine coating
to our club and he talked more about preparing wood
than the product. The main message he got across is that a piece
of engineer cut wood has 6 sides! "The reason why many
coatings fail is that the unprotected bottom of the wood wicks up water
from the deck. The water then becomes trapped inside the wood by the
coating on the other 5 sides. When the wood is heated by the sun the water inside turns to
vapour which has sufficient force to easily lift a perfectly nice
coating. Think of the power of a steam locomotive! You are
left with a flaky finish. This is the reason why many deck mouldings are installed on standoffs, to keep them high and dry. The time it takes for the damage to occur is
proportional to your local climate."
Below is listed my
experience with different finishes I have tried over the past 40
years. They are listed in my order of preference, which is the
reverse order in which I discovered them. Go figure.
- SIKKENS Cetol Marine - This is
now my preferred coating. The shine is somewhere between varnish and
polished tung oil. It's extremely tough, rated for walking on.
I applied 5 coats to my tiller and after three years of full
exposure to the sun there was NO peeling, lifting or wear, even in the spot where I tie a line around the tiller to secure it for
mooring. The single biggest advantage of this coating is that it breathes water vapour out and keeps liquid water out. With four coats there is 100% UV blockage. The
first few coats penetrate the wood to displace trapped air which is excellent because it protects the inside of the wood. This is evident from the bubbles popping to the surface. This is
extremely
important if the wood is exposed to the outdoors or where water can
stand on it like a deck. A fresh coat dries in a few hours
with recoat time being 24 hours. It can be
 applied with a brush or a
rag to as low as 50C. You should apply a maintenance coat
once a year to maintain the surface and UV protection. Do not sand between
coats. At most severe use a Scotch Brite pad. And remember what James
(007) said, "Stir but not shaken," when you
mix the contents in the can. Stirring brings up the UV block goop from the bottom of the can. Oh so important. applied with a brush or a
rag to as low as 50C. You should apply a maintenance coat
once a year to maintain the surface and UV protection. Do not sand between
coats. At most severe use a Scotch Brite pad. And remember what James
(007) said, "Stir but not shaken," when you
mix the contents in the can. Stirring brings up the UV block goop from the bottom of the can. Oh so important.
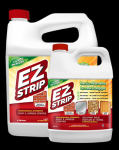
- REMOVAL - EZ Strip varnish remover can dissolve hardened Cetol Marine.
Its available from Home Depot. Just paint it on, wait 30 minutes
and scrape it off. Use a carbide tipped cabinet
scraper as it will last longer than a metal one. The problem with sanding is that the
removed Cetol clogs the paper quickly. If you are scraping be careful of the corners, they might leave a gouge. The Cetol I removed from my tiller came off in two applications, followed up with the belt sander for the flat ares and a palm sander for the curvy top and bottom. There were a few spots of deep penetration that stayed. Not a big deal since Cetol was going back on. Tkae the suggestion from the local Sikkens Technical representative,
"Maintain the coating. Don't let it deteriorate to expose the
raw wood or you will have to start all over again."
Fortunately a maintenance coat is dead easy.
- TUNG OIL - This finish is very
good and can be applied with a brush or a rag as low as 50C. It doesn't shine as bright as any of the other coatings, BUT, it is
extremely tough, it stands up to UV and rough wear for about 2 years
on the Canadian prairies. It penetrates the wood to displace water
and it breathes, somewhat. The later is extremely important if the
wood is fastened to a deck. It dries very quickly. I have applied
four coats in two hours on a spring day.
If tung oil is applied with a brush, it dries to a shiny finish. If
it's hand rubbed with a rag, it forms a polymerized satin finish
that is extremely tough. The best way to describe the finish is
"an expensive looking satin" that feels soft to the touch. Subsequent coatings can be applied whenever you like if you use a
rag. If you use a brush, you should do a light sanding with bronze
wool or a Scotch Brite pad.
- OIL
- I
tried several well-known brands of oil and all of them eventually
resulted in the same burned look. The wood became so dark that I
eventually replaced it. I attribute this to long exposure in the hot
sun. However, it is easy to apply, even as low as 50C,
and I know people who have good success with it. It doesn't last
very long though. I had to apply about four coats each summer,
which I found tedious. On the other hand bugs
don't stick to it.
- VARNISH - Varnish has a very
nice finish but from my point of view, requires too much time and
effort to apply, especially if the boat is stored outside. It must be applied at 200C, out of
direct sunlight and away from bugs. We SELDOM have these
conditions on the prairies and our painting season is very short.
If the weather is good, the bugs are also out.
- POLYURETHANE
- Polyurethane
has a very nice finish but it does not breathe. Therefore, any
moisture wicked up at the base of the moulding turns to vapour to
destroy the finish. In only six months, the resin peeled off and the
residue in the wood pores was very difficult to remove.
- POLYESTER
RESIN -
Polyester resin looked OK, but is a horrible finish for exterior
wood. It is too thick to penetrate deep into the wood to prevent
water absorption and it doesn't breathe. Therefore, any moisture
wicked up at the base of the moulding turns to vapour to destroy the
finish. In only six months the resin peeled off and the residue was
very difficult to remove. My wood trim and looked worse than when I
started.
- EPOXY -
I love epoxy as a glue, but as a finish it must be covered with a
UV varnish to protect it. I have had no problem using a Sikkens
Cetol Marine, tung oil or a UV rated
varnish over epoxy. (Varnish doesn't last as long as tung oil
though).
SAVING
THE PLANET ONE BRUSH AT A TIME
-
BRUSH CLEANER - Instead of cleaning your brush after each coat with some
toxic chemical, try this time saving pollution free trick. If you
are between coats, work the bristles clean of most of the paint (or
whatever), wrap it in a plastic bag and then place it in the freezer.
To apply the next coat, remove the brush from the freezer and let it
thaw to resume painting. You can repeat this an endless number of
times. Freezing prevents oil or latex paint and varnish from
curing. One added benefit of this technique is the bristles are
already loaded with paint so you don't start with a "dry" brush.
Just remember to clean the brush if someone decides to clean the
freezer. Can't find a freezer? Shove the brush in a snow
bank! Oh by the way, this trick does NOT apply to epoxy, but then you
knew that!
- PRESERVE LEFTOVER PAINT &
VARNISH - Store pure leftovers in a cool, dry place with the cap tight
so it is sealed. Premixed stuff should be used, not saved. Reduce
the amount of air in the container with a product called Bloxygen.
It contains pure argon that displaces air to prevent oxidation and
thereby preserve the product. Success isn't assured, especially
for two part wood finishes.
RESTORE NON-SKID on DECK
- INTERLUX INTERDECK - The cured finish feels velvety and is very sticky underfoot.
Dirt doesn't seem to stick to it. I've seen it on an SJ24 that is raced weekly.
At end of season it looked as good and performed as well as beginning of
season. It showed no sign of wear or scuffing. This is
amazing since none of the crew was particular with the shoes they wore.
|