| SJ23 Tech Tip B40, (Updated 2025-06-06) Bob Schimmel. | |||||||||
|
Seal SJ23 Stanchion or Pulpit Foot & Mounting Bolts. |
|||||||||
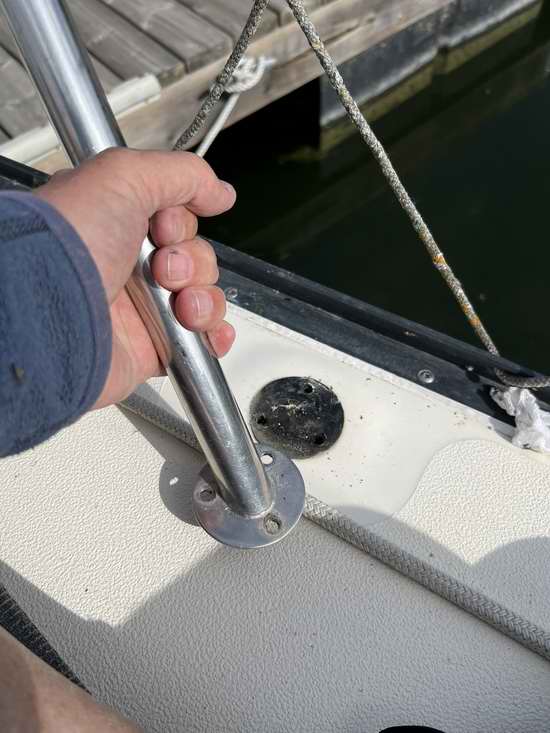
 Moist air will find its way inside a hollow stanchion through the lifeline opening. It's doubtful that moisture can get inside the pulpit unless you've drilled into it. The pushpit I fabricated had a hole in the bottom of the foot so the TIG welder could lay down a bead. While the pulpit looks to be sealed, be wary of a pin hole opening somewhere for the same reason. When the air temperature inside drops below the dew point, the moisture condenses and the water accumulates at the bottom. It does so in a significant amount because it NEVER evaporates. Moist air will find its way inside a hollow stanchion through the lifeline opening. It's doubtful that moisture can get inside the pulpit unless you've drilled into it. The pushpit I fabricated had a hole in the bottom of the foot so the TIG welder could lay down a bead. While the pulpit looks to be sealed, be wary of a pin hole opening somewhere for the same reason. When the air temperature inside drops below the dew point, the moisture condenses and the water accumulates at the bottom. It does so in a significant amount because it NEVER evaporates. Sealing the entire bottom of a stanchion to the deck prevents the water from draining which will likely lead to corrosion and splitting a tube with each freeze / thaw cycle. These cycles can also break the foot to deck seal, resulting in water dripping though a bolt hole into the cabin. An air gap under a pulpit foot can definitely wick up water which is what initiated this Tech Tip. I confirmed the loose foot with a vigorous wrenching of Panache's pulpit post while feeling for movement of the foot relative to the deck. Another major source of pulpit movement comes from carrying the mast during road travel (momentum) or winter storage (weight). See Tech Tip A07.
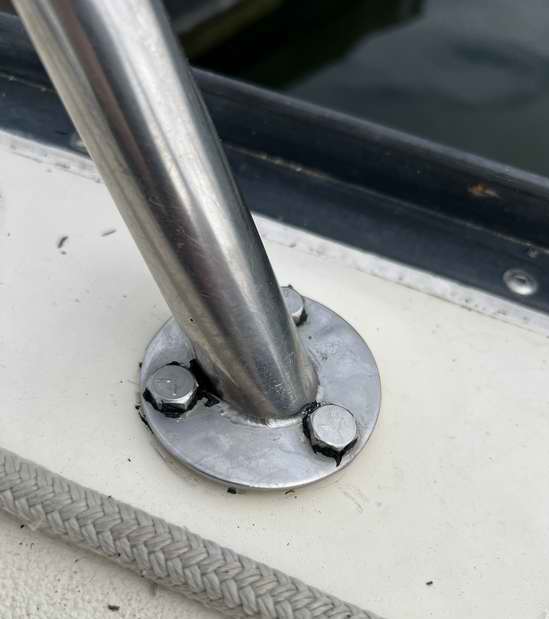
STANCHION - Sealing a stanchion foot to the deck is seldom a problem as the wide foot provides lots of space for your favourite marine sealant (Sikaflex, 3M 4200, Butyl Rubber, etc). Fortunately the stanchions have a drain hole at the bottom to let water out which is precisely why you shouldn't seal the entire underside of the foot. Always leave a passage through the sealant for water to flow out.
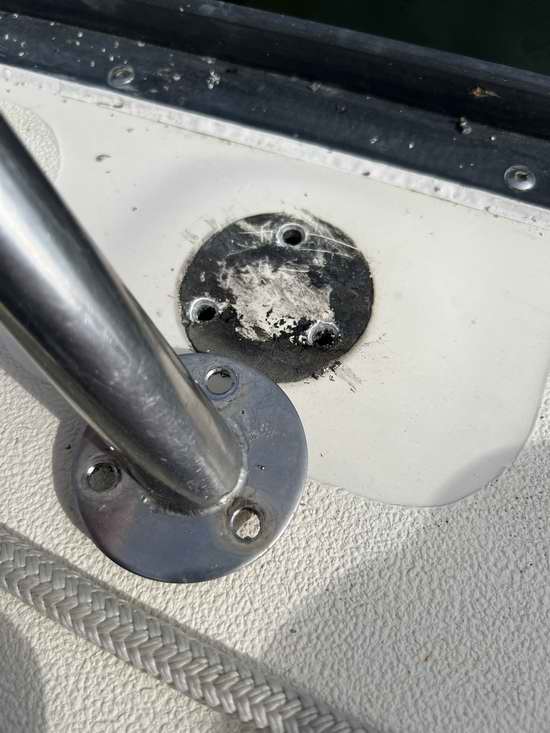
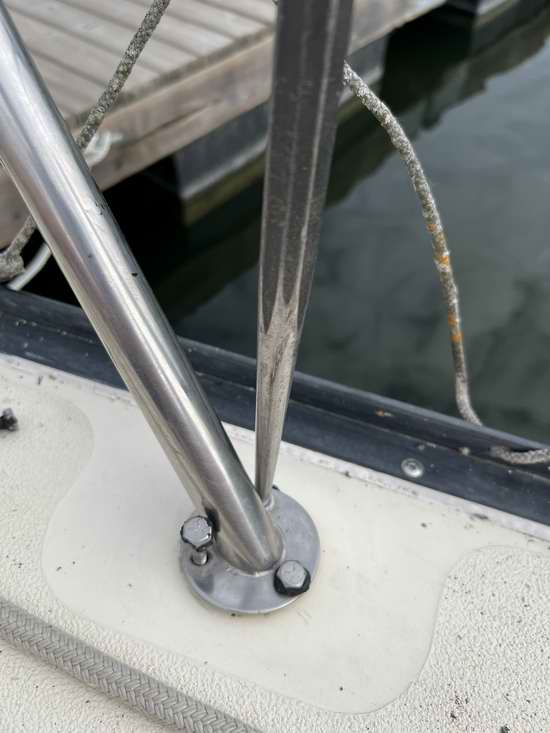
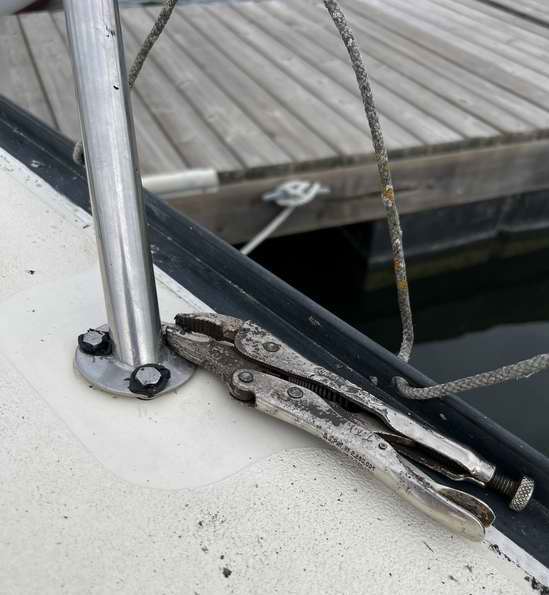
SEAL a FOOT - The best technique that comes to mind for sealing a stanchion or pulpit is to circle seal each deck bolt hole with sealant, leaving a space between them for water to flow. If you think the air gap isn't open enough, lay a SS flat washer over each bolt hole to limit squeezing the sealant out and to maintain the stiffness of the stanchion. A 1/16" wide air gap on deck is more than enough. Regardless of which technique, you should be able to poke something in there to keep the gap open. If the pulpit has never been off, then expect a lot of dried sealant and dirt under each foot. It's best to reseal them one leg at a time. Removing the pulpit entirely makes it difficult to align to the mounting holes as the tubing has a lot of memory. There is sufficient flex in the tubes to clean the deck and underside of each foot. Use an aligning pin to position the foot over the bolt holes. Sure saves a lot of aggravation when working with sticky sealant. That is the process shown below.
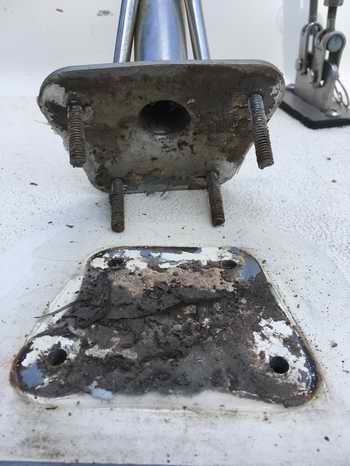
MOUNTING BOLTS - The mounting bolts are a unique problem. I have several on Panache that defy sealing and I'm tired of sponging up the water in the settee bilge. The bottom of a bolt head is seldom a smooth surface and sometimes a bolt goes through the deck at an angle. Neither of these situations is conducive to creating a good seal. To aggravate things, you know that movement can break a seal so your instinct tells you to tighten the "bejesus" out of the nuts. After all, movement causes a deck leak don't you know! Then you come up on deck to discover the sealant was squeezed out from under all the bolt heads you just tightened. This is quickly becoming a bad day. You could increase the holding power of the bolt head by using a flange bolt that has slightly more surface area under the head, if there is space for the flange. Failing that, I've stuffed sealant around the outside of a bolt head as a desperate solution. It looks ugly but there are times when you just have to do a temporary fix. If it actually keeps water out then somebody is looking after you! You have limited time on a buckshee fix, so time to git to it! INSTALLATION - Get a buddy to help because you don't have the arms of an orangutan to reach between the deck and the nuts below deck. In any of the following techniques, bevel the hole below the sealant then sanitize the surfaces with acetone before you apply sealant.
|
|||||||||
|
Return to Tech Tip Index. . . . . . . . . . . . . . . Have a Question? |
|||||||||