|
STEP |
ACTION |
TIP |
|
1 |
Position the outboard shift lever in neutral and don't adjust it.
|
* After removing the lower assembly, DO NOT operate the shift lever on the power head or the rod on the lower assembly. This keeps both in sync with each other when reinstalling the lower assembly. See step 11.
|
|
2 |
Remove
the nuts that hold the lower assembly (gear case & propeller) to the power head.
|
The lower assembly of a small outboard will usually separate now. |
|
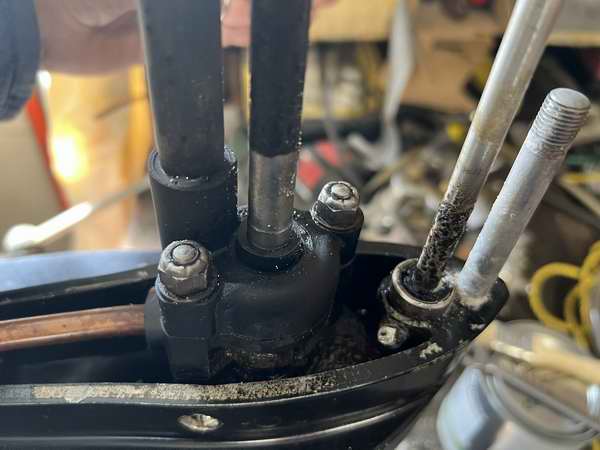
3 |
NOTE - For an outboard that has been converted to a long shaft, you may have to separate the lower assembly ~1/2" then jiggle the shift lever to forward to expose the shift lever screw. This connects the upper portion of the shift lever to the lower portion.
|
NOTE - Having
removed the screw through the gap you should be able to pull the lower assembly away
from the power head.
* If you have an outboard that was converted to long shaft, look for
a screw above the extension that was inserted in the leg. |
|
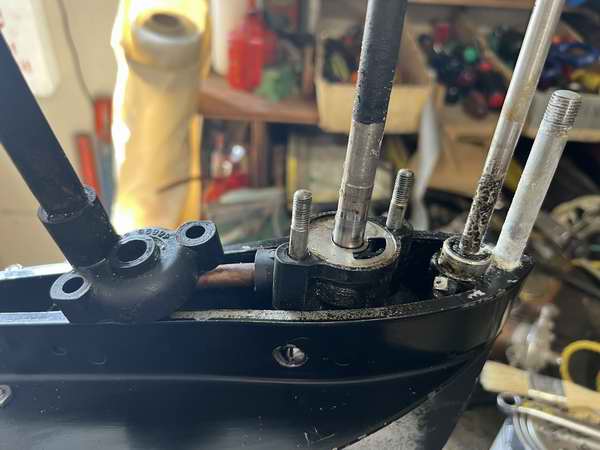
4 |
Remove the nuts that hold the top half of
the water pump housing. Remove the cap and note the SS disk against the top of the impeller that seals the top of the pump. Remove the disk and note the number & condition of the impeller vanes and in which direction they point.
|
Place the impeller on the work bench with the vanes pointing in the same direction when it was in the pump housing. No point getting confused!
* Replace the impeller if the vanes are hard, cracked or missing. You MUST install the new impeller with the vanes pointed in the same direction.
|
|
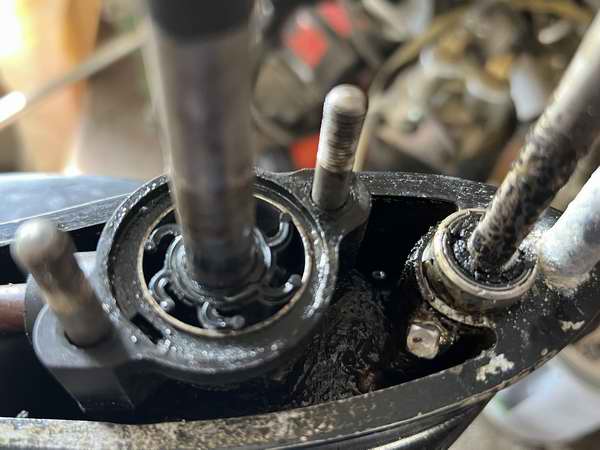
5 |
With the impeller removed,
inspect the inside of the pump housing; walls, top and bottom sections.
|
If the inside surfaces are smooth then the pump is OK to
return to service. If the surfaces are rough, you should replace the pump.
A rough surface can quickly wear out an impeller. Roughness is an indication of having sucked up sand in shallow water.
* Outboard water pumps are displacement type that depend on the seal of the vane tips and the sides to move water. If you run this
pump dry for only one turn you will likely tear off the fine side seals, rendering it next to useless.
|
|
6 |
If tiny bits of rubber are missing from the impeller
count on them being inside the block. They must be removed so water flow is not
restricted.
|
Direct full pressure tap water
into the engine flushing port, letting water flow at full volume. Use a rubber tipped
nozzle on the end of a garden hose to seal it to the block. This back flushes the
cooling channels and should remove any clumps of rubber. On my Merc 75 it spit rubber particles out on the driveway almost immediately. If you can't spot them and notice that the water flows more freely, consider it fixed.
|
|
7 |
Install the key pin that
locks the impeller to the drive shaft. Ensure the key pin is
squarely seated on the drive shaft so it can slide into the
slot of the impeller.
|
Use a dab of grease to hold the key
pin in
place during assembly.
|
|
8 |
Install the new impeller by rotating it
into the
water pump housing in the same direction it turns when the outboard runs. Don't tear or cut the rubber on the sharp corners of the pump housing during installation.
|
* If you have difficulty compressing the vanes, tighten a hose clamp around them. Hold the vane over the pump base and nudge the impeller in the housing. This is similar to compressing piston rings for a cylinder during engine rebuild.
* If you install the vanes pointing backwards they are likely to
break when the outboard starts. Dang!
|
|
9 |
Place the SS disk on top of the impeller, being careful to align the key to the hole that prevents rotation in the housing. Lower the pump housing cap over the base and tighten the nuts.
|
With some outboards is it important to
torque these nuts to spec to ensure the pump doesn't leak. A leaking
pump can't deliver all
the water to the block. My Merc has an additional rubber seal around the power shaft and rests on top of the water pump.
|
|
10 |
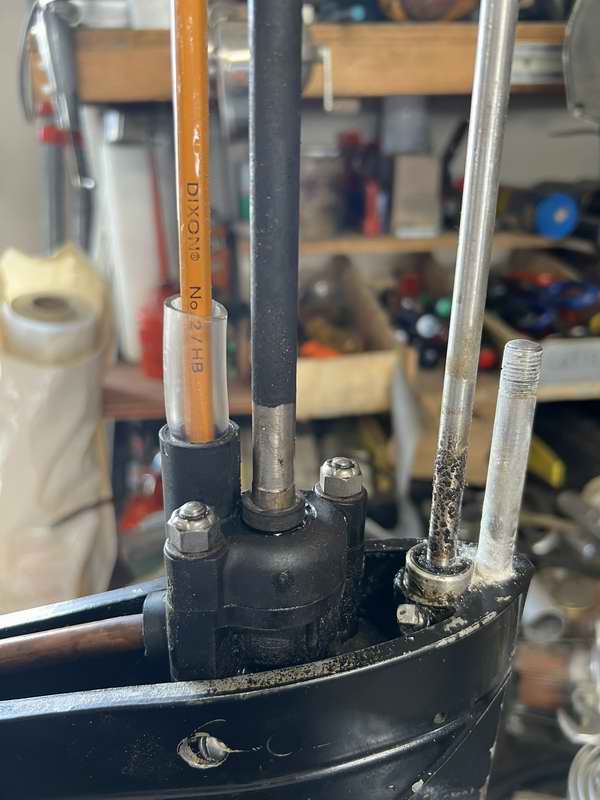
Install the lower leg assembly to the power
head. Tighten the nuts you removed in step 1.
|
It is usually easy to align the power shaft and shifter rod to the power head.
* But for some obscure reason if invert my Merc 75 outboard to align the propeller shaft, shift rod and water delivery tube, it
works most every time. On my Merc, and I presume others, it is difficult to align the 1/4" water delivery tube into the pump outlet after the power shaft and shift rod are engaged.
* To solve this I inserted a 2" long vinyl tube to the top of the pump to guide the water delivery tube in while I can still touch it with the bottom section slightly out. (Pretend the pencil is the water delivery tube).
Confirm all three are installed correctly. Don't guess.
|
|
11 |
Verify that the propeller turns freely with the gear shift lever in neutral. Likewise, it should rotate in the correct direction with the lever in forward or reverse.
- Now is also a good time to check the propeller nut. That can be expensive as it sinks to the bottom.
|
* If the propeller doesn't turn in neutral, the gear shift lever and the lower unit are out of sync with respect to each other. Remove the lower unit, rotate the shift rod till the propeller turns freely (neutral), then reassemble with the gear shift lever in neutral.
|
|
12 |
Start the outboard with the leg in
the water
at least as deep as the cavitation plate. After the outboard starts you should
immediately see
a strong stream of water leaving the outlet nozzle. Verify that the propeller turns freely in neutral and has thrust in forward and reverse.
|
* It is absolutely essential
that the lower leg be immersed in water for impeller
lubrication and cooling, but cooking oil or white grease can protect the vanes for
the first few turns of the outboard.
* If there is no stream of water, I hate to say this but you "screwed up." Not nice to say but either the water delivery tube is not inside the water pump (step 10) or the key pin is not seated correctly (step 7). I learned this lesson the first time I replaced an impeller.
|