| SJ23 Tech Tip B18, (Updated 2017-06-19) Bob Schimmel | |
|
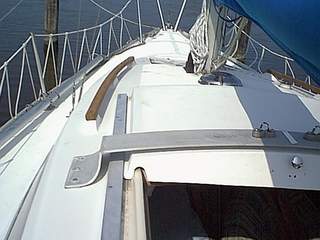
Cabin Top Grab Rails, Restore or Replace. |
|
|
Are the ole coach roof grab rails looking a bit shabby? Maybe
it's time to replace them or give them a good overhaul
with your favourite finish. On the other hand you could end the
maintenance cycle by replacing them with metal or simply leave them off!
The problem with that approach is that they have a practical value, albeit minimal, as something to
hang on to. Let's face it, they definitely dress up the coach roof.
Without the rails those "bumps" on the cabin roof have nothing to do but look dumb! So once you make
the decision to rework the existing rails or replace them with new wood, how do you go about
doing this
job?
REFINISH the EXISTING GRAB RAILS - If the wood on your grab rails is still in good condition but they could use a new coat then you should consider removing them to do the job properly, without making a holy mess on the deck. This permits you to strip the old finish off, fill any gouges and seal the rails to the deck. Ironically it's the sealing that is the most important factor, not finishing the wood. In all likelihood the old caulking is brittle and no longer seals to the deck. You can test the seal by giving each rail a good twist with both your hands. If they flex with respect to the deck stubs and/or the seal is cracked, they require resealing. Simple as that. The sealants available today are far superior to the factory original caulking and they flex up to 50% to stay sealed. This flex provides the best protection for the deck. REMOVE the GRAB RAILS - Drill out the wood plugs with a sharp slightly undersized drill bit. You may use a Brad drill bit to start drilling a clean hole but don't bottom out the hole as you will likely damage an expensive bit when you hit the screw head. Instead finish with a standard metal drill bit and don't drill much deeper than 1/4." If you damage the drive hole of the screw (#10 Roberts) then you can't unscrew it. Also be careful not to gouge the edge of the hole with the drill bit. So stop short of the screw head, pick out all the debris with a sharp pointy awl, thoroughly clean all bits of wood from the edge of the hole before removing the screw. Failure to clean the hole will result in the screw pushing up on the bits of wood, lifting hand rail splinters and damaging the edge of the hole so a new plug can't seal it. Clean the top of the deck stubs that support the rails and temporarily cover the screw holes with tape to seal the core of the deck. Depending on your climate, duct tape can usually be removed up to two weeks after application. However, I wouldn't leave it any longer as you may have a messy clean up job with the adhesive. Electrical tape does not leave any adhesive but then it doesn't stick as well either. Forget about using masking tape. Coating - Once the wood has been restored it must be coated on all six sides to create complete protection. My preference of coatings is Sikkens Cetol Marine. Four coats wear extremely well, blocks 100% of UV and passes vapor while blocking water from coming in. It creates a satin finish that feels wonderful. It only requires a recoat every second year or so, depending on your climate, all without sanding. The bonus is that Cetol Marine is chemically compatible with Sikaflex adhesive and they stay stuck to each other. What more could you ask for? Here are some points to remember:
INSTALL the GRAB RAILS - The grab rails are mounted according to
the vintage
of your hull.
|
|
|
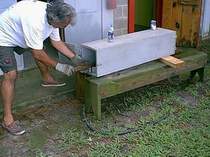
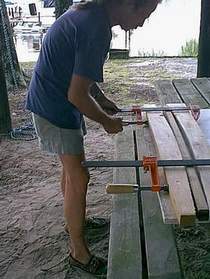
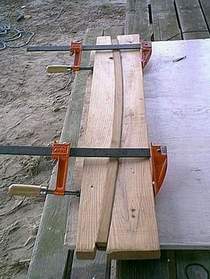
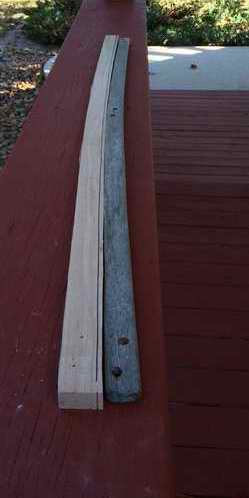
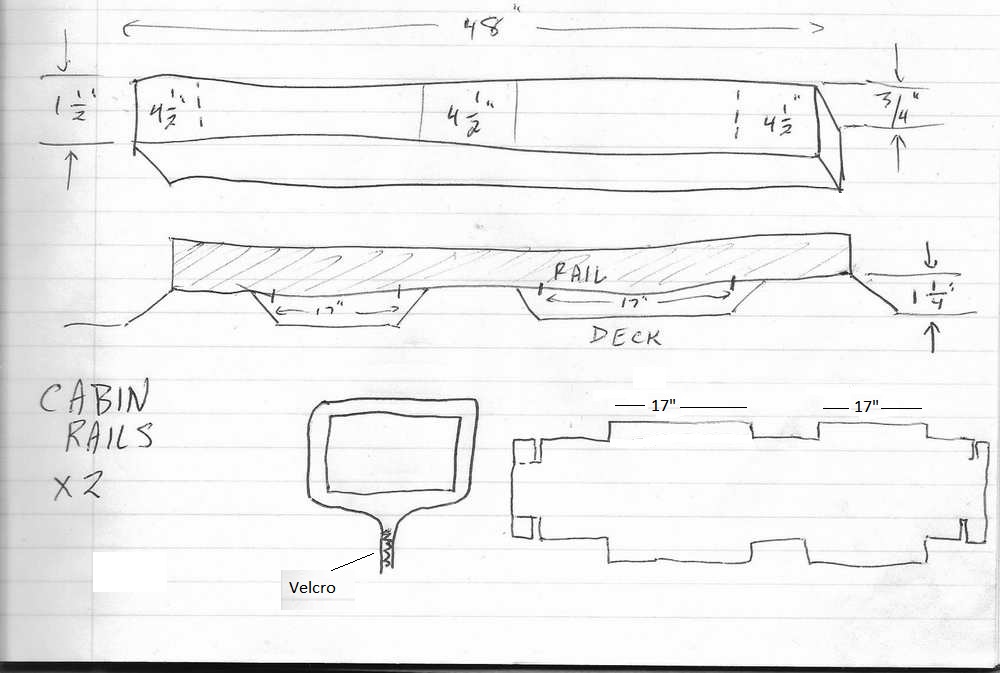
FABRICATE NEW RAILS - Replacement wood grab rails should be cut from straight grain solid hard wood. The original rails were solid teak but you may substitute with mahogany or other hard wood. Remember that when you attach a rigid item to fibreglass the rule of thumb is, "always shape the item to conform to the fibreglass, not the other way around." Fibreglass must NEVER be placed under permanent stress. Therefore, new wood rails must be steam bent, laminated or cut to shape. Insert dimensions here. STEAM BEND - Steam bending is probably the least wasteful technique. Bending is not as difficult as it may seem. Simply use an electric kettle for a boiler, shove a radiator hose over the spout (must be a tight fit so you don't lose steam), connect the hose to the steam box and push the wood inside the box to "cook" it. Keep the water at a hard boil. Leave the wood inside the box till it gets REAL hot right to the core. At the "magic moment" (about 2 hrs if it is hot outside) the wood will become elastic and you can pull it out to bend it. You only have about 10 seconds to form it to the desired shape so form it around a mold. Practice with a piece of scrap wood and use insulated gloves. Remember that wood will always spring back about 10% after steam bending, so allow for it by over bending. Shown below is Paul's handiwork on replacing the rails on his boat. |
|
|
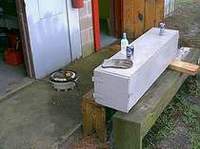
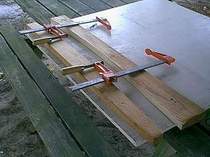
After several attempts at steam bending some expensive oily teak, I gave up. Teak is one of those woods that doesn't always lend itself to bending as the natural oil prevents the steam from penetrating to soften the wood. Instead, I cut the teak into strips and laminated it over a mold. At right you can see my results mounted on the deck.
Drill the holes to install the grab rails. Apply at least 4 more coats of Sikkens Marine Cetol for complete UV protection. TOP
|
|
|
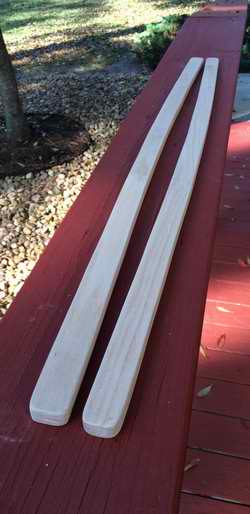
CUT FROM HARD WOOD - Use an existing rail as a template to
outline a new one on straight grained solid stock. Cut with a very sharp
jig saw blade or use a band saw. Dry fit each piece to the deck to confirm a
fit. Port and starboard should be the same, but don't count on it! Rough sand with a belt sander to
smooth the sides and round the corners. If you've
chosen a wood other than teak, stain it to
the colour of your choice. My preference is Minwax because the colour
is so uniform. Before clear
coating I usually let fresh stained hard wood dry in the sun for 24 hours, longer if you can still smell the stain, rotating
it every 2 hours for uniform
heating.
|
|
|
COVER to PROTECT the GRAB RAILS - Regardless of how you shape the rails, steam, laminate or cut, the single most important thing is to seal the screw holes with wood plugs and completely coat the surface with Sikkens Cetol Marine or other clear coat. I can't emphasize this enough. I initially applied 4 coats of Cetol for protection against UV in the extreme sun East of the Rockies. Then I apply an annual coat to maintain the protection, that is if I don't forget! Not everybody likes Cetol Marine in which case, use your favourite clear coat. As good as some of these coatings are the morning sun shining through the dew has a way of penetrating a finish like nothing else can. Few owners are around to wipe off the dew nor do they have the time for the required maintenance. This is the primary reason why many manufacturers have switched away from wood trim on a deck. But there is a solution to this problem too.
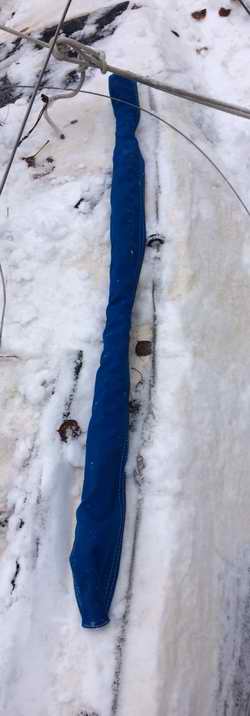
So warm up your sewing machine and make a couple of rail covers from Sunbrella. The rails have a circumference of about 5.5". Leave a 3/4" hem on each side to attach Velcro. Click here to view my pattern (not to scale). Sorry for the
winter photos but this is reality in Canada. Its the perfect time to
take your projects home for completion. The rail covers do fit tighter than shown in the
photo. There was ice under the rails preventing the Velcro from
latching. Panache
was temporarily parked for a repair job when Mother Nature made a surprise
visit, depositing 6" of cold sunshine on the deck in early October. This was the first chance I had to clear the deck.
Surprise, surprise, the snow did not stick to the Cetol coated grab rails. Hmmm.
TOP
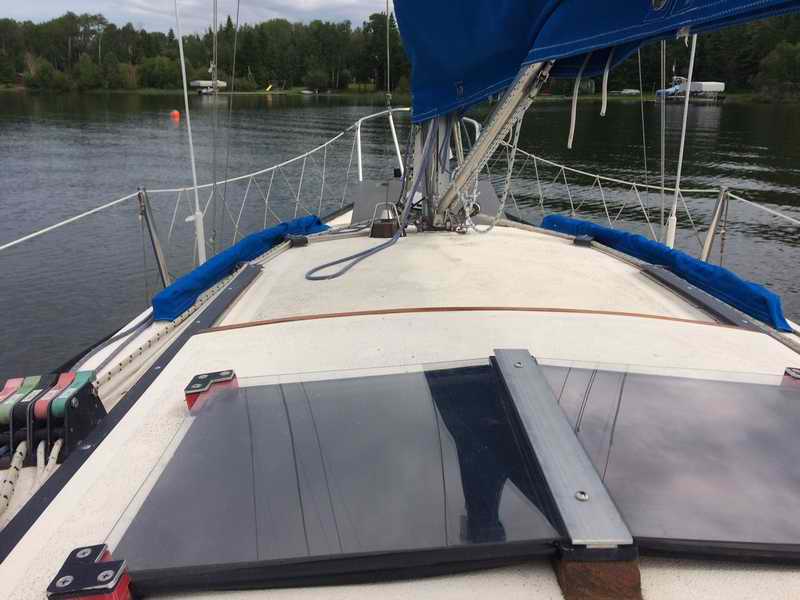
OK I'll give you a break, here are both rails covered in the summer.
|
|
|
Return to Tech Tip Index. . . . . . . . . . . . . . . Have a Question? |
|
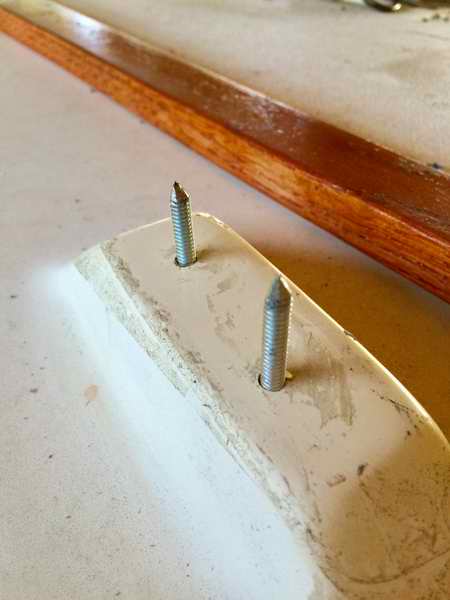 - Finally you can make some transfer studs by sharpening the top of a
screw, set it in the stub hole and push the new rail on top of it.
This will prick a hole in the bottom of the rail through which you can
drill an accurately placed hole. Drill the aft holes first.
Set a screw in, then move forward to the next set.
- Finally you can make some transfer studs by sharpening the top of a
screw, set it in the stub hole and push the new rail on top of it.
This will prick a hole in the bottom of the rail through which you can
drill an accurately placed hole. Drill the aft holes first.
Set a screw in, then move forward to the next set. 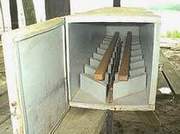
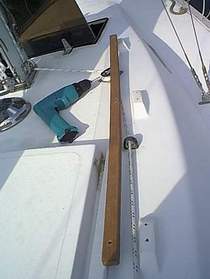

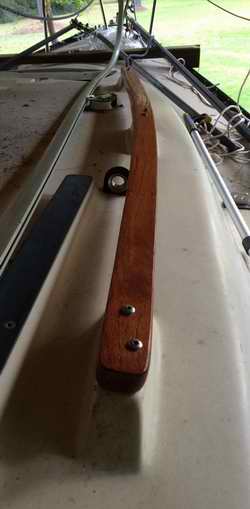
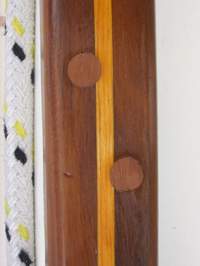 The
teak is laminated with pine for colour contrast. At left is a detail
photo of the tapered wood plugs on top of each deck pod. They were
drilled from the same teak stock for colour match. Plugs are required
to seal the screws against moisture and thereby prevent them from
corrosion.
The
teak is laminated with pine for colour contrast. At left is a detail
photo of the tapered wood plugs on top of each deck pod. They were
drilled from the same teak stock for colour match. Plugs are required
to seal the screws against moisture and thereby prevent them from
corrosion. 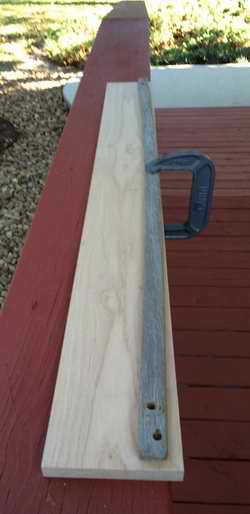
