| SJ23 Tech Tip B24, (Updated 2021-05-25) Larrie Taylor, Phil Sutton, Alan Weld, Bob Schimmel, Tim Woods. | |
|
Boarding Ladders -
Five Designs. |
|
| In 2000 it became mandatory
in Canada to have a permanently mounted boarding ladder on a pleasure
craft with a freeboard
that is too high for a swimmer to reach the gunwale to pull themselves out of the water.
The SJ23 falls
well into this category. The rational for a permanent
boarding ladder being that at the time
of an emergency the rescuer is too panic stricken to find the portable ladder to render
assistance. This can be for a myriad of plausible reasons;
stored in the 'wrong' place, left on shore, in the kid's sandbox, etc,
etc.
Consider the predicament
if everyone jumped
overboard to go swimming, only to discover that NOBODY hung the portable
ladder! This actually happened in the Mediterranean where all
healthy swimmers drowned around a free floating sailboat.
Why the rest didn't push the lightest person up to
the gunwale is beyond me. On a SJ23 it's a three-foot reach from the water to the gunwale.
Virtually impossible for the average swimmer, never mind an expert
swimmer who is not tired. Your other choice is to climb aboard via the
engine, the anchor line or some other line you left drooping in the
water. Here's hoping you had the forethought to tie knots in the
anchor line.
Good Luck! Install a ladder!
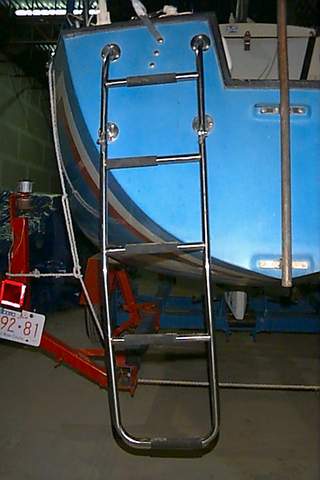
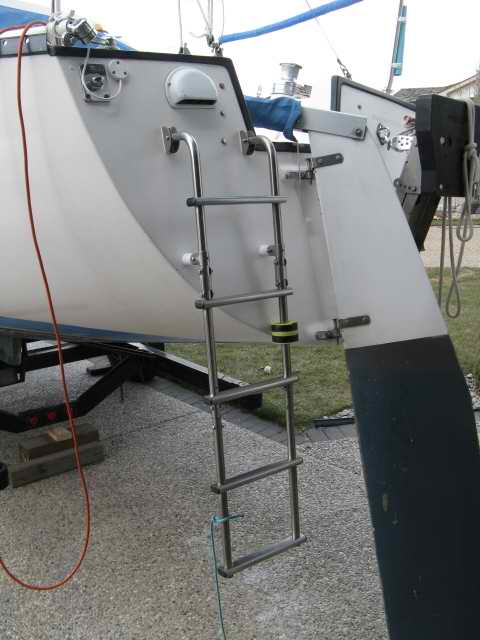
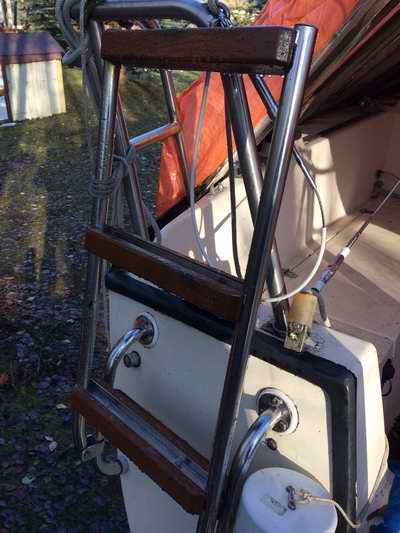
The best feature of this ladder is that it reaches very deep into the water to ease that first step up out of the water. This is the most difficult step. Many ladders fall short in this category, no pun intended. In addition, the 7/8" OD tubing is very strong, even on dry land. When flipped up, the bottom step is level with the top of the pushpit or lifeline for a neat appearance. To improve the traction of the original design, each step is covered with a tough fitting neoprene tube as shown above. Unfortunately the tubing on this ladder has stretched with age and it now rolls under foot, making it "difficult" to keep your foot on the rung. So a better solution is to add flat wood or a vinyl cap on top of each rung. See step below.
NOTE - As good as this ladder is, it can be improved by making it slightly narrower and longer so it can be installed closer to the center line and a bit lower to make it easier to climb on board. As long as the rudder does not touch it.
|
|
The Bolton ladder shown above was manufactured many years ago by Bolton Stainless Inc. This company manufactures custom stainless steel hardware for the boating industry. To view the current version of this ladder go to their web site. I have installed two Bolton ladders. It is absolutely top quality hardware. 8176,
Highway 97 |
|
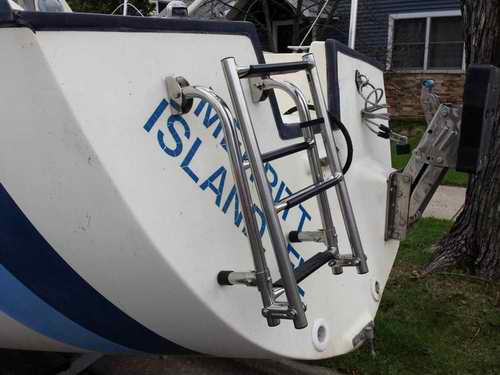
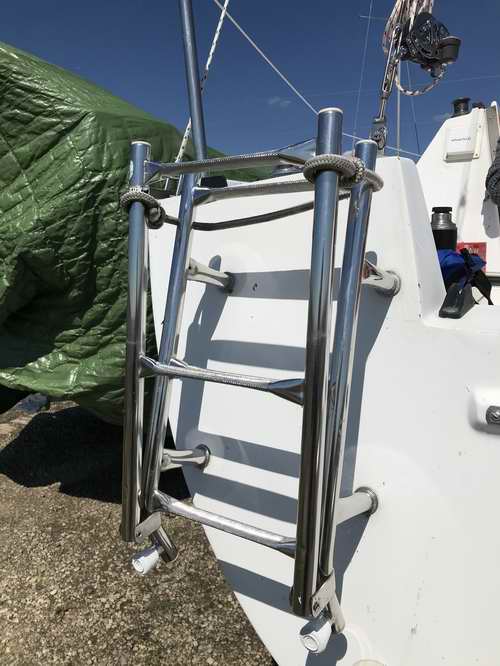
ALAN'S LADDER (2014) - Alan Weld installed a new ladder to Elizabeth Jane's transom in 2014. Installation was simple; drill four holes, seal them and insert hardware. Other ladder owners report this model has held up very well over the years.
After I removed Panache's ladder I discovered that it was installed under a lot of strain that bent the metal frame and stressed the holes in the fibreglass. Try as I might I could not reinstall it. This is NOT GOOD! I solved the problem with a combination of some slight bending, some fiddling with the leg length and added a spacer under the bottom left foot till it fit to the original drilled holes. This of course is all due to the convex curve of the transom. Another solution is to shorten the longer leg so both bottom legs touch the hull at the same time. All four feet should touch the transom at the same time. Keep in mind that you require a reasonable space between the ladder and the hull for your toes. Some people have reinforced the transom with bracing from the inside. While I haven't found it necessary there are limits to how much strain the transom can hold. It would be perfectly fine to install some dimensional lumber to the inside of the transom. Mount it vertical and shape it to fit. Saturate it with epoxy to protect it from humidity. Add some bedding compound to remove hard spots between the wood and the fibreglass. Through bolt the ladder to the lumber using large stainless washers. Seal the bolt holes with butyl rubber or Sikaflex. Awe you know the routine!
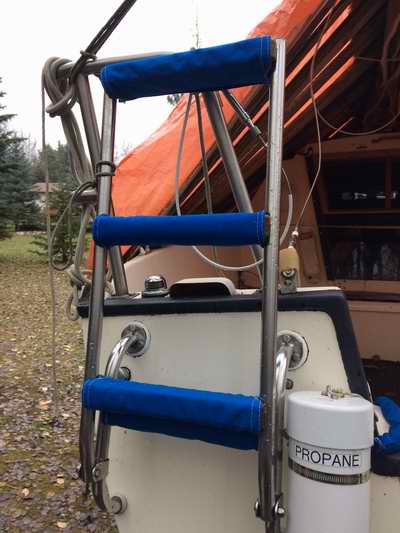
As good as the Cetol is, I prefer to keep the steps covered with Sunbrella to protect against water, UV and ice damage. A much superior solution. Click here for a cloth pattern to cover the wood steps. The ends should be left open to ventilate the wood rung. I added a rope loop (5/8" line) to the bottom to assist with that all important first step, lifting your body out of the water. The rope loop hangs outside the ladder so it automatically drops when the ladder is deployed. You can't make this loop too long though as your shin will pay the price when you foot slides under the transom. Its an important point to consider.
|
|
| LADDER SAFETY PRECAUTION - Tie your ladder in the up
position with a slip knot and a three-foot long trip line, with the free end hanging
about a foot
above the surface. This way a swimmer can release and
lower the ladder to climb on board. Practice this
procedure the next time you are anchored in your favourite swimming hole.
It
could save your life. |
|
|
This step is simple to make and so effective to use because it cuts the 33" freeboard height in half, eliminating the sometimes desperate crawl over the gunwale. When you are alongside in your dinghy, just clip the two hooks over the toe rail and step aboard in a civilized manner. No more desperate effort to grab the winch on the cabin top or companionway rail to pull yourself aboard. After you use it once you'll discover it is easier and quicker to use than the transom boarding ladder. I store my step in the dinghy to get on the boat and return it there once I'm aboard. I find it of little use to step off the boat, preferring instead to slide off the gunwale into the dinghy. This design is very compact and floats.
* PS:
The elderly gent in our club who I copied this step from, used to crawl under
his
life line and almost always beat me onboard. He always chuckled over
that. |
|
|
UPDATED RAIL MOUNTED EMERGENCY LADDER - This ladder folds up into a nylon bag. It can be clipped to the toe rail for ready use. If you tie a line to the bottom rung and hang it outside the bag within reach of a swimmer, then you have a ladder that can serve a useful purpose. This ladder is available from Binnacle.
|
|
|
Return to Tech Tip Index. . . . . . . . . . . . . . . Have a Question? |
|
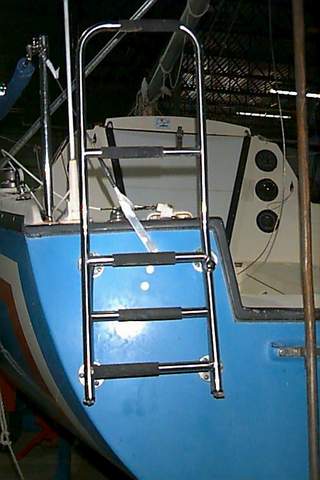
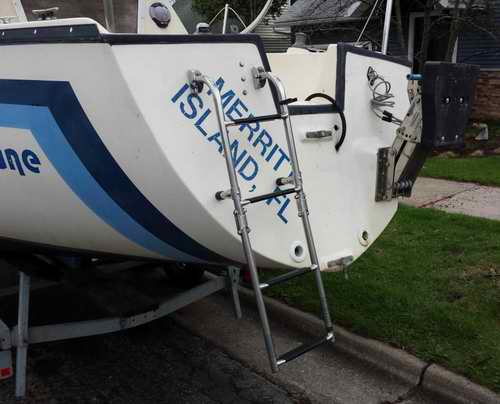
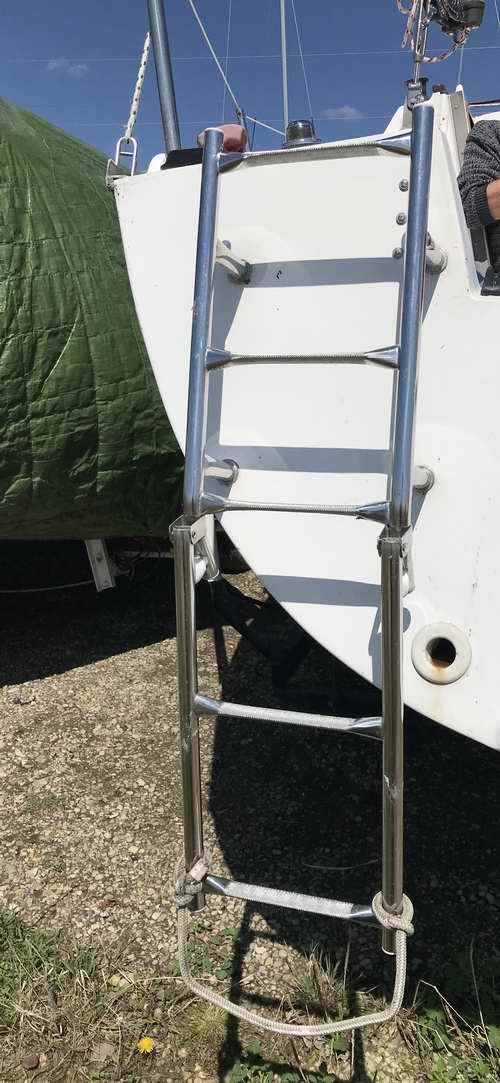
 Ordering information. Search on Ebay for transom/stern boarding
ladder. It's been suggested that the 5 stepper ladder is too long to fit on an SJ23
transom.
If that is the case consider lowering the ladder so the bottom feet rest against the
edge of the transom
as installed on Siesta at left.
The longer ladder sure makes it easier to get out of the water. Also note the blue pull down line for the swimmer.
Ordering information. Search on Ebay for transom/stern boarding
ladder. It's been suggested that the 5 stepper ladder is too long to fit on an SJ23
transom.
If that is the case consider lowering the ladder so the bottom feet rest against the
edge of the transom
as installed on Siesta at left.
The longer ladder sure makes it easier to get out of the water. Also note the blue pull down line for the swimmer. 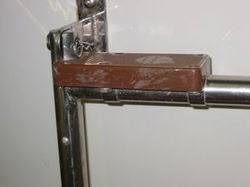
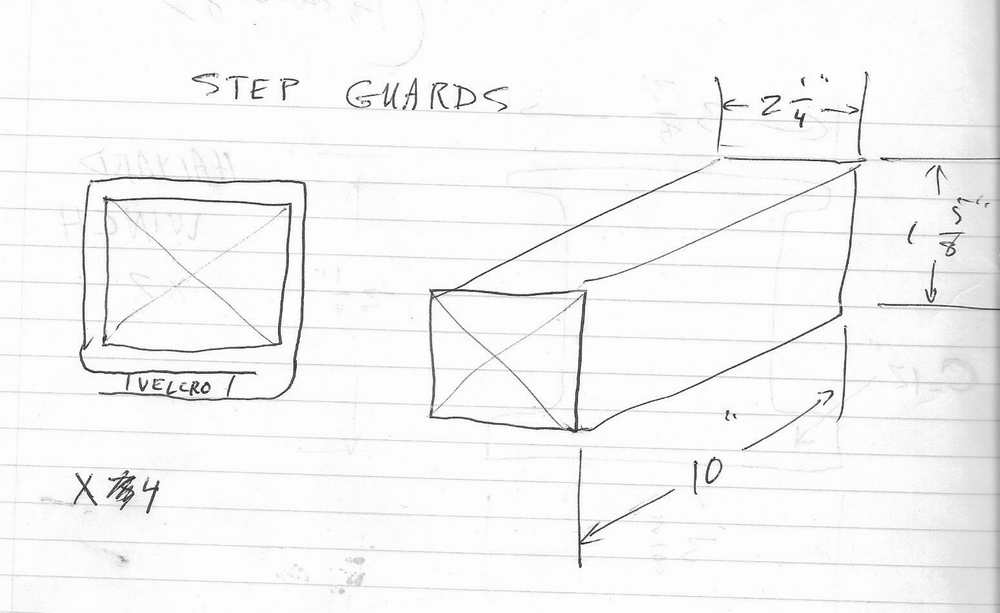
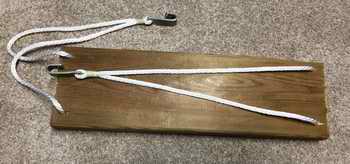 CONSTRUCTION - Make the step from soft wood (cedar, spruce,
etc) with round
corners to protect the gel coat. Its your decision if you want to
clear coat it but I prefer the traction of the unfinished wood.
Drill a hole through each corner for the 1/4" line and adjust the length to about
10" down from the toe rail (above the gunwale of the dinghy) which is a good height to step in/out of the
bottom of the dinghy. Make the hooks from 3/16" thick stainless
steel strap bent to hook over the toe rail. Leave the opening of the hook a
bit loose so it fits over the toe rail without marring the finish.
Drill a 5/16" hole through the long end of the hook to run the line through.
To keep the line in place tie a knot
above and below the step. This is not required if the line fits snug in the
hole. Tie a
whipping around the line just below the hook to lock the angle of the step
against the hull. That's it you're done.
CONSTRUCTION - Make the step from soft wood (cedar, spruce,
etc) with round
corners to protect the gel coat. Its your decision if you want to
clear coat it but I prefer the traction of the unfinished wood.
Drill a hole through each corner for the 1/4" line and adjust the length to about
10" down from the toe rail (above the gunwale of the dinghy) which is a good height to step in/out of the
bottom of the dinghy. Make the hooks from 3/16" thick stainless
steel strap bent to hook over the toe rail. Leave the opening of the hook a
bit loose so it fits over the toe rail without marring the finish.
Drill a 5/16" hole through the long end of the hook to run the line through.
To keep the line in place tie a knot
above and below the step. This is not required if the line fits snug in the
hole. Tie a
whipping around the line just below the hook to lock the angle of the step
against the hull. That's it you're done.