|
This
installation was a laborious process. I probably added a lot of time by building several prototypes.
However, each one
served a different purpose. One was simply a
prototype to test fit everything. Lastly, I used the old hatch
to confirm the tools I had and the processes I developed would not damage
the new acrylic.
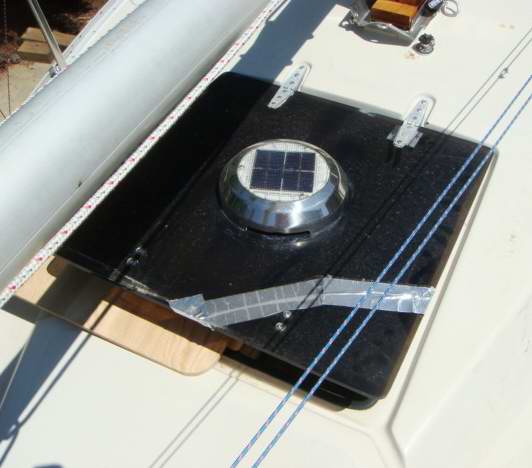
I bought a new acrylic hatch from Gene Adams in Seattle. The nice thing about getting stuff from him is that he knows
the correct size
of everything. I got the handles from Go2Marine, an online parts supplier. I
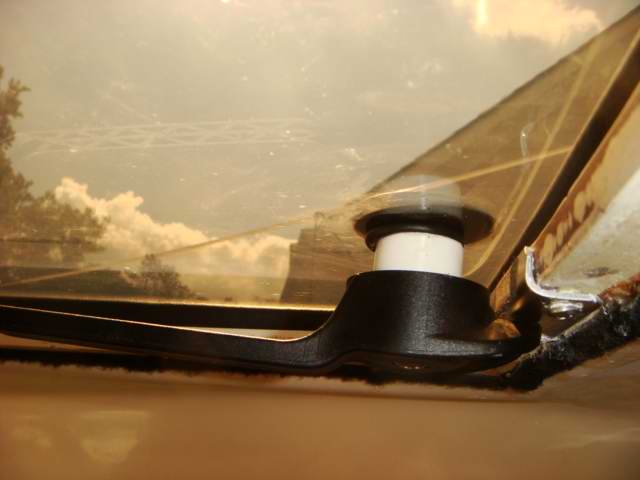
was able to reuse the old hinges but I did make new spacers for them. I have a
stainless steel hatch riser arm from the old hatch that I may not install. The hatch stays open when it
leans back
against the mast. For now, I'm going sailing; I can always install the
riser arm later.
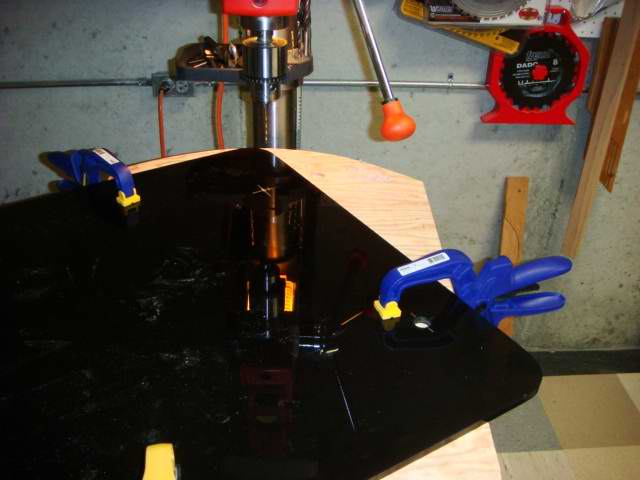
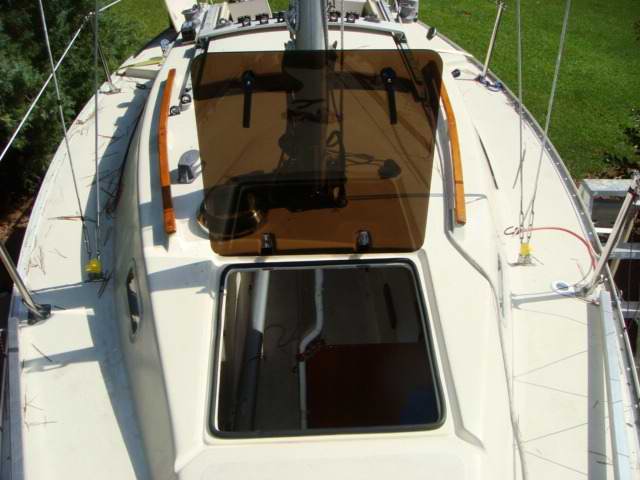
 INSTALLATION - I built a prototype
hatch of 3/8"
plywood, using the new acrylic as a template. For this hatch, I attached the
hinges first to help hold it in place while working out the location for the
handles. For the actual hatch, I got some VERY good advice from Bob to
position the striker plates BEFORE attaching the handles. INSTALLATION - I built a prototype
hatch of 3/8"
plywood, using the new acrylic as a template. For this hatch, I attached the
hinges first to help hold it in place while working out the location for the
handles. For the actual hatch, I got some VERY good advice from Bob to
position the striker plates BEFORE attaching the handles.
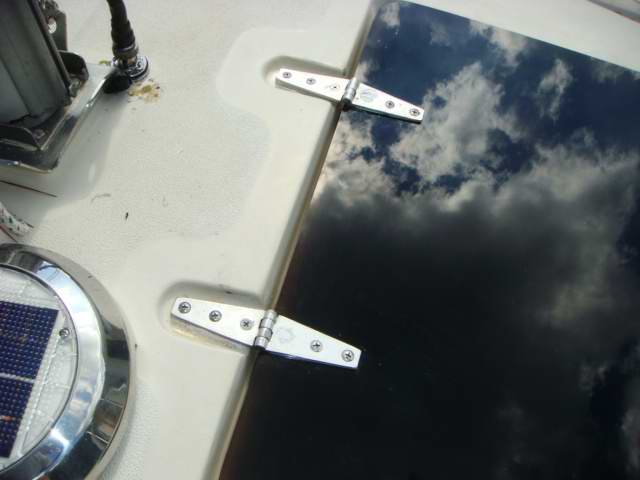
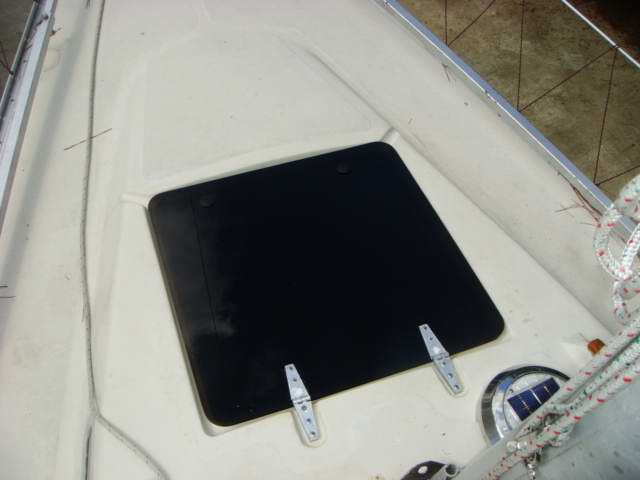
I had new striker plates made from stainless that are longer than the original plates. I highly recommend a minimum striker
plate length of 2", unless you can get a flush mount and use bevel head
screws. I used pan head screws and the extra length is just enough to mount the screws far enough apart so as not to impede the rotation of
the handle. I positioned the handles far enough apart on the hatch so they can
rotate inward without hitting each other. If you turn them the wrong way
they hit the side of the opening and still hold the hatch closed. This is an
added bonus. I put the striker plates on prior to the final hatch
installation, in part because the prototype gave me an excellent guide for
positioning them and it worked out fine. In retrospect, I would probably
get the final hatch installed and then put the plates on.
 The trickiest part of this whole operation
was positioning the handles on the actual hatch. The plywood prototype was on
the boat for a week, during which time it baked in the sun and was drenched with
two days of rain, so it was a little deformed when it came off. It definitely
helped to have done it once on the plywood hatch. I measured everything
about six different times but ultimately there was a little bit of guesswork
involved in determining where to drill the pilot holes. I drilled a 3/32" pilot
hole using a standard bit (the specialized acrylic bits are ridiculously
overpriced) with the drill press set to the lowest speed possible. I then used a
5/8" hole saw to cut the final hole. To be sure this would not damage the
acrylic, I did test holes in the old hatch. I used a router bit attachment
to my Dremel tool to chamfer all the holes. The trickiest part of this whole operation
was positioning the handles on the actual hatch. The plywood prototype was on
the boat for a week, during which time it baked in the sun and was drenched with
two days of rain, so it was a little deformed when it came off. It definitely
helped to have done it once on the plywood hatch. I measured everything
about six different times but ultimately there was a little bit of guesswork
involved in determining where to drill the pilot holes. I drilled a 3/32" pilot
hole using a standard bit (the specialized acrylic bits are ridiculously
overpriced) with the drill press set to the lowest speed possible. I then used a
5/8" hole saw to cut the final hole. To be sure this would not damage the
acrylic, I did test holes in the old hatch. I used a router bit attachment
to my Dremel tool to chamfer all the holes.
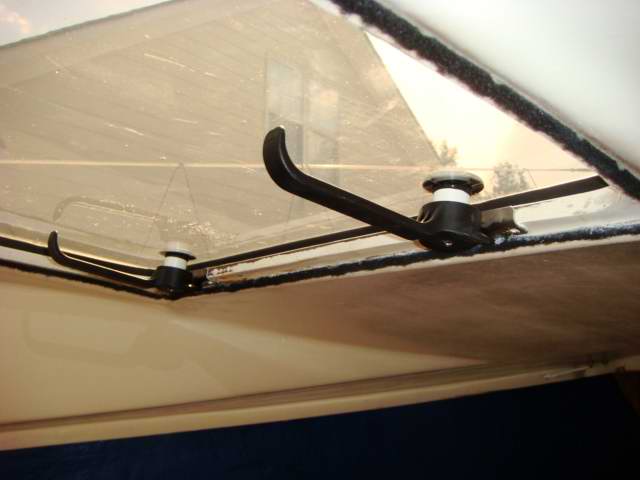
 Much to my relief, all my measuring and practice paid off.
The handles
lined up perfectly. The spacers were the correct length and all that
remained was to install the hinges. When I removed the old hatch, I drilled
out the old holes with a 1/4" bit and then filled them with epoxy. When
I
reinstalled the hinges, I drilled slightly oversized holes for 10-24
stainless bolts. I attached the hinges to the cabin top first. I put a layer
of Sikaflex between the spacer and the gel coat and made sure some went in
each hole. I did the same for the part of the hinge that attached to the
acrylic. Gene Adams suggested using two bolts thru the
acrylic, omitting the bolt closest to the edge of the hatch. This kept the
bolt from impinging on the weather strip. I replaced that as well. Very
easy to do. I had some 1/8" aluminum backing plates cut for the hinges on
the acrylic, instead of washers. I stuck a some rubber gasket material on
the backing plate between it and the acrylic. I let the whole thing
dry overnight and woke up to a fully functioning hatch in the morning. Much to my relief, all my measuring and practice paid off.
The handles
lined up perfectly. The spacers were the correct length and all that
remained was to install the hinges. When I removed the old hatch, I drilled
out the old holes with a 1/4" bit and then filled them with epoxy. When
I
reinstalled the hinges, I drilled slightly oversized holes for 10-24
stainless bolts. I attached the hinges to the cabin top first. I put a layer
of Sikaflex between the spacer and the gel coat and made sure some went in
each hole. I did the same for the part of the hinge that attached to the
acrylic. Gene Adams suggested using two bolts thru the
acrylic, omitting the bolt closest to the edge of the hatch. This kept the
bolt from impinging on the weather strip. I replaced that as well. Very
easy to do. I had some 1/8" aluminum backing plates cut for the hinges on
the acrylic, instead of washers. I stuck a some rubber gasket material on
the backing plate between it and the acrylic. I let the whole thing
dry overnight and woke up to a fully functioning hatch in the morning.
Overall this job went very well. A lot
of thanks to Bob and to Gene for their suggestions. I think I took more
time than I needed to. I certainly over-engineered it. I tested the
water integrity today by scrubbing Shangri'-La's decks. Not a drop below. Taz Coffey
|