| SJ23 Tech Tip B35, (Created 2023-04-01) Bob Schimmel. | |
|
Gel Coat Repair. |
|
|
Note the chalky appearance: As kids we’re told ‘don’t judge a book by its cover’, when teaching children about prejudice and jumping to conclusions. But what if the book’s cover told us a lot about what we’ll find inside? What if it inspires up to dig a bit deeper? Spring is a good time to take a look, before the boat goes in. I like to think that a person can learn a lot about a boat by the condition of the gel coat. On older boats especially you can tell man things. Which side of the boat people board from – by seeing where weight has been put on stanchions, and where the bases have flexed against the bedding point. Where people most often sit or stand – by wear and colour. Where heavy items have been dropped – by examining chips and cracks. Where mooring and anchor lines sit – by noting rub and wear. Which direction the boat faces during both on and off seasons – by looking at colour changes in the gel. By examining the story that the gel coat tells, you can also see where repairs are needed – and how to prepare the surrounding areas so that the repair can be done properly and won’t require that the same repair will be required again in the near future. Back to our book-cover example: Consider this reading until the end of the story, seeing how characters and plot interweave and then drawing a cover to suit the story best.
What is gel coat (and what it’s not): Gel coat is in the fibreglass resin family – it acts and hardens very similar to a resin, and requires the same catalyst added in order to activate and harden. Various viscosities are available – the thickest type designed for use with a putty knife – but more commonly found in a consistency designed to brush on or thinned down and sprayed. When fibreglass boats are built, the gel coat is sprayed into a female mould first. Once the required thickness (0.5-0.8mm, typically) is attained, the activating agent allows the layer(s) of spray to harden. Fibreglass and resin are then applied in a pre-calculated thickness to build up a strength and backing for the required components. Once the coatings, layers, core and support pieces are in place, the mould is removed and the various components are assembled: keel, superstructure, hatches, etc. Gel coat is an ideal product to use: It can be moulded easily to created non-skid patterns, innumerable colours, highly cost effective, can be stored for long periods, and only activates with a catalyst. Gel coat is used as a barrier between fibreglass and other surface products (like antifouling products), and is utilized both above and below the waterline. Osmotic blistering Gel coat can be purchased in repair kits (a small amount of gel coat putty, catalyst and colour-matching samples), or in larger sizes (litres or gallons) of a white base. Gel coat can also be mixed and colour matched the same way that paints can. For the reasons mentioned above, gel coat is an ideal surface product to clean, patch, and repair and relatively easy to keep looking great.
WHAT TO LOOK FOR
Chips – probably the most common of damage to gel coat – an object falling on or banging gel coat can create a chip in the surface. Sometimes the chip is within the 0.5-0.8mm thickness of the gel; other times it removes the entire layer and fibreglass beneath the chip can be seen. In order to the repair, the edges of the crack should be chamfered, and colour matched gel coat, thickened to a putty consistency spread in place (almost as a hole in drywall is repaired).
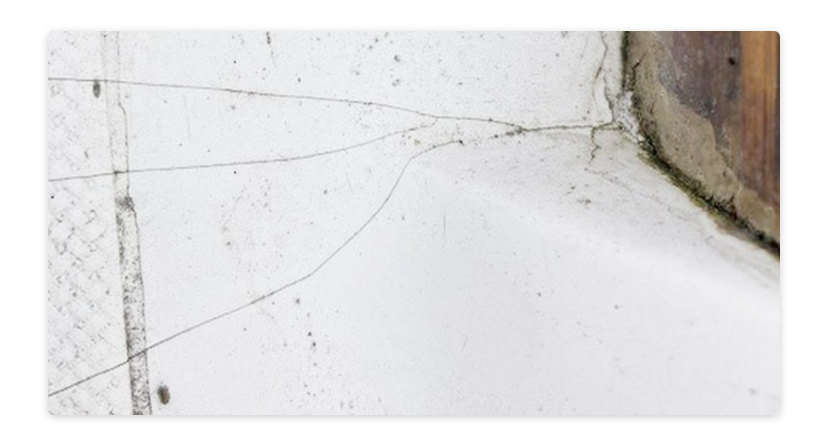
Stress cracks – this type of cracking is caused by the underlying fibreglass, or surface hardware flexing to the point that the layer of gel coat cracks.
FADED & WORN GEL COAT
Fading/worn surface – caused by regular rubbing (such as dock lines and fenders) against the gel coat, or simply by age. When such a thin layer of gel coat is worn down by weather, sanding, polishing and washing, the layer gets thinner and thinner. Given enough time and wear, the gel coat becomes so thin that the fibreglass beneath it can clearly be seen. The cure for worn gel coat is to thicken the layer by brushing or spraying additional layers to the desired thickness.
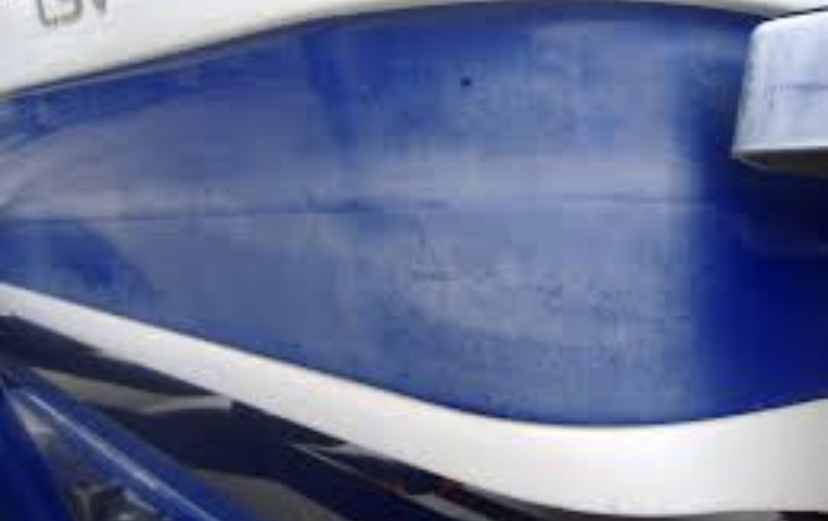
Oxidation – gel coat oxidation manifests itself with a very chalky appearance, particularly seen in coloured gel coat. Gel coat is porous, and this ‘chalk’ appears when the pores in the upper layer of the gel coat become choked with dirt, dust, cleaning products, etc. In this case, a light abrasive should be used to remove the upper layers of gel coat, along with the clogged upper pores. The underlying surface will be clean, shiny and clear. A polishing agent (or rubbing compound) of 1000-3000 grit is used for this purpose. Many are designed to be applied using a machine polisher and thick polishing pad. A wax is then applied, which fills the pores, preventing further clogging and chalky appearance. crazing – also called spider cracking.
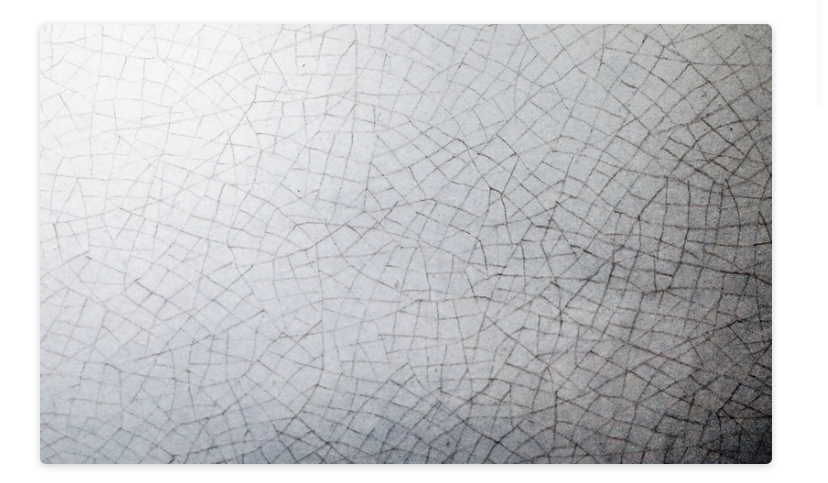
Crazing/spider cracks – often temperature related – both in initial cause, as well as worsening appearance: different materials aboard can cool and warm at different rates. Gel coat crazing occurs when the gel coat layer freezes, warms, and heats at rates different from the underlying fibreglass, or deck fittings (often metallic). Over the winter months, if left untreated and unprotected, water droplets can enter these cracks and freeze. The water expands, making the cracks wider and deeper.
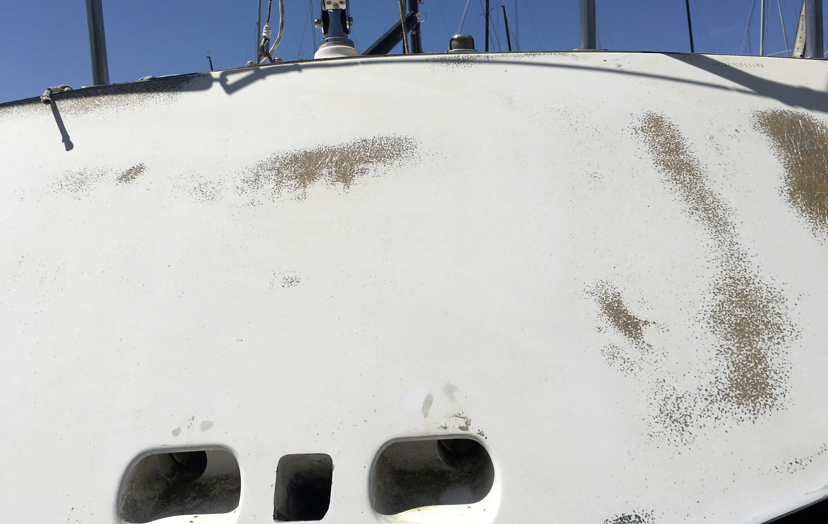
Osmosis/blistering – these bumps in the gel coat surface (appearing like blisters) are caused by water permeating and collecting in points beneath the gel coat surface. The water trapped beneath the gel coat surface (if below the water line) is then drawn outward to the water surrounding the point through osmotic action. This makes the blister expand and grow. In order to correct this situation, the surface needs to be ground out and gel coat re-applied. Often this is over a wide area, and can become a significant repair. Stress cracks.
Maintenance tips and tricks to prevent gel coat damage before it starts
Whether taking on routine maintenance this spring, or preparing for a larger repair – be sure to understand the story that your boat is reading to you – and prepare a repair to match that story. (Ie if osmosis is occurring, water has entered the gel or fibreglass from some point – part of the repair should be to prevent further entry of water into the area. Similarly, when repairing stress cracks, the stresses should also be mitigated: hardware should be tightened, with backing blocks used appropriately. Hardware may need to be removed, examined, chamfered and fresh sealant applied in order to prevent similar damage in the future.
|
|
|
Return to Tech Tip Index. . . . . . . . . . . . . . . Have a Question? |
|