SJ23 Tech Tip D03, (Updated 2015-10-18) Frank May, Bob S, Bobby Kawamura & Bill Ward

Index

Outboard Bracket Mounting Nuts - Crawl below cockpit, Access hatch to tighten nuts

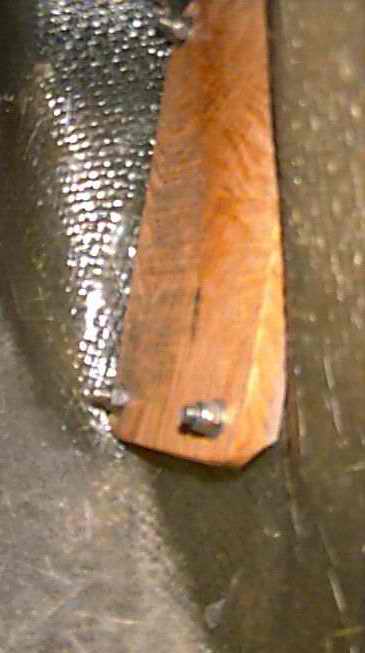
Q - In April 1998 Frank May asked if anyone has replaced their outboard motor bracket?  If so, how did you manage to get a wrench or a socket on the mounting nuts located inside the hull, on the starboard side of the transom? 

A - Frank this is an incredibly lousy job.  You WILL get dirty, especially with glass fibres so wear a surgical mask to prevent breathing the air borne fibres.  Also, wear coveralls to protect your skin and clothes.  Tighten the cuffs and collar.  It helps to be slender, loose 30 pounds quickly or find that skinny friend who owes you a favour.  Torquing these screws in the factory was done by a skinny little kid (Steve) who was kept around only because he could fit into those small far reaching places, armed with a 7/16" wrench.

DOING THE "COCKPIT CRAWL" - The following instructions apply to those early SJ23 hulls where the cockpit drain tubes go down through the hull.  If your drain tubes go through the transom (later version hulls) you could temporarily remove them or install an access hatch in the aft end of the cockpit. 

  • Place a support block under the back of the trailer to prevent it from tipping.
  • Empty the port locker, completely.  Wash the locker, if you have to. (Probably needs it anyway).
  • Throw an old rug or canvas tarp on the locker floor.
  • Step into the locker, facing the cockpit.  Kneel down, almost with your bum on your heels, and sit leaning to your right side.  Duck your head as you go in sideways or your right ear will really hurt!
  • Then stretch your body out.  Now is an excellent time for your assistant (you do have one I hope) to hand you large vice grips or a crescent wrench (few people give you the correct size wrench).
  • Wriggle like a snake towards the outboard bracket and don't drop that wrench.
  • The assistant then works the outside of the bracket bolts with a wrench while you hold the nuts on the inside.
    One suggestion; it is frowned upon to swear at your assistant for you may need him again!
  • To get out of the cave, wriggle back along the bottom of the hull (somewhat like a moray eel going backwards in its hole), towards the locker.  Then, when your feet are at the forward end of the locker, roll forward towards your right, ending up on your hands and knees with bum pointing in the air.  Then wriggle out backwards.  AH FRESH AIR!!!  It is basically impossible to turn yourself around to get out of the hull.
  • Sure hope you don't suffer from claustrophobia. 
  • PS:  I have done this on my own with a charged cell phone close by.
Above you can see the outboard backing plate on the inside of the transom.  Of interest are the lock nuts holding the outboard bracket and keeping your expensive outboard from falling in the drink!  Now that would look somewhat silly! 
NOTE:
I have done this job many @#$%&* times now and hated it every time.  The next time I go in, I'll paint the inside of the hull so the glass fibres are held captive in the paint.

By the way, have someone stand by while you are doing this job, just in case you get stuck or become panic stricken with claustrophobia.  It is basically impossible to yell for help while you are down there.  Nobody can hear you, hear you, hear you!  In addition, don't mention my name when the 911 squad shows up.  The last thing I want to hear on the news is how this crazy Canuck said this could be done.  I'll deny it all.

ACCESS HATCH to TIGHTEN BRACKET BOLTS - The following suggestion comes from Bobby Kawamura as an easier method of inspecting the bracket bolts. "My SJ23 is equipped with a 7" diameter access hatch (the plastic twist disk you see on dinghies and kayaks) mounted at the stern of the cockpit, above the cockpit seat.  This inspection port creates convenient access from the cockpit to the outboard bracket nuts.  It's a little cramped to get a socket on the nuts, but nothing like the contortionist act described above.  When the nuts need tightening, just twist off the plate and stick your arm in.  It still takes two people to tighten the outboard mount, but it's no big deal.  My boat was equipped with the inspection port when I bought it, but it doesn't look difficult to install with a drill and a jig saw.  The ports cost about $11.00 US each and it takes a tiny smear of marine grease to seal the port.  Estimated time might be about an hour and a half, including loosing the socket wrench and drinking a rum.  The porthole is also useful for inspecting gudgeon, swim ladder bolts and corner stanchion bolts.  Heck you could store small things down there if they are stuffed into a compartment attached to the back side of the cockpit wall."  Bobby


Bill Ward took this concept one step further by installing three 6" access hatches.  The way he puts it; "This Tech Tip talks about inspecting the gudgeon bolts and other fasteners inside the transom.  It suggests climbing into the port cockpit locker and contorting around to get into position to see/work on stuff mounted to the inside of the transom.  Not this 6’1”, 280 pound sailor!  Ain’t gonna happen!" 


Now I have reasonable access to the outboard, gudgeon and ladder mounting bolts all without working up a sweat.  Bill


NOTE - It's a good idea to check the tightness of the outboard mount, gudgeons, stanchion and boarding ladder nuts every few years.  Resist the temptation to lay stuff loose on the floor back here.  You'll never find it! 

Happy spelunking
Bob Schimmel


Return to Tech Tip Index. . . . . . . . . . . . . . . Have a Question?