| SJ23 Tech Tip D12, (Created 2024-10-18) Bob Schimmel. | |
|
Merc 75 Outboard Repair - Switch Box, Kill Switch. |
|
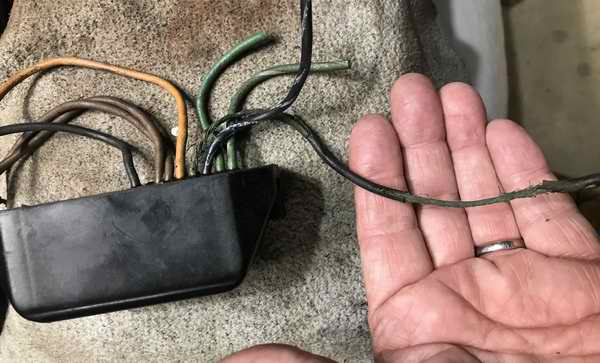
 Its disconcerting, to put it politely, when you discover corroded wires in your trusty outboard. Take a close look at the exposed wire in my hand. It is coated with copper oxide for its complete length. Its at the back of the "Switch Box" that the wire is down to just a few strands. While the primary drive of a sailboat are the sails, there are times when the engine is required; restrictions in a harbour or the demands of Mother Nature with inclement weather. I need my outboard working again. Its disconcerting, to put it politely, when you discover corroded wires in your trusty outboard. Take a close look at the exposed wire in my hand. It is coated with copper oxide for its complete length. Its at the back of the "Switch Box" that the wire is down to just a few strands. While the primary drive of a sailboat are the sails, there are times when the engine is required; restrictions in a harbour or the demands of Mother Nature with inclement weather. I need my outboard working again. However, I am looking forward to the day when I can tow a boat while under sail but so far I have thought it prudent to tow with the control of the rudder and outboard. Discretion being the better part of valour. The lake was a mill pond when I was on my trek to the far end for Panache's end of season haul out when some guys waved me down. Their outboard died and there was no wind. They were actually sculling back to the marina that was 5 miles away so I offered them a tow. I'm still amazed at how well the Merc 75 pulled their boat with this corroded Switch Box. |
|
|
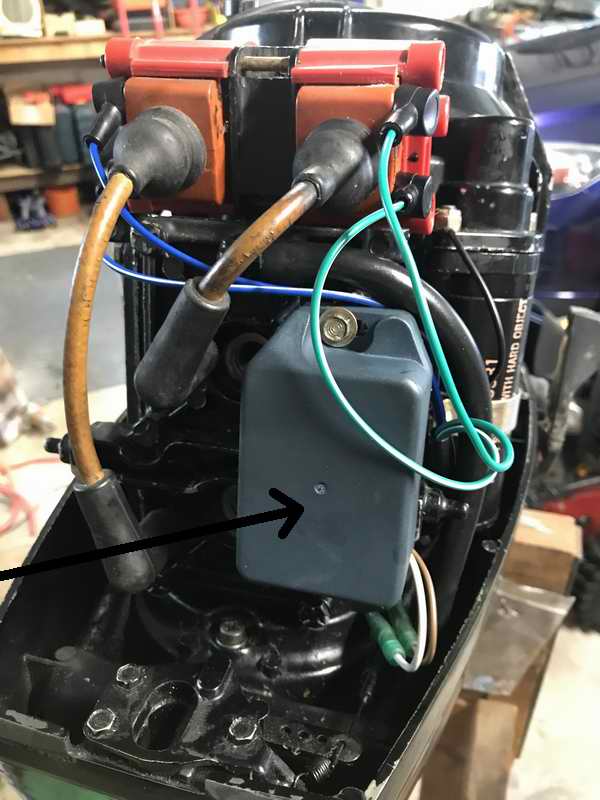
Much to my surprise the Switch Box in Panache's outboard had a badly corroded wire connected to an ignition primary coil. The cracked insulation fell off as I rubbed the wire to remove a spark plug. Judging by the amount of corrosion on this wire, the insulation was leaking for a few years. The local repair shop told me that older Mercury outboards are noted for this type of corrosion. My guess is the insulation finally broke down this summer after years of exposure to the synthetic oil. Only a few strands were left in the wire which explains the occasional erratic idle with one fouled spark plug not receiving enough juice. Ironically I towed a sail boat for 5 miles with this corroded wire. At any rate this condition is not dependable. Now for the bad news. The Merc Switch Box is manufacturer discontinued but a local repair shop found an OEM switch in Vancouver, BC at $600 CA. Well that expense for this 45 year old outboard almost makes it worthwhile to replace the outboard! I found an after market module for $155 CA on the good ole Internet. Finally some common sense. It is prudent to take a photo of the installed defective unit, noting how the wires are routed and where they are terminated, especially if you do the repair 2 weeks later when the part arrives; Its quite a job to fit all the components of an outboard within the tight constraints they are installed. You have to give the engineers credit for their design. The routing of the 8 wires of this module are no exception. It took a few tries to achieve a logical layout that prevents chafe, overheating and minimal strain. It took a while to find new spark plugs. Turns out I had a set of NGK BUHW plugs in my parts box. Success, a healthy spark in both plugs. |
|
|
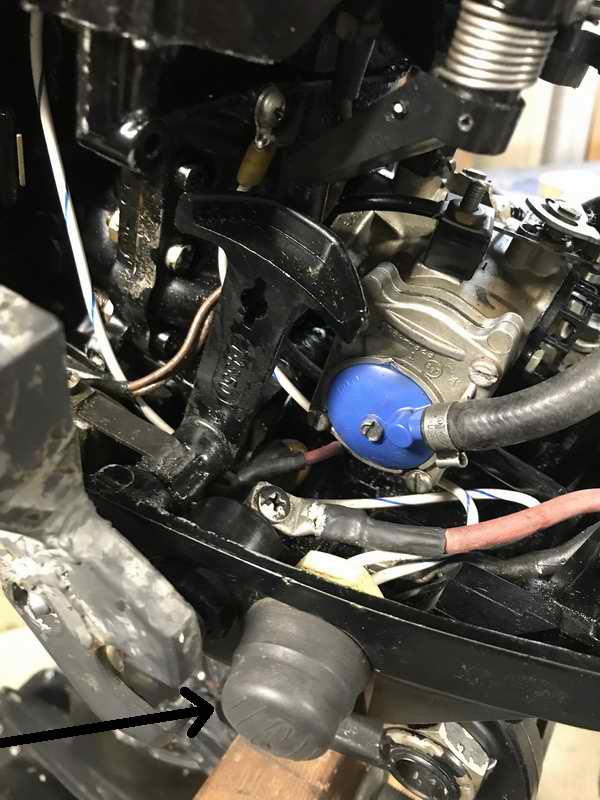
Upon closer examination in the dark areas under the block I discovered the insulation on the kill switch wires was also cracked. Another problem waiting to jeopardize my next adventure. Aaaarch. This switch was equally expensive to replace so I decided to refurbish it, saving ~$80 in exchange for some sweat equity. I removed the kill switch by cutting both wires going to the engine connections and spinning off the retaining nut and rubber cap. Once free of the outboard the remaining wires stubs were cut off immediately behind each contactor inside the switch so I could use a narrow punch to drive each connector out of the housing. It helps if you support the connector housing on a socket held in a bench vice. Once extracted, the wire end of each contactor was filed flat and a depression ground using a Dremel burring bit. This facilitated drilling out the old wires using a tiny drill bit. Since the metal surface of the inside of the contactor was whistle clean I inserted a new wire and soldered it in place. The excess solder was filed off both contactor barrels so they could fit back inside the connector housing. Next I slipped the rubber bellows over connector housing and tested the switch for continuity. This switch is a momentary operation. Finally assembled the connector was in outboard case and the wires directed to their respective termination. This allowed me to cut the wires to length, crimp and solder a new ring connector to the ends and tighten each under its respective screw.
Success, the switch can kill the spark again. |
|
|
Return to Tech Tip Index. . . . . . . . . . . . . . . Have a Question? |
|

