| SJ23 Tech Tip E18, (2020-12-06) Buddy Wright | |||||||
|
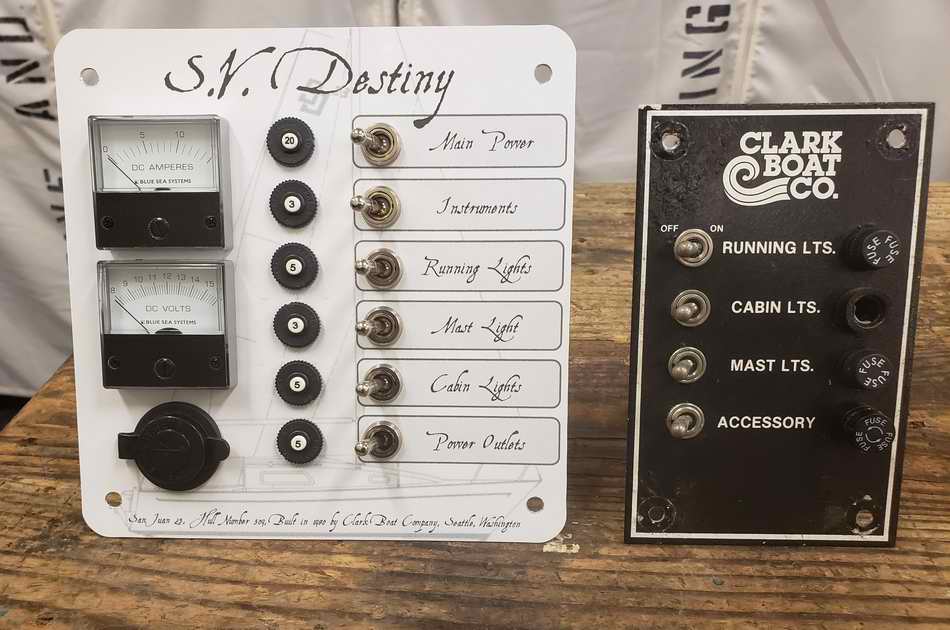
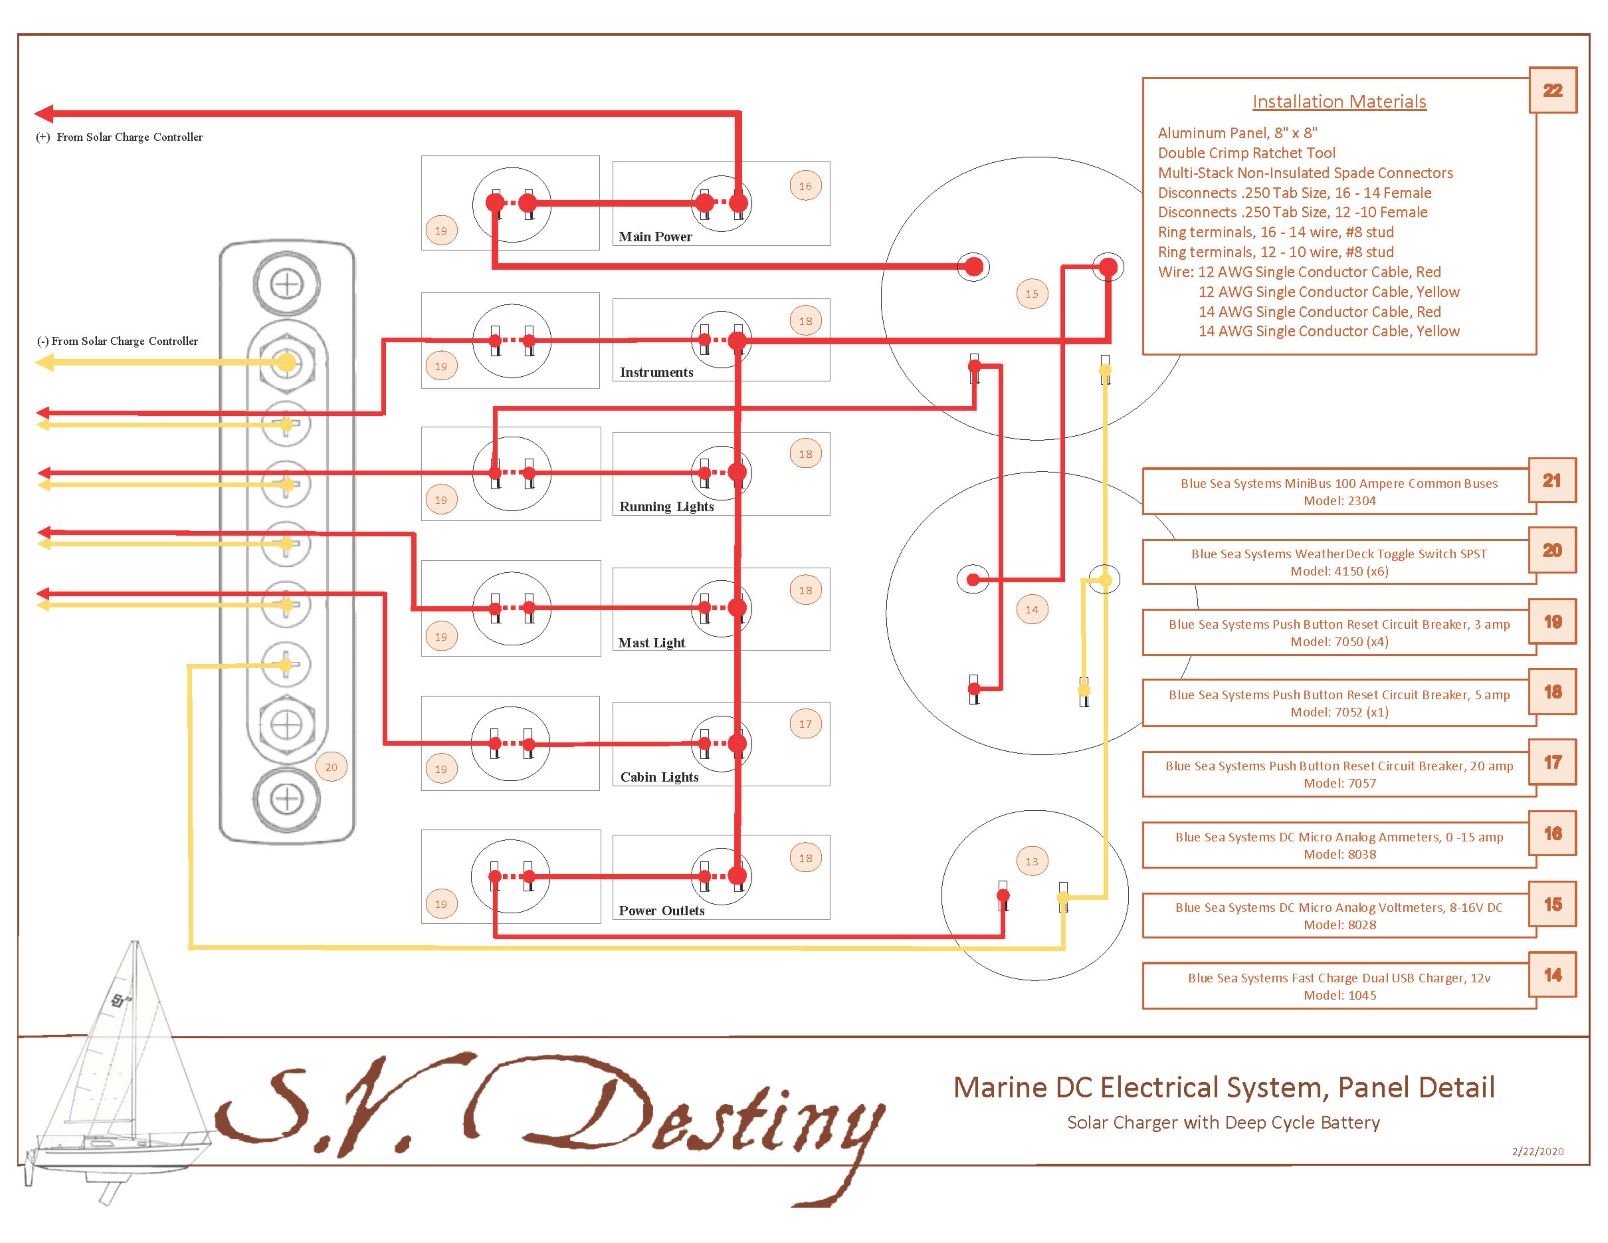
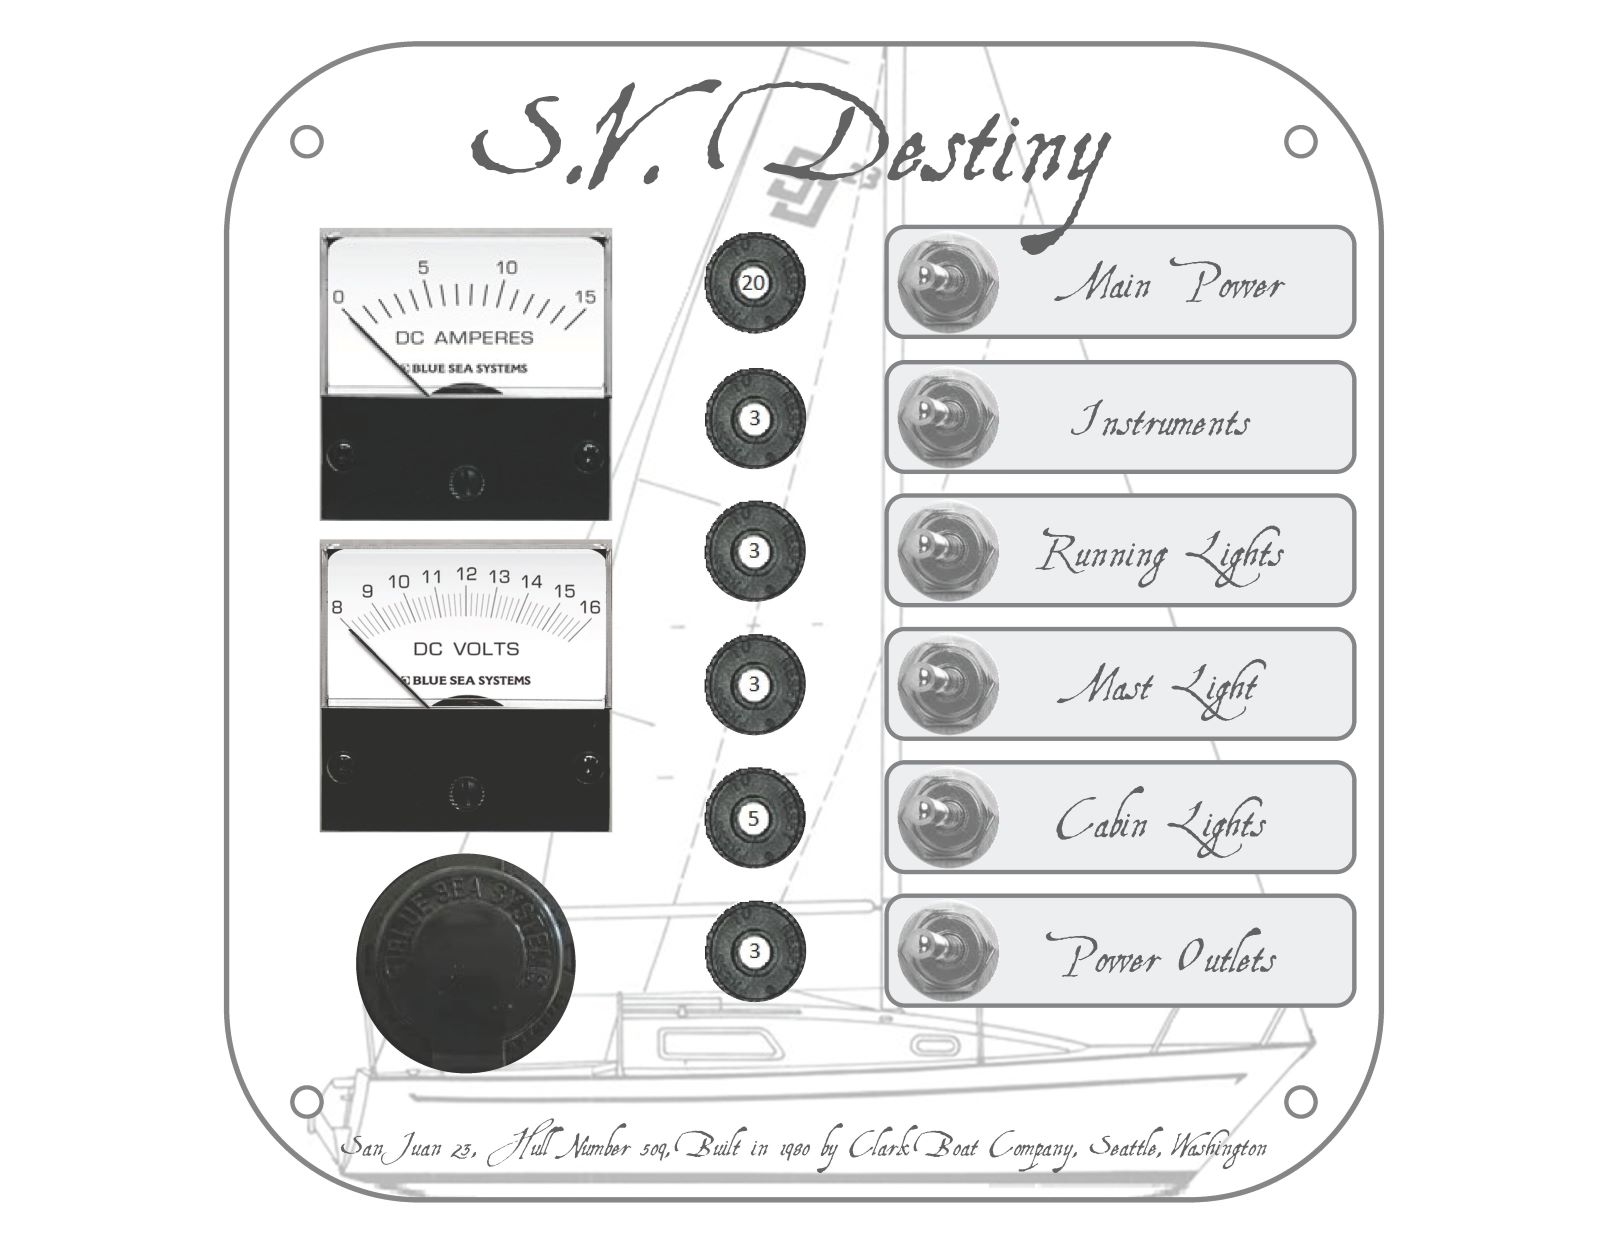
Fig 1 - The design and layout was done with Microsoft Publisher and printed on a blank aluminum panel for perfect alignment of all components. The circuit breakers, switches and gauges were all sourced from Blue Sea Systems.
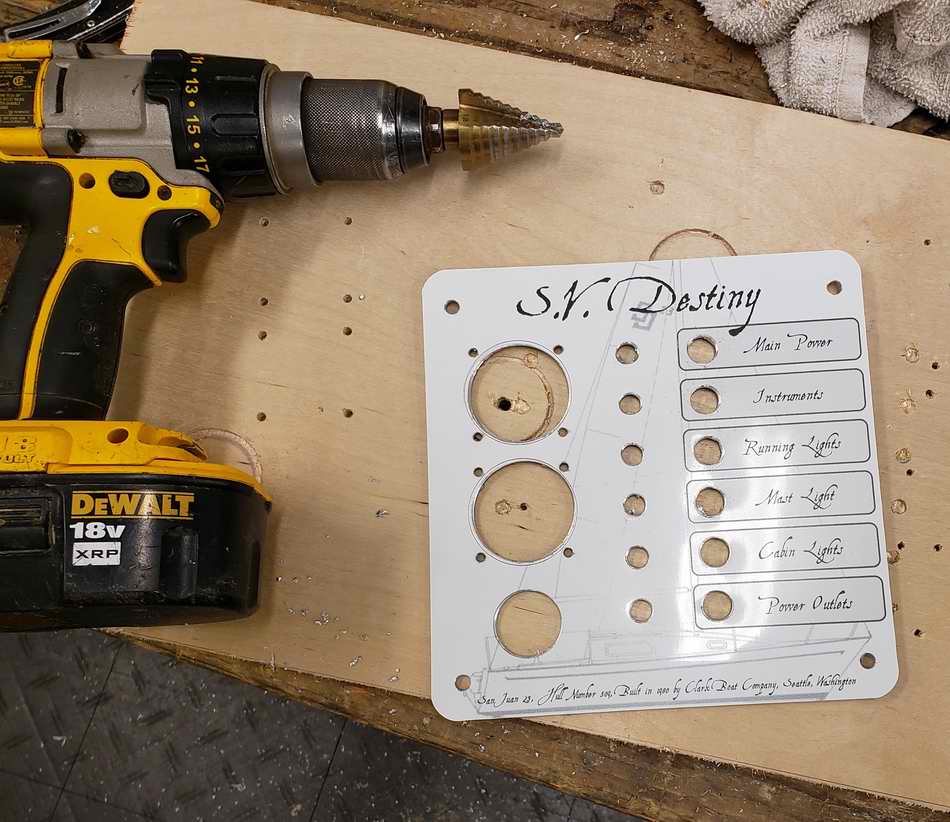
Fig 2 - The holes were drilled with a hole saw and a step bit. A step bit can make a neat hole in sheet metal very quickly. Usually neater than a drill bit. You just have to know when to stop pushing so it stops at the correct size. That's when you realize the advantage of having printed the layout on the blank panel.
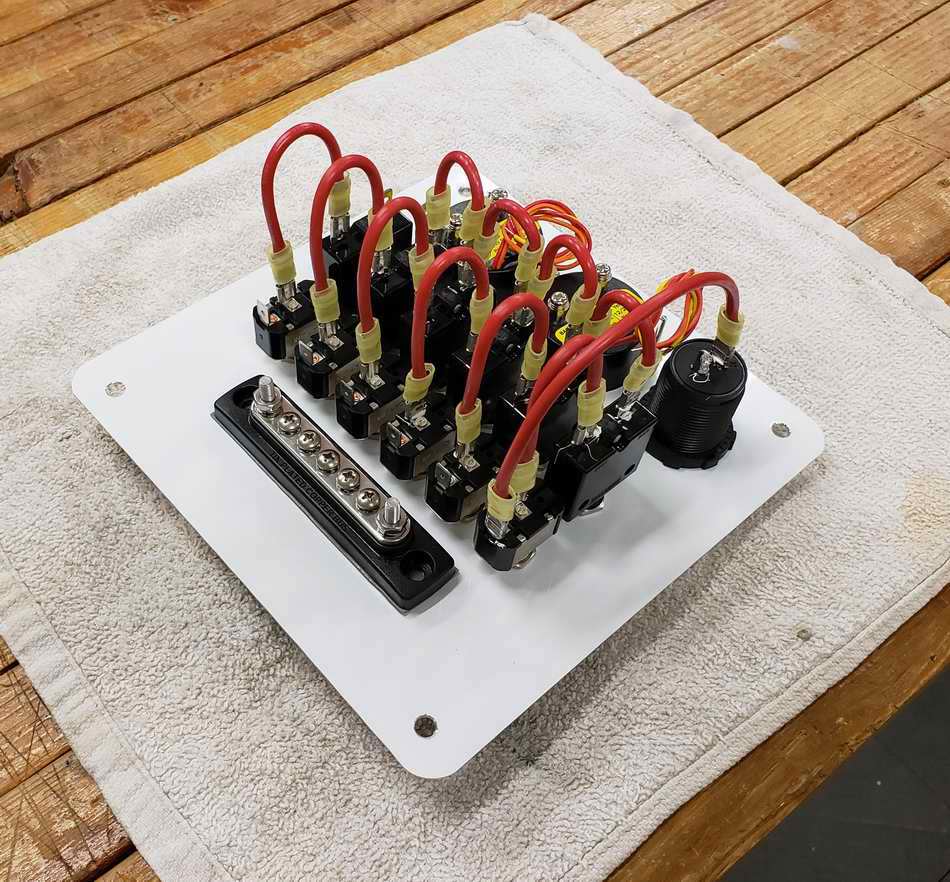
Fig 3 - The power distribution panel looks good at this stage with the internal wiring complete. Buddy installed two analogue gauges. There's something satisfying about reading an analogue gauge; showing relative and absolute values measured constantly without power consumption.
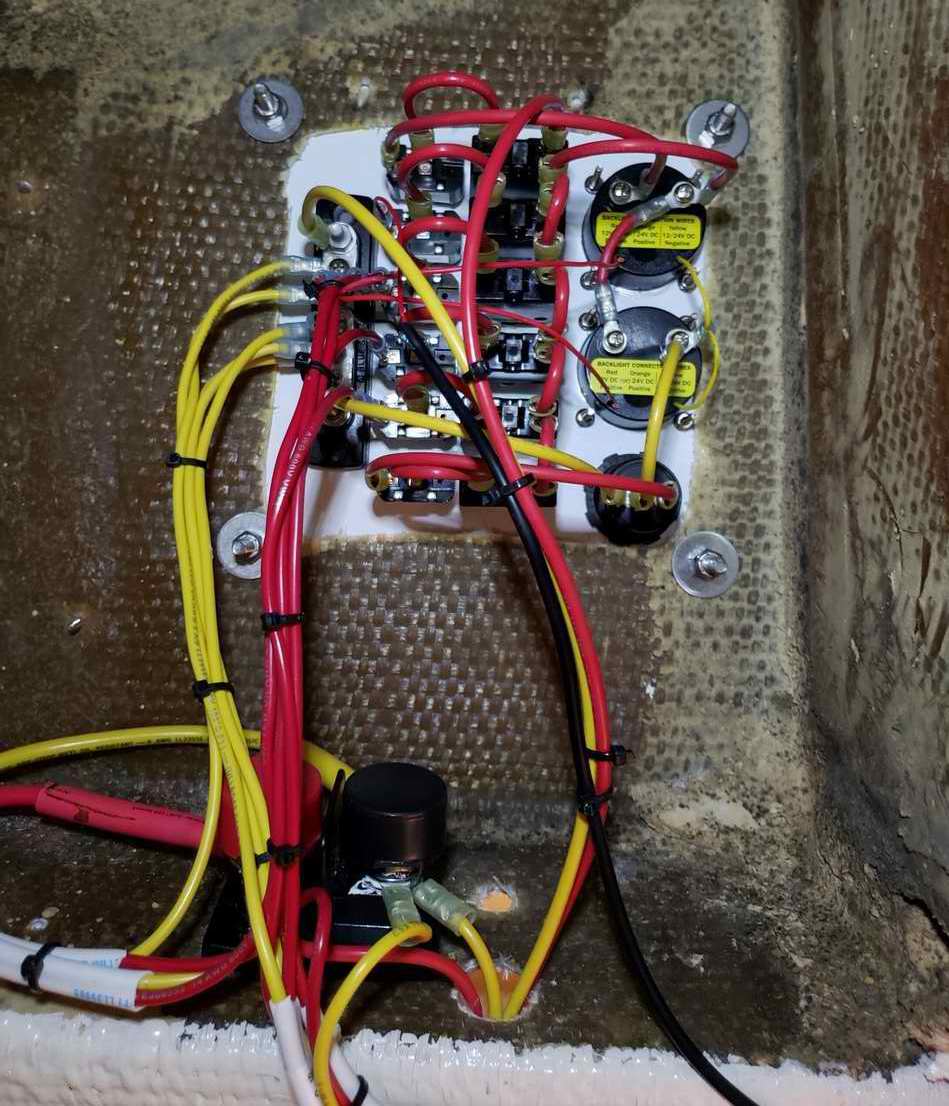
Fig 4 - The back of the power distribution panel from inside the port cockpit locker. Access through the port locker makes it quite easy to access the wiring or to remove the panel. Its doubtful it will ever have to be removed with this quality of workmanship.
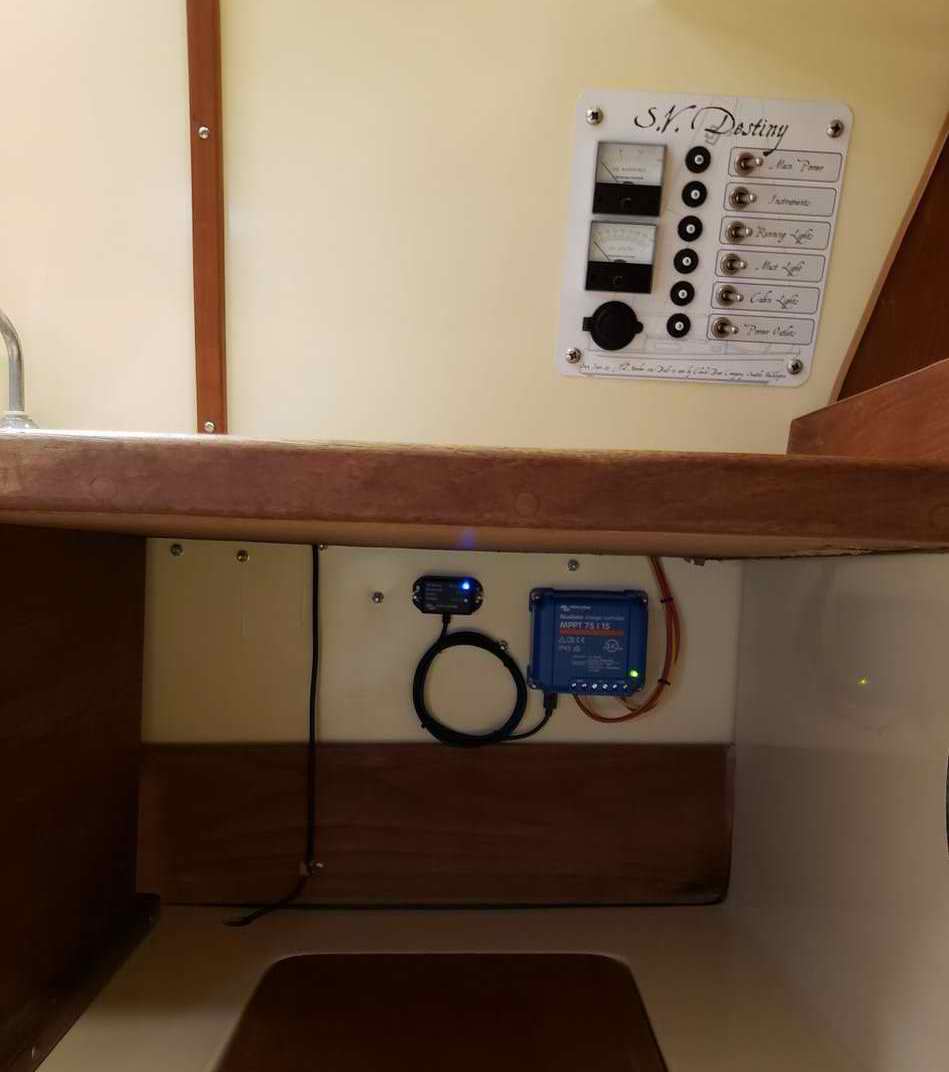
Fig 5 - The power distribution panel installed at the aft end of the port settee. The blue Victron 75/15 MMPT solar charge controller is below it, within line of sight to see the LEDs. Victron has an excellent Blue Tooth APP to monitor the performance on a smart phone. Note the red & yellow power wires that come down from the distribution panel.
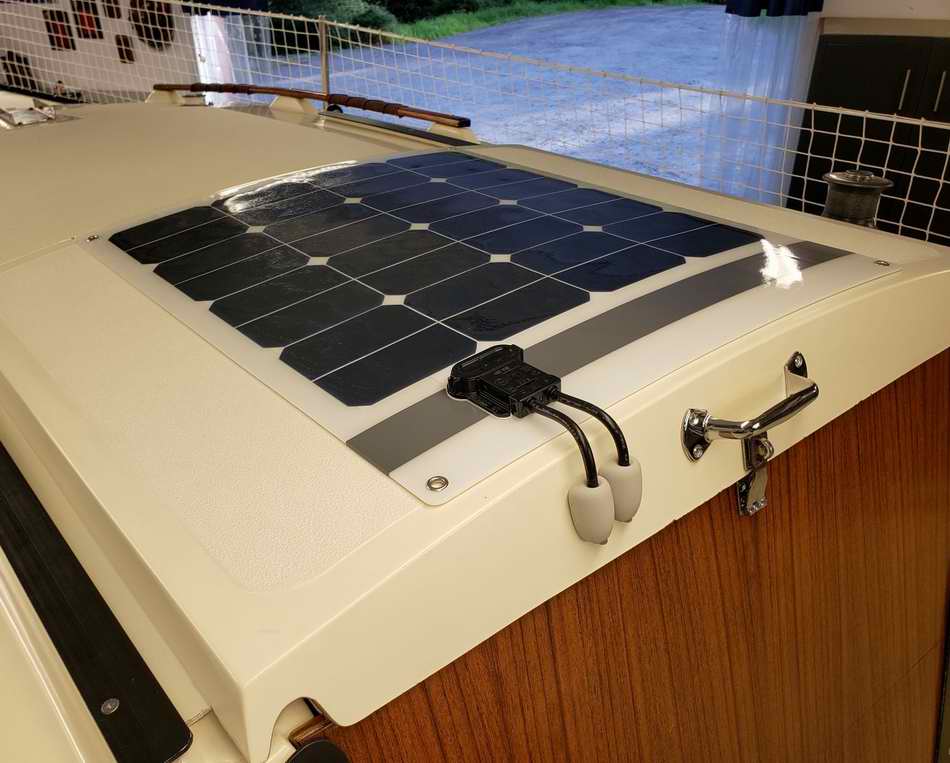
Fig 6 - All the power for Destiny comes from this Sunpower 50W flexible solar panel on the sliding hatch. It charges a 100AH battery. We can also charge the battery from the 6A generator in the outboard, but have never plugged it in. Our power needs are so minimal, 2A at best, that the single solar panel is more than adequate. There is no shore power connection for a 110VAC battery charger.
Fig 7 - As shown below, the solar panel wires that go through the end of the sliding hatch, terminate in a DC plug that is manually plugged in a socket to charge the battery when the hatch is closed. I have daydreamed of a system that would automatically connect the panel to the charge controller whenever the hatch is closed, but honestly I don't know if I'll ever build it. It's really easy to just plug and unplug it when I want to charge the battery. We use so little power that I leave it unplugged for weeks at a time. This has the added advantage of drawing the battery down for a good charge.
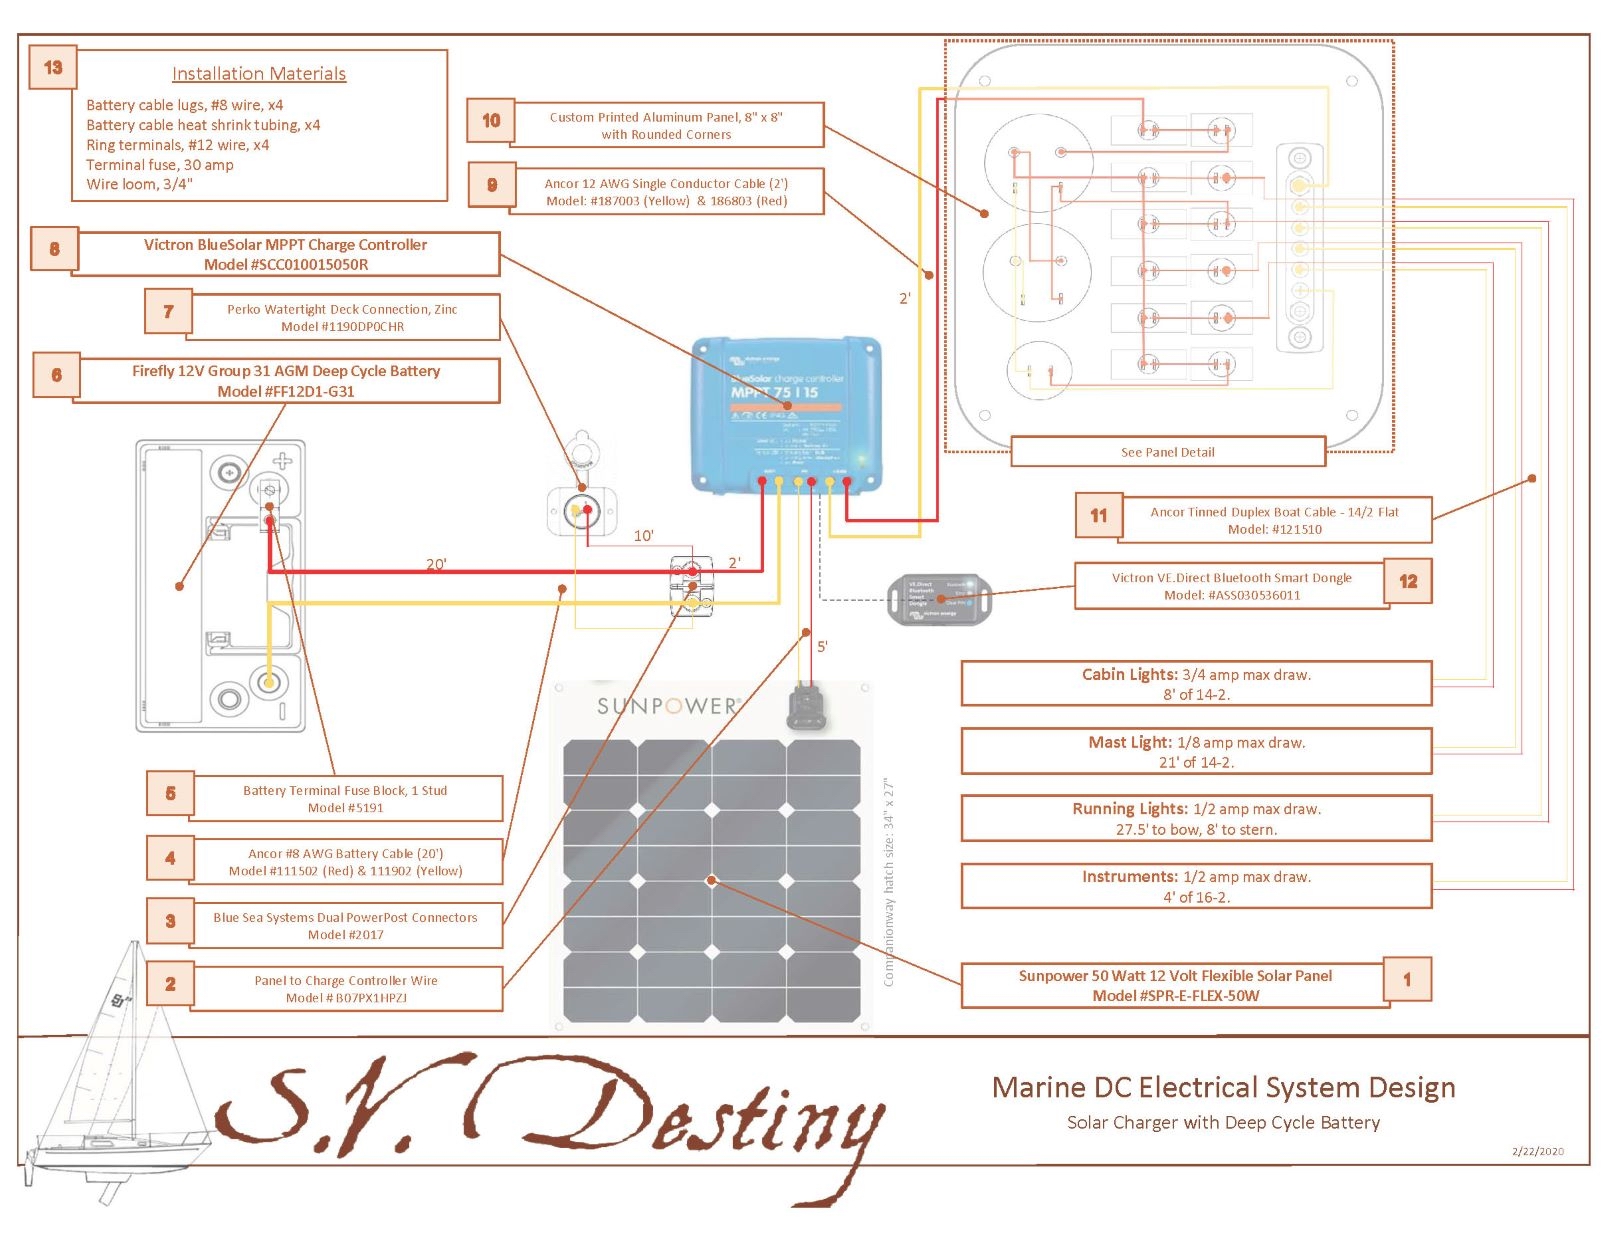
DESIGN CRITERIA - The following files are large to show the details.
After a full season of using Destiny with the new electrical system, I can say that I have no complaints or problems. Everything works as intended and we have all the power we need. The USB jack in the solar panel is handy to a charge a cell phone, Bluetooth speaker or our handheld VHF radio. |
|||||||
|
Return to Tech Tip Index. . . . . . . . . . . . . . . Have a Question? |
|||||||