| SJ23 Tech Tip F29, (Updated 2016-10-21) Bob Schimmel, Frank Langner, Glen. | |
|
Winch Maintenance - Lewmar, Barient, Barlow, Spare Parts, Grease, Bolts, Sheet cleat, Sheet Over run. |
|
|
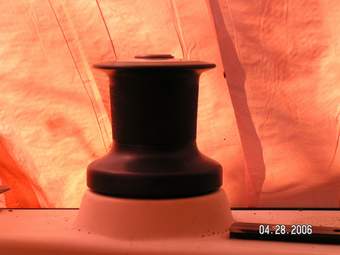
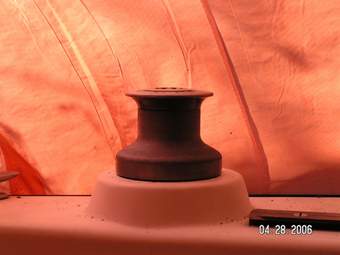
Winches should be cleaned and lubricated every few year before the grease gums up, washes away or prevents the pawls from operating. Weekend cruisers might go till they feel it turning stiff but this really is too long unless you can live with increased wear and/or breakage. If the pawls don't engage when you expect them to, the winch handle can whip around and hurt you. "I have serviced both Barient and Lewmar single speed winches and found them to be quite simple and straightforward. I'm sure there are web sites that describe them in detail but the following are my steps when servicing winches in Fall." Frank Langner.
BARIENT WINCH - This winch probably has the most components. The process is pretty much the same as described above, except that the barrel comes off differently. Push down quite firmly on the center of the winch
(inside the handle drive hole) with a blunt
ended tool like a Robertson screwdriver or a punch. As you push down with one hand, rotate and carefully lift the barrel with the
other hand and it should come free. Barient has an interesting spring arrangement
inside that moves aside when you push down with the tool allowing the barrel to be
lifted.
It can come apart quite suddenly, so be careful it doesn't fly up at you
or drop overboard. Also, keep your hand over the top of the barrel
to retain the handle drive. Once the barrel is free of the base
the handle drive is also free to drop out. Inside are 2 pawls
(bottom) and a needle bearing cage on the base. The other 2 pawls
(top) are in the handle drive.
The barrel of most Barlow winches I have seen are locked down by a large slotted screw through the top of the barrel. Once the screw is loosened the barrel can be lifted off. The rest of the servicing is self evident. With time the screw loosens and you must tighten it. No big deal, just monitor it. Bob Schimmel __________________________________________________________ SPARE PARTS - It is helpful to have extra pawls and springs available in case you lose one. Especially the springs since they are small, thin, and can take flight so easily. I suggest doing maintenance on land where your chances of finding it are slightly better than on water! This does NOT apply to weeds or grass, you may as well be over water. However, if you insist on servicing a winch while on the water then you might consider saving yourself some embarrassment and expense. That pawl spring is ridiculously expensive.
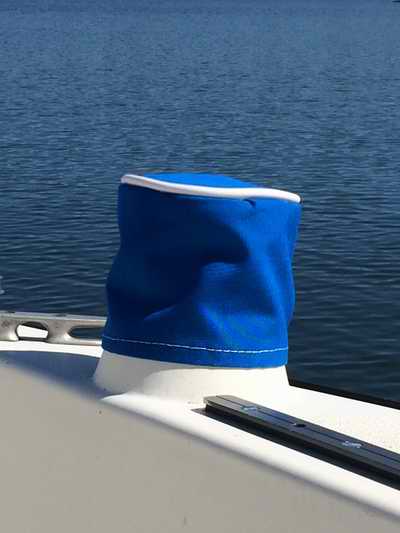
GREASE - Lewmar sells a light winch grease but white lithium or a synthetic grease is also OK. All these greases shed water and adhere to the components. Use grease on the bearings and automatic transmission fluid on the pawls/springs so they operate quickly and the winch functions as designed. Grease on the pawls will make them stick so they can't bottom out between the teeth. Some people advocate dry pawls in the interest of rotational speed down to freezing temperature and to prevent dirt accumulation. For the same reason they use extremely light grease on the bearings, spread sparingly. HINT - Take only one winch apart at a time. That way if you forget how to reassemble the clean winch you can copy the one that is still assembled. You can also use your digital camera to record the correct assembly. Always keep a camera handy to record things. A winch cover keeps the bearings clean, especially if the boat is on a prairie (dust) or desert lake (sand). MOUNTING BOLTS - The 1/4" mounting bolts should be set through holes lined with epoxy. Over drill the hole, fill it with epoxy, let cure, drill it out to size 24 hours later. The epoxy column prevents compressing the deck as the nuts are tightened against the base plate. Use a large flat washer behind each nylock nut. Prevent turning the bolt as the nut is tightened from below. I generally tighten to firm. No point in going beyond that. About every 5 years you should confirm that the nuts are still firm. JAMB CLEAT - That factory cleat you see aft of the winch is actually a jamb cleat designed specifically to hold a jib sheet behind a winch. The sheet goes clockwise around it and is pulled snug into the tapered end to stay securely. It very seldom lets go. If it does, the lines is too thin, slippery or the sheath is worn. I have occasionally sprinkled water on Panache's sheets to make them stick. An excellent feature of this jamb cleat is that it holds and the line can be released under load; a feature that is crucially important when all hell breaks loose. I don't know of another device that can perform both functions as well. Some people don't like this cleat design and would prefer a duel cam cleat. Read Glen's comments. "If I understand your post, you want to use a CAM cleat downstream of your loaded winch on your jib sheets. If that means a cleat that has two, but can also have only one, moving jaws that grip the line. In some ways they revolutionized some parts of boat rigging, beginning in the late 60's. Their boon is their easy swipe-in action, which is also their bane, because a simple lift or bump can release the line. In my life time, I have never sailed a boat with a cam cleat for a winched sheet: always an eared cleat. The only variant of that is a self-tailing winch. A self-tailing winch essentially has a rotary cam cleat, that frees up one hand of the crew. It has a trade-off when it's time to release the genoa sheet; pull the sheet out of the clutch and lift it straight up. This is the best way to effect a clean release. While a self tailing winch works well on a larger boat, my preference is a traditional winch on an SJ23 from a boat-handling perspective. The reason that you would not want a cam cleat downstream of the load, is that a cam engages and disengages with the same ease. There are places and functions on a boat where this risk is outweighed by the improved convenience. A case in point is the jib halyard on an SJ23. The jib halyard leads to a small winch on the cabin top and then you need to do something with the tail. A cam cleat at the edge of the cabin top does fine behind the winch. In an emergency, you can release the jib halyard with a simple lift of the tail. A simple cam cleat can carry the post-winch load and it is out of the way, so a little person might not drop your jib while sailing. But back in the cockpit the helmsperson might not appreciate a catastrophic release of the jib, because bad things could happen. That lends to the use of positive sheet control for things like jibs. An errant foot or another line becoming taught and lifting a jib sheet out of a cam cleat could make you wish for your old pirouette days." Gleno. SHEET OVER RUN - The sheet leading into a winch should always feed in to the bottom from below so the coil of line piles upward, neatly. When you first pull the line in it should be done with only 1 wrap around the winch. Then as the sheet tightens, place 2 or more turns around the winch and crank on the winch handle to tension the sheet. If you follow this procedure it virtually prevents an over run that is next to impossible to release. In a really strong blow you may have to cut the line to release it. I don't know about you but I hate ruining a perfectly good line. "At the end of a very long Puget Sound race, final short beating leg to the finish, I was on an SJ24 and the world famous Dennis Clark of Clark Boat Company was on the other. I forget who was leading, but Dennis tacked, his jib backed and the boat did a 1800 turn. We won. Pirouette? Yes, but that was caused by an "over run" on the winch, which is any time you do not have a clean, upward climbing coil of line on a winch. The winch coil gets pinched and cannot be released. The jib is backed and you do a pirouette! By the way Dennis had to cut his jib sheet to free the line. Even the good guys have a little mishap every now and then. A clue about what leads to a riding turn is too many turns on a winch prior to winching pressure or having the lead from the loaded side approaching the winch at a horizontal angle or from above. This is when you need a fixed fairlead placed low ahead of the winch or a winch pad that holds the winch at a tipped angle to make sure the winch directs the incoming line toward the bottom of the winch." Gleno P.S. Dennis married Margie, the skipper of the boat I was on that day! |
|
|
Return to Tech Tip Index. . . . . . . . . . . . . . Have a Question? |
|
 I have also seen a guy use a custom made bag to field disassemble
a delicate
component rich device like a winch. The bag has two hand holes and a
winch hole. Each hole was equipped with an elastic band to
create a tight seal around the arms and the winch so a part can't be lost. He simply inserted his arms,
slipped the bag over the winch and went to work. Now mind you the guy knew what
he was doing since he completely disassembled the winch keeping all the loose
parts
in the bag. Saves all kinds of embarrassment don't you know. Of course there was a beer at stake for every lost
component. I wouldn't recommend disassembling anything in a dusty
areas but it could be possible with this bag.
I have also seen a guy use a custom made bag to field disassemble
a delicate
component rich device like a winch. The bag has two hand holes and a
winch hole. Each hole was equipped with an elastic band to
create a tight seal around the arms and the winch so a part can't be lost. He simply inserted his arms,
slipped the bag over the winch and went to work. Now mind you the guy knew what
he was doing since he completely disassembled the winch keeping all the loose
parts
in the bag. Saves all kinds of embarrassment don't you know. Of course there was a beer at stake for every lost
component. I wouldn't recommend disassembling anything in a dusty
areas but it could be possible with this bag. 