| SJ23 Tech Tip B05, (2020-03-02) Bob Schimmel, Rick Bensyl & Brian King | |||||||||||||||
|
Window Leak -
A
Trick to Seal the Frame to the Hull. |
|||||||||||||||
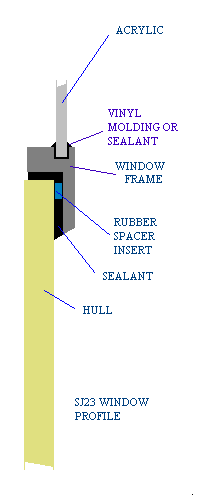
| The windows of a San Juan 23 were top of the line at the
time of manufacture. They consist of 1/4" thick
clear acrylic (Plexiglas)
glazing housed in a two piece exterior aluminum extrusion equipped with an internal locking ring and
a decorative inside vinyl trim. The top and bottom halves of
the external aluminum frame are held together at the joints
(fore & aft ends) with a short internal steel strap and two steel screws.
While you shouldn't have dissimilar metals touching each other, my straps were
coated in very light grease and not rusted so I left them
as is. This might still be OK in salt water. I'm not sure.
The acrylic
glazing is sealed to the external aluminum frame with what looks like silicon sealant. The aluminum frame
that
houses the acrylic, forms the outside half of the window assembly that
keeps the water out. This frame is sealed to the
outside of the hull
with a liberal application of adhesive under the overlapping flange.
The external assembly is clamped to an internal locking ring at the edge
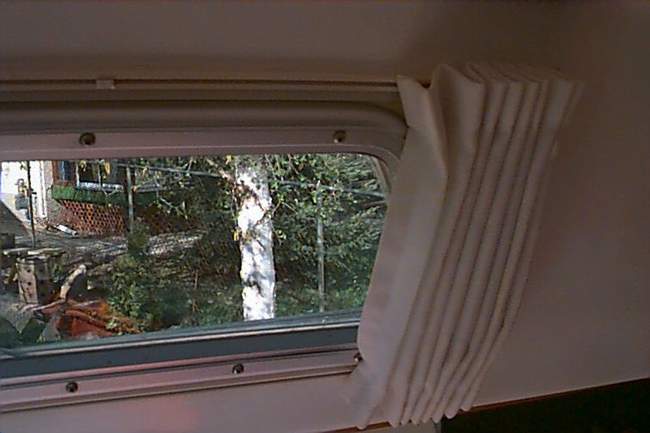
of the window hole. The screws through the locking ring are visible in the photo below.
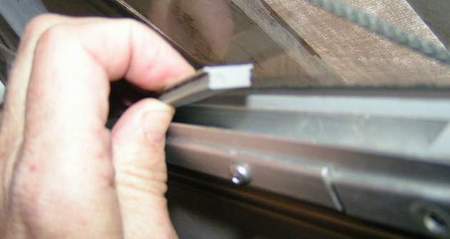
Finally a grey vinyl trim is pressed inside the locking ring to cover the gap and create
a finished look inside the cabin. In
time, this window will leak in accordance with some obscure but
universal law of nature. This is due to the fact that a
sailboat hull flexes under load and the acrylic expands and contracts
more than fibreglass. For this reason the rigid window frame has to
"float" over the flexible sealant sticking to the edge of the rigid fibreglass hole. One of the
best things you can do for your boat is to spend time onboard to look for
leaks while it is
raining! The heavier the rain the better. If the acrylic is not scratched or milky, the minimum repair will likely involve resealing the aluminum frame to the hull. Trying to reseal the window by smearing sealant on the outside edges of the frame is not only incredibly messy and ugly, but almost certainly doomed to failure. Acrylic has a higher coefficient of thermal expansion than metal or fibreglass, which is why this window design leaks so often. This is especially true if the window frames are not sealed to the hull with the glazing version of polymer sealants designed to deal with large expansion and contraction. Some people rid themselves of this problem by replacing the acrylic with tempered glass. The clarity is far superior, they don't scratch, the window is easy to clean, and the ultimate strength is far superior to acrylic. The bonus is that tempering glass is fairly inexpensive. If there is a leak
between the aluminum frame and the hull, then the entire window assembly should be removed
and
re-bedded. Leaks such as these can cause horrible rot problems in a boat
with balsa core or plywood sandwich construction, not to mention cushions
and fabric.
(This
is why it is so important to seal the balsa or plywood core with epoxy
before you install a fitting through the deck).
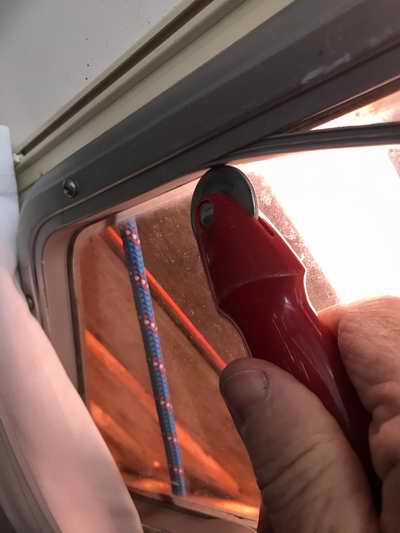
Shown at right is the metal locking ring on the inside of the window. To remove the window from the hull, remove the screws to reveal the frame to hull sealant. The factory likely used Boat Life, a similar flexible lightweight off-white caulking or sealant. If the sealant has turned to a rubbery consistency that crumbles under the push of a finger then it has deteriorated a long time ago. It may be difficult to duplicate the original manufacturer seal between the acrylic and the aluminum frame. If it is bad it might be better to replace the whole window, frame included. I'm told that superior windows are available today but I don't know at what price. Rick Bensyl bought some from Minney's Yacht Surplus in Irvine, California for about $59 each (2008). They are slightly bigger so he simply cut the hole a bit larger. On the other hand, you could replace the acrylic with tempered glass bedded in glazing polymer. See "Rebuild a Window" at the bottom of this Tech Tip. BEFORE you REMOVE the WINDOW - Apply masking tape around the window keeping no more than 1/8" away from the frame. This leaves space for a fillet to seal to the hull. Apply a pull of tape overlapping each corner of the window frame to the hull. Draw a reference line down the center of each tape, from hull to window. Use a razor knife to cut the tape along the perimeter of the frame. These lines will be used to position the window in the same place. Without these reference lines you cannot place the window in the center of the hole with equal overlap on all sides. Temporarily tape 2 wood blocks to the cabin side, along the bottom of the window frame. These will be used to support the frame on the edge of the opening during installation. As an alternative to wood blocks you could use 1/8" guide pins temporarily set though the hull and the aluminum frame to support the window. It would also be possible to place 3/16" long tubes over each pin to act as a spacer. Remove the grey vinyl trim from inside the frame and remove the mounting screws in the locking ring. The old sealant between the aluminum frame and the hull may have to be cut in places with a razor knife or sharpened putty knife. Be gentle in this procedure so you don't bend or break the window. Move around the window in small steps so you don't gouge the gel coat. Once free pull the window frame out gently so you don't bend it. Remove all remnants of old adhesive from the hull and the aluminum frame. If silicon sealant was used, apply a liberal amount of silicon seal remover to clean the surface down to bare gel coat. (NOTE - Acetone dissolves acrylic, so don't let it contact the window). If you have to take the window home, cover the window hole with heavy duty poly taped to the hull with duct tape. It will stay stuck in the rain provided it was applied dry.
NOTE - To maintain a water tight seal the metal components used for the windows MUST NOT be installed rigidly against the hull. Rigid metal frame bends less than the hull that jiggles and flexes while under way. In addition, metal, and especially acrylic, have a larger thermal expansion than fibreglass. To maintain a water tight seal between the two requires a thick enough sealant that is flexible enough to allow for shear movement so the sealant is not torn loose.
If one of Panache's windows leaks again I will seal it with butyl tape using the following sequence.
If you've done this job correctly, you can forget about window leaks for the next ten years, or more! Ironically the 3 front windows have never leaked. Only the side windows have. TOP ____________________________________________________________________________________
Scuttlebutt has it
that the length of this moulding can be restored by heating and stretching
it. So I tested this by
soaking it in hot tap water and washed it with a nail brush while I was at
it.
It was left in very hot soapy tap water for about 30 minutes till
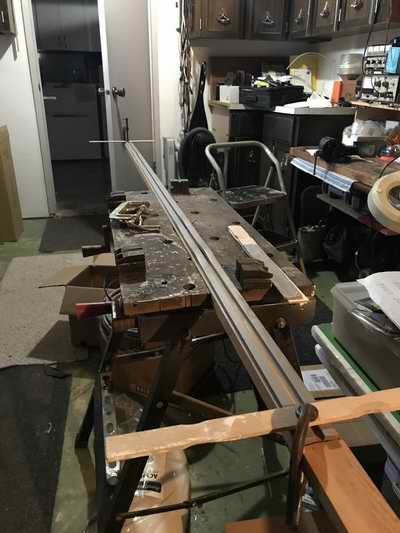
it became soft. Then it was dried and moved to the "rack"
which consists of a long (1x2)" stick marked at 78" to create a
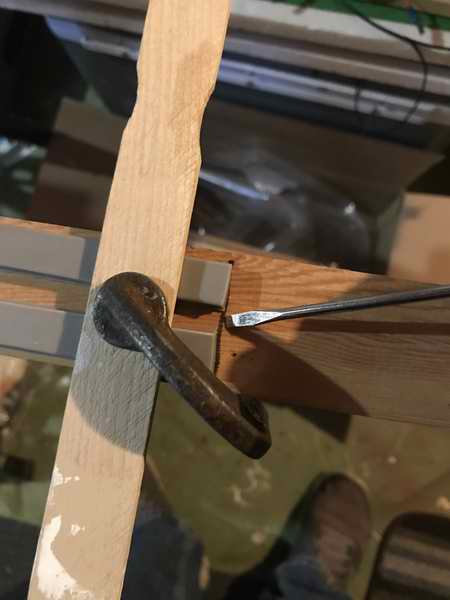
target to stretch to. The moulding was first clamped at the end of the stick with a
paint stir stick and a C clamp. Then stretched past the 78" mark
to offset shrinkage and clamped similarly. I kept it on the "rack"
for a day to cool in the stretched position, hoping it would acquire a new
memory.
By the
way, removing the moulding from the window makes this job a lot easier than
putting the whole boat in the sink!!!
See results
below.
AFTER NOTE: Stretching this moulding does not work. It shrinks back to its shrunken length since it has memory. Too bad. For this reason I plugged the gap with a reasonable facsimile, at the top of the window frame where it can't be seen unless you look up while laying on the berth. I cut the length of the plug so it pushes and holds the grey moulding into the curved ends of the window frame. This looks a whole lot better than the ugly gap with the moulding drooping out of the frame ends.
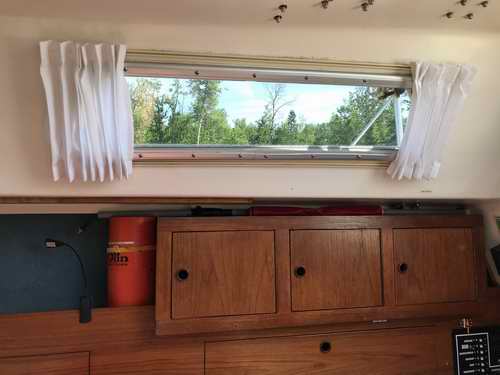
The photo below shows the washed moulding reinstalled with a spacer at the top. What an improvement. Washed and repaired curtains don't hurt either!
____________________________________________________________________________________ REBUILD A WINDOW (Brian King): I replaced the vinyl glazing on both main windows in 2009. They have been in place for a couple of weeks now and experienced some pretty heavy Seattle winter rains. There have been no leaks so I'm pronouncing this a qualified success. Now it is only a matter of a test of time. It should be noted that I have tempered glass in my windows, not acrylic. See Glass below. The new vinyl moulding between the glass and the aluminum frame is for a 3/16" thick glass that fits in a 3/8" deep channel that is 11/32" wide. It is part number GC727C from C.R. Lawrence. While not an exact replacement the dimensions are very close and as such it fits snug. The actual measurements of the glass channel on my boat are 27/64" depth and 21/64" metal opening. Minimum order is a 100' roll and only about 20' are needed for the SJ23. Ordered on line, it cost about $72 with shipping to Seattle. Here are the photos showing the installation:
_____________________________________________________________________________________ TEMPERED GLASS WINDOWS - Several of my SJ28 buddies replaced their acrylic windows with tempered glass. SJ28 and SJ23 windows are identical in construction. Disassemble the windows using Brian's instructions listed above and verify they fit perfect in the frame. Lay the port acrylic on the starboard side to determine if the two are symmetrical. You might be surprised. Give your acrylic to the glass shop as a template to cut the glass and temper it. Use the services of a glass shop for this as polishing the rounded edges are beyond the abilities or tools that most people have. Install and seal the tempered glass as per the steps shown above. The vision through tempered glass is clearly superior!
|
|||||||||||||||
|
Return to Tech Tip Index. . . . . . . . . . . . . . . Have a Question? |
|||||||||||||||
 INSTALL AND SEAL THE WINDOW - Now is the time to make a decision on which sealant, and the accompanying
procedure, you want to use to install your window.
The procedure for slippery glazing sealant is more complex and messy than
for butyl rubber tape.
 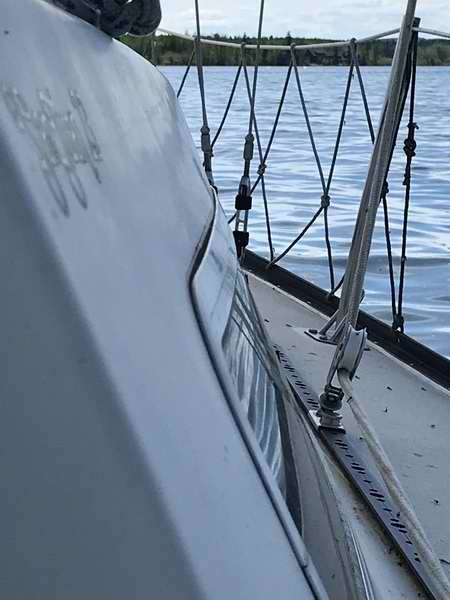 When installing the window you'll
discover that the frame does not match the curved cabin wall. This is OK since the window is
flexible enough to conform to the curve. I
formed my aluminum frame a bit to more closely to match the hull curvature
and ease fitting the frame. However,
it was still too straight when I realized the soft sealant in the middle of the frame
would be squeezed out as it was pressed against
the hull. To prevent this I placed 3/16" thick rubber spacers
against the
outside of the cabin where the aluminum frame touches.
