| SJ23 Tech Tip B19, (Updated 2021-01-01) Bob Schimmel | |||||||
|
COMPANIONWAY DROP BOARDS - Replace, Secure for Storm, Store while Underway, Paint Rails. |
|||||||
|
TWO DROP BOARDS - The factory configuration was a single fibreglass drop board.
This is perfect for winter or long term storage but pretty difficult to
store for day
to day sailing. You are likely to poke
something with a corner or drop it on something, like your foot. A better option is to
cut it in two sections so they are easier to
handle or use while sailing.
I have two acrylic boards on Panache. The bottom board is level
with the
gunwales, which is good enough to keep a lot of the water out of
the cabin.
Although, if the weather is so rough that waves are threatening to
swamp the cockpit, both drop boards better be in place with the sliding hatch closed.
Your next option
is to
find sheltered water so you can rest in a pub to talk about your ordeal!
Drop boards can be made from different material, each with their pros and cons.
The bottom board must be solid to keep cockpit water out of the cabin. If
you want to install a vent, do so through the top of the top board only. A vent can be inserted as a louvered unit
(weaker) or created with a pattern of holes drilled in a downward slope to
keep the rain out.
CONSTRUCTION - The easiest and most accurate way to make a drop board that fits the existing tracks is to cut a template from cardboard. Cut the "bottom" perfectly straight and draw a center line down the middle of the cardboard, perpendicular to the edge. Write "OUTSIDE" on the cardboard. Place some alignment marks on the hull (apply masking tape in those spots): center bottom on the hull and center top on the sliding hatch. Tape makes for easy removal of the marking when the job is done. Hold the cardboard on the small ledge that supports the bottom board, aligning the cardboard center line to the alignment marks. Trace out the left edge of the cardboard following the inside of the track. Cut the cardboard and place in track to check fit. Similarly trace out the right edge following the inside of that track. Cut the cardboard and place in tracks to check fit. If you are happy with the fit, trace the top parallel to the bottom of the sliding hatch. You must leave a slight gap for the hatch to slide over. However, if your hatch can be lifted a bit I'd be tempted to cut it higher, for a secure fit. You can always cut it lower later if needed. If you want two boards for easier handling, draw a cut line across the middle, parallel to the top. Remember to cut at a 450 slope so water flows into the cockpit! Before cutting the board, consider adding UHMW slides under the sliding hatch as per Tech Tip B04. Also consider a sectional bug screen of the same size so a drop board can be interchanged with a bug screen. The board shown here is made of starboard, a product similar to a cutting board.
Failing all of this you could trace out the board from another SJ23! Now why didn't somebody think about this!
On Panache I made one that fills the top half to rest on the bottom acrylic. The top one has a tough screen that can stop the squirrels that have shown up recently. This screen will work in conjunction with a similar one on the forward hatch, all to maintain ventilation. If the cabin was dry before, it is even drier now.
TOP
|
|||||||
|
SECURE DROP BOARDS for a
STORM
- Several SJ23 club members have broached their boats which makes "keeping the fish out of the
cabin" a somewhat important consideration. In the post mortem of the 1979 Fastnet Race, companionways with sloped sides were considered dangerous
as it was all too easy for the boards to slide out with the boat lying
on her side. An open companionway makes a boat very vulnerable as a wave can easily find
its way below, filling the cabin and sinking the boat. This is exactly
what happened to several of the boats. The first suggestion was to redesign the companionway with vertical sides but it was soon
discovered that it was awkward
and time consuming to slide the boards in or out. This was abandoned
in favour of locking the boards down in a sloped companionway track to retain
the quick removal/install feature. On a San Juan 23 you can very
easily adopt the same technique.
Just to give you an idea of how quickly a boat can be swamped, in the
spring of 1999 a Holder 20 broached at a regatta in front of Bobby
Kawamura. "The
companionway boards were not in place which left a two square foot hole
for water to enter the cabin. The boat was awash in about two minutes and left the crew
swimming. In that short period of time, the hatch sucked in enough water
to leave nothing but the stern sticking above the surface. After seeing the Holder sink so quickly, I put my boards in and closed
the sliding hatch. In future I will be more careful by sailing with the companionway
closed in more than moderate conditions. The Holder design is
lighter and more water tight than an SJ23. In rough weather it
would be prudent to: wear a lifejacket, latch the forward hatch and
lockers, lock the companionway boards in place and close the sliding hatch as well."
Bobby
Kawamura. At least a couple of SJ23 owners on the distribution list have come very close to broaching their boat. Sail hard and often enough and it may happen to you as well, usually when you don't expect it. The difference between telling a story at the marina with wet feet versus being rescued from the cold water may be the price and preparation of installing a good lock down system. THREE TECHNIQUES to SECURE the DROP BOARDS. 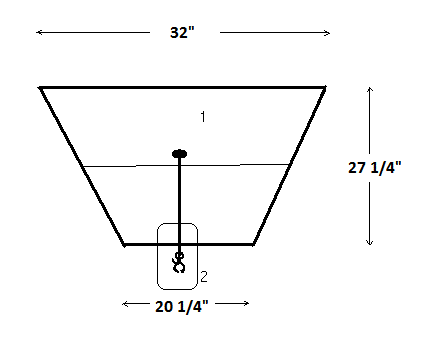 Single
Cord -
Shown here is a diagram of Bobby Kawamura's lock down technique by using a
single tether to hold both
companionway boards in place. Drill a 1/4" hole (1) in the
upper board, close to the bottom. Run a 1/4" low stretch line
through the hole and tie a figure eight stopper knot on the inside.
Tie
the other end of the line (bowline) to a brass trigger snap shackle.
Snap the trigger shackle to an eye strap (2) installed below the
bottom board. The upper board should stay in place by the tension in
the line. The bottom board should not be able to go anywhere as it's
held captive by the top board. Single
Cord -
Shown here is a diagram of Bobby Kawamura's lock down technique by using a
single tether to hold both
companionway boards in place. Drill a 1/4" hole (1) in the
upper board, close to the bottom. Run a 1/4" low stretch line
through the hole and tie a figure eight stopper knot on the inside.
Tie
the other end of the line (bowline) to a brass trigger snap shackle.
Snap the trigger shackle to an eye strap (2) installed below the
bottom board. The upper board should stay in place by the tension in
the line. The bottom board should not be able to go anywhere as it's
held captive by the top board.
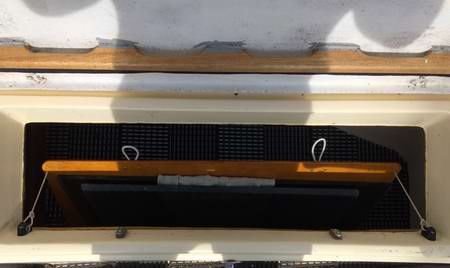
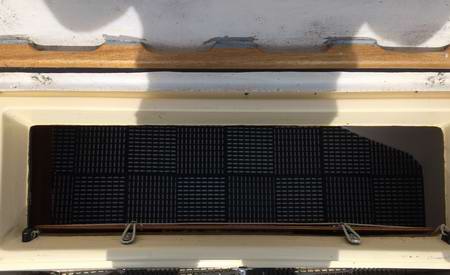
Dual
Bungee Cords - An
alternative is to hook two strong bungee cords over the top of the upper
board with the lower end permanently attached to an eye strap
on either side of the companionway. Panache's cords have excellent hold down strength and are very secure. Definitely quick to set and easy
to remove, especially from inside the cabin. I
didn't flip Panache upside down to confirm the
bungee cords
will hold the boards in place! But I did hang them from the
bungee cords to prove they can hold the weight of the boards inside the tracks! There are also two eye straps close to the top of the
moulding to store the top hooks, ready for use. This way I only have to transfer the top hooks from the storage eyes
and slip them
over the top board.
Quick operation and peace of mind. I can easily reach them while
standing in the cockpit.
Sliding
Hatch
and a Lock - And finally, if you find yourself bouncing
around out there in the slop and you haven't installed a system to secure
your drop boards, you should at least close the sliding hatch over the
boards! Then
set the hatch lock or use a small karabiner to latch the
hatch to the top board. This holds both boards securely in
place, such a simple thing to do yet so often over looked in the panic of
the moment.
If you have another ingenious idea I would appreciate hearing about it.
Please email me. TOP
|
|||||||
|
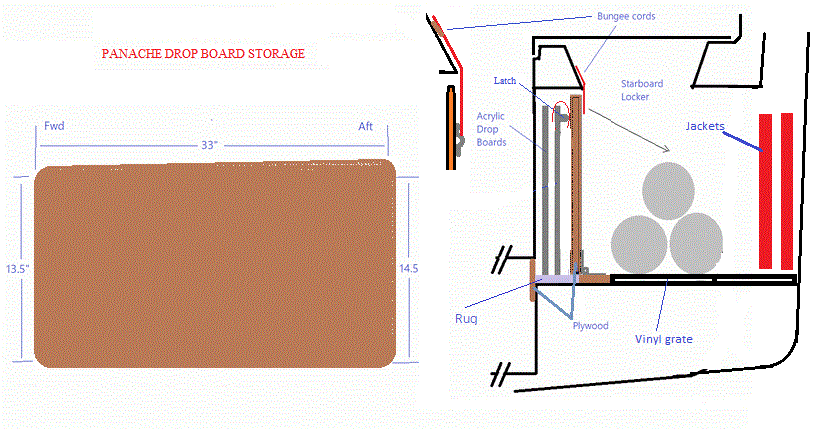
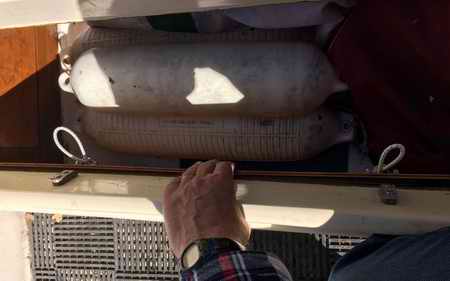
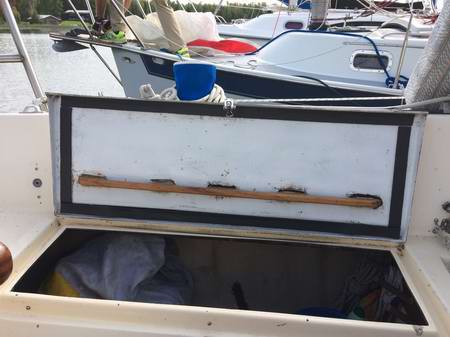
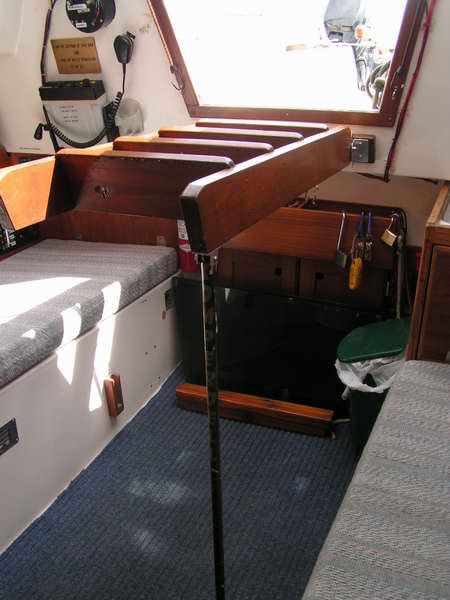
STORE DROP BOARDS WHILE UNDERWAY - Mike Foreman asked, "where does everyone store their boards while underway? I've tried under a cushion in the cabin but when the boat heels both the boards and the cushions take a hike. The only place left I can see is the port cockpit locker, which is a catch-all for everything else." Storing a single drop board while under way is a difficult task, as reported by many. Thankfully Panache's boards are split in two so I don't have this problem. While storing a two part board is less of a problem, they are still awkward to handle. I hate carrying them down the companionway ladder because the passageway is narrow and I'm usually in a hurry for some reason or another. I have a little rule on board Panache that works well. It goes like his, "If it's used inside then it must be stored inside. If it's used outside then it must be stored outside." The only exception to my rule is the hanked sails stored on the forward berth so they are accessible through the forward hatch. This has worked pretty well for me in most case as it's stored close to where it is used. It's a good idea to store things in a convenient place on board a small boat for the times that Mother Nature decides to get a tad nasty. Anyway the following are good ideas submitted by various people. Pick the one that suits you best.
|
|||||||
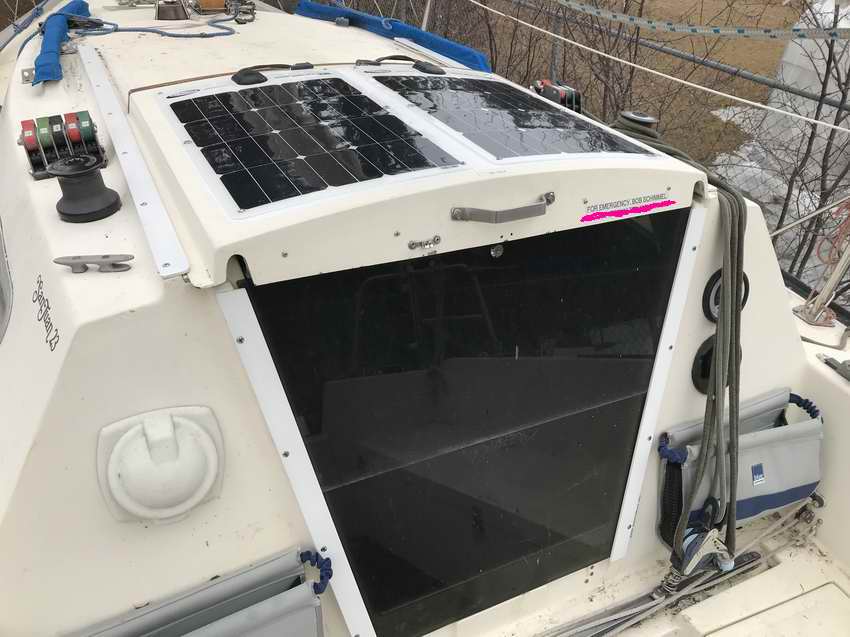
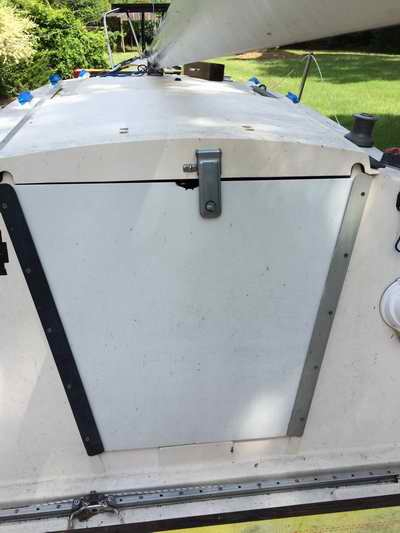
 DROP BOARD
RAILS - Panache's original drop board and sliding hatch rails were
made of teak. Unfortunately the teak was pretty beat up when I bought
the boat so opted to replace them with aluminum rails painted black to match the
factory anodized toe rails. The overall colour scheme looked
good, BUT in a full Alberta sun, they get hot as hell, something I never
accounted for. When I grab around the
rails to pull myself out of the cabin,
OUCH! I instantly let go as the metal is way too hot for my fingers. So at the risk of offending the masses with a sacrilegious act, I
lightened the colour
to save my skin. DROP BOARD
RAILS - Panache's original drop board and sliding hatch rails were
made of teak. Unfortunately the teak was pretty beat up when I bought
the boat so opted to replace them with aluminum rails painted black to match the
factory anodized toe rails. The overall colour scheme looked
good, BUT in a full Alberta sun, they get hot as hell, something I never
accounted for. When I grab around the
rails to pull myself out of the cabin,
OUCH! I instantly let go as the metal is way too hot for my fingers. So at the risk of offending the masses with a sacrilegious act, I
lightened the colour
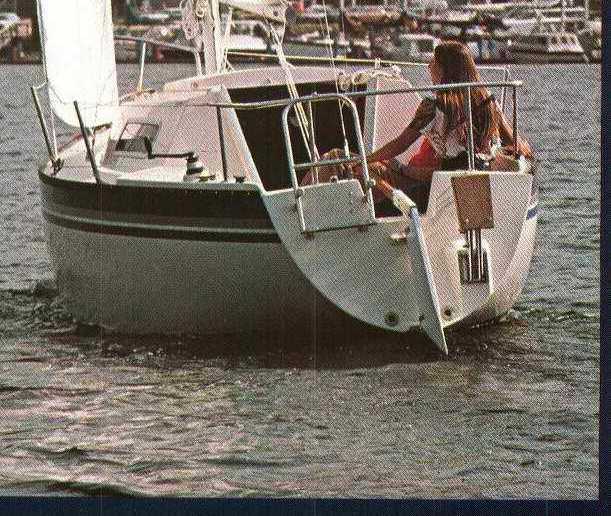
to save my skin. As usual, roughen up the old paint till dull, wipe with acetone, then spray paint with light even coats to prevent paint wrinkling. You can achieve a very smooth finish if you sand lightly between coats to remove bumps. Hang in the sun or a warm furnace room to bake for a few days before installing on the boat. Seal around the screw holes to keep water out. The drop board and sliding hatch rails are now a gloss white that is several shades lighter than the gel coat, looking like this brochure photo. This is a tough automotive enamel paint (expanding and contracting with temperature) so it will be easy to wash the grime that dirty hands leave. I'm happy to report they stay cool in the hot sun.
|
|||||||
|
Return to Tech Tip Index. . . . . . . . . . . . . . . Have a Question? |
|||||||
 Similarly, slope cut (450) the mating edges of the top and bottom
boards. Remember to cut the slope in the correct direction so water
flows into the cockpit! Round off all corners to 1/4" radius.
It protects the board and minimizes damaging anything you might poke.
You could install a hasp for a lock but I don't like the fact you WILL
hit your head on the strap. There are other creative ways to lock a
hatch.
Similarly, slope cut (450) the mating edges of the top and bottom
boards. Remember to cut the slope in the correct direction so water
flows into the cockpit! Round off all corners to 1/4" radius.
It protects the board and minimizes damaging anything you might poke.
You could install a hasp for a lock but I don't like the fact you WILL
hit your head on the strap. There are other creative ways to lock a
hatch.  WINTER STORAGE - Depending on the climate you are in, there is
merit for having a single board equipped with a large vent. Its
perfect for winter storage, being secure and tough.
WINTER STORAGE - Depending on the climate you are in, there is
merit for having a single board equipped with a large vent. Its
perfect for winter storage, being secure and tough. 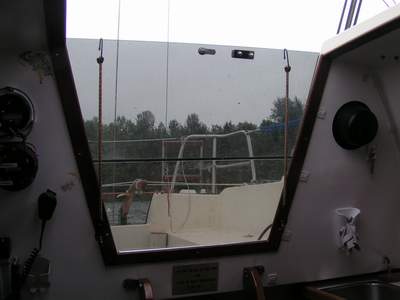
 D. Wendal
- "When I used the split wood companionway boards, I stashed
them inside the port cockpit locker, which makes them readily
accessible without entering the cabin. I now use the one-piece
fiberglass door and I simply lower it down into the space behind the companionway steps. It seems to ride just fine there, not
noticeable at all until you need it. Then it's easily positioned
from inside the cabin."
D. Wendal
- "When I used the split wood companionway boards, I stashed
them inside the port cockpit locker, which makes them readily
accessible without entering the cabin. I now use the one-piece
fiberglass door and I simply lower it down into the space behind the companionway steps. It seems to ride just fine there, not
noticeable at all until you need it. Then it's easily positioned
from inside the cabin."