Box Cushions for the Cabin (2000) - I replaced Panache's
aging factory settee cushions with 3" thick medium density urethane foam. The support the new cushions provide leaves
enough ceiling height for a 5'10" tall person to sit against the bulkhead and with adequate support
for sleeping without bottoming out (170 lbs). See
Tech Tip C08 for dimensions.
All foam and covers were replaced at the same time.
- Urethane foam is more
expensive but outlasts and outperforms the cheaper stuff.
- Memory foam is even
more expensive and is the ultimate for sleep comfort. As your body
heats up the foam, it relaxes and forms to your body, cradling you
with uniform support and comfort. It holds this shape till you move
which is why it is
called memory foam. This is perfect to keep you from rolling
off when the hull rocks. However, the absolute best mattress for
keeping you in place is a bean bag mattress in a bed box.
Unfortunately there isn't enough room on an SJ233 for one of these.
- Closed celled foam is
warmer than open celled foam.
- Closed
cell foam floats and open celled foam sinks, although not
immediately. You never know when this will be needed.
The top and front of Panache's cushions are covered with Olefin, a tough high quality 1970s fabric that almost never wears out. The
bottom, back and ends of the cushions are covered with a water proof vinyl fabric. I chose vinyl for the bottom so the foam couldn't wick up water. This way the cushions stay put, don't wick up water and I stay dry through the night. Been there, done that, don't need to do it again.
This has been a wise decision on more than one occasion! I usually
flip them over for meal time to protect the fabric from a spill. Wiping
up a spill on vinyl is easy. There is a #4 vinyl zipper around the back to remove
the cover.
As good as all this is, I'm looking for a fabric spacer to add ventilation under the foam. I want to rid the foam of that clammy, damp feeling. That moisture will eventually lead to mildew and stains that I'm not interested in.
Split the Settee Cushion (2024)
- My original design called for two cushions on the starboard settee so I could just slide stuff across to the other cushion to access the storage below. Short cushions are also easy to pack away in the cabin for winter storage. Unfortunately I ran short of Olefin, the top covering material, so was forced to make a long single cushion for the starboard settee. On the flip side (no pun intended), the long cushion looks good and is comfortable to sleep on, hence my quandary in splitting this ~25 year old cushion. But I'm really fed up with having to move stuff off the settee. I now own a heavy duty Sailrite LSZ sewing machine, so here goes nothing!
- The starboard cushion was split at the 1/3 portion. The 2/3 portion will fit nicely under my upper torso so my bum doesn't bottom out at the split while sleeping. The 1/3 portion will give me convenient access to the battery and primary circuit breaker below the settee.
- Cut lines were drawn across the fabric and the foam using a carpenter square while the cushion was stretched with foam inside.
- The zipper slider was pulled to the long 2/3 cushion side.
- The cushion fabric and zipper was cut using sharp scissors.
- The foam was set on its side against a cabinet with the cut line ~1" past the corner of the cabinet. Supported as such it was easy to saw down along the cut line using a Henkel serrated bread knife held at a shallow angle. Use very light pressure to let the teeth cut, staying on the line.
- The long cushion fabric was turned inside out and the open end of the zipper was stitched across to hold the slider captivate. Then the pre-cut end panel was sewn on. To complicate things I added a fancy zipper pocket to tuck the slider into. Why not!
- The long cushion was completed after I wrestled the foam back inside the cover. Wow that's a job. Now I know what its like to stuff a cat in a bag.
-------------------------------
- The zipper slider for the small cushion was moved to the larger cushion in step 3 above. Restoring the zipper on the small cushion was problematic as the correct size slider is elusive around here. For this reason I replaced this zipper plus the entire back and end panels of the cushion. Sometimes a remake is the simpler solution.
- The teak fiddles at the turn of the settee do a good job of keeping the cushions on the settee. An additional fiddle has so far not been needed.
Helpful Videos
-
Watch one of these videos. You might get more out of them than reading my description.
Box cushion for the cabin. Box cushion with piping for the cockpit, Box cushion construction with excellent description.
Parts - 1 M of colour matched vinyl fabric to close off the cushion ends. A 32" vinyl zipper for the short cushion. 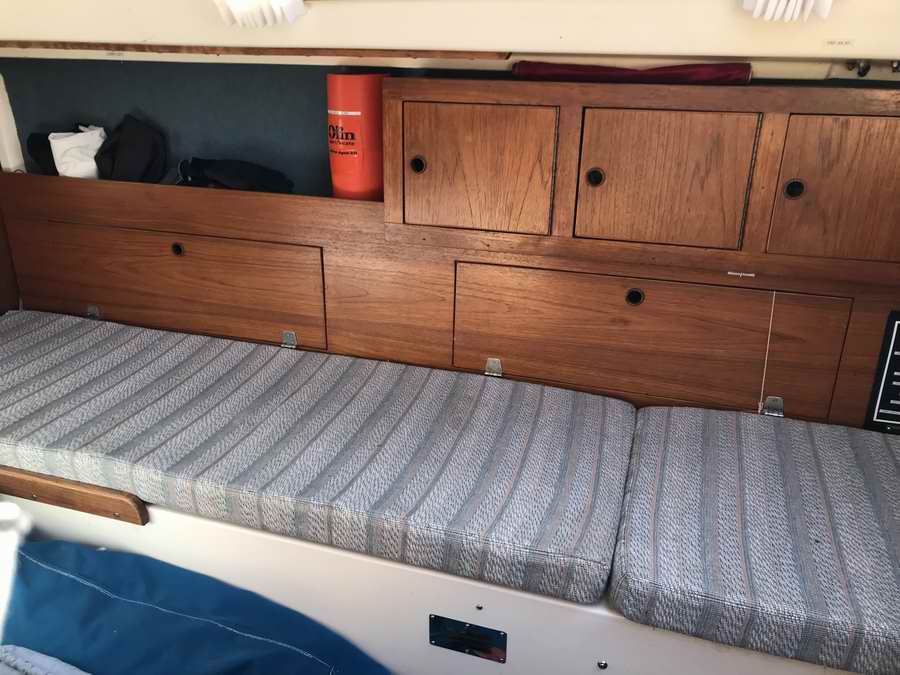
Starboard settee cushion split at the 2/3 point and still comfortable to sleep on.
I instantly realized that access to storage below is quicker and easier. TOP
 Backrests (2000)
-
The original factory backrests that covered each opening were made
of 1/2" plywood covered with foam and fabric, stapled a
zillion times at the back. Just like the cushions, they looked very 1970ish, so
they had to go! There was also a fiddle along the edge of the shelf
to keep stuff there as the boat heeled. It was too low to be useful, so it had to go as well. Backrests (2000)
-
The original factory backrests that covered each opening were made
of 1/2" plywood covered with foam and fabric, stapled a
zillion times at the back. Just like the cushions, they looked very 1970ish, so
they had to go! There was also a fiddle along the edge of the shelf
to keep stuff there as the boat heeled. It was too low to be useful, so it had to go as well.
I wanted to create a unique backrest look with a continuous wood grain finish so I
covered the whole works with a single sheet of 1/2" teak plywood. To restore the fiddle I carried the plywood
to 3"
above the shelf. A jigsaw with a double cutting blade does an amazing job of cutting out the doors without tearing out wood. The cut is glass smooth, and is perfect for this type of job. I have seen a couple of SJ23s that didn't have access to the storage area behind the backrests.
This may have been the case on earlier SJ23s. Each
back rest door is latched with a double roller catch similar to those
used on kitchen cupboards in the 1950s, similar to the ones used on the galley doors. They are a bit stiff to
operate but then they have never opened with the boat on its side, so I see no need to replace them.
Construction - The
back rest door hinges are positioned at the bottom, level with the tops of
the cushions. Positioned as such an open door can flip down flat
on the cushion. I used stainless steel hinges, veneer for the edges and
teak finger pulls in the holes to prevent splinters. The finger pulls were expensive
but they improved the appearance so much that it was worth it. They also provide a bit of ventilation. All the teak
is stained with a light application of Minwax coated followed up with hand rubbed Cetol for a very durable, washable
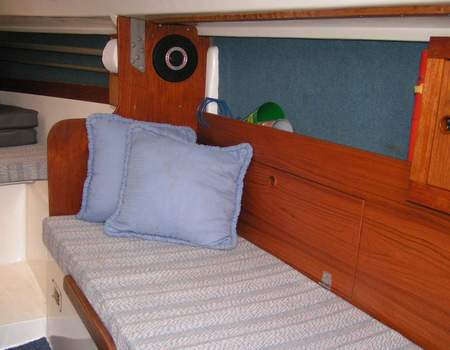
finish. Now I have a smooth wall to sleep against and a slightly wider
berth to lie on. With my 5' 10" height I don't have quite enough headroom for
sitting against the backrest. So I slump a bit with a cushion behind my back. This works
OK for a while but I find it much more comfortable to sit upright against the bulkhead
with
my legs extended along the settee. Perfect with a reading light under the overhang of the ceiling and arms length to the table for my evening tea. The cushions are also handy for those guests
who are inclined to spend a
little longer drinking their grog on a rainy day. EVERY BOAT has its
compromises! TOP
 Speaker Enclosures (1995)
- A
peek at the photo above reveals a speaker
installed in the top of the bulkhead. This was done by one of the
previous owners. While I would never
recommend cutting a 5" diameter hole into a load-bearing bulkhead, the plywood
has shown no sign of fatigue. I'm sure this has a lot to do with the fact that I
smoothed the inside of the hole round to distribute the forces uniformly and saturated
the wood with epoxy to strengthen it. Speaker Enclosures (1995)
- A
peek at the photo above reveals a speaker
installed in the top of the bulkhead. This was done by one of the
previous owners. While I would never
recommend cutting a 5" diameter hole into a load-bearing bulkhead, the plywood
has shown no sign of fatigue. I'm sure this has a lot to do with the fact that I
smoothed the inside of the hole round to distribute the forces uniformly and saturated
the wood with epoxy to strengthen it.
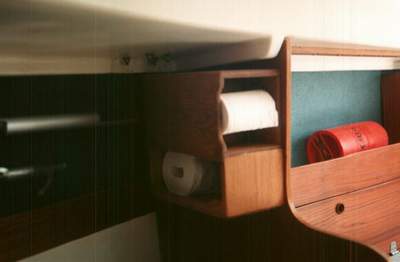
When I bought Panache my two young sons
were quite small and loved to poke sticks into everything, especially delicate speaker
cones. This prompted me to construct the speaker enclosure shown
at the left which does triple duty as an "after dinner roll holder" and
nightstand for anyone sleeping on the forward berth.
There is a slightly different design of a similar unit on the port
bulkhead that stores a small fire extinguisher, mosquito trap and other sundry items.
The bug screen for the forward hatch now lies on the narrow shelf.
Both enclosures restore
some strength to their bulkhead. The cabin of a SJ23 is not a great acoustical chamber so I stuffed the inside
of the each enclosure with fibreglass insulation to minimize reverberations and a small hole to let air pass for the speaker cone. The speaker wires are hidden on the forward side
of the bulkhead, right against the hull. If
I had to install speakers from scratch I would have chosen an enclosure on a mounting bracket on the aft side of
the bulkheads. They would be out of the way without compromising
the strength of the bulkhead.
NOTE: Unfortunately my late 1990s AM/FM/Cassette radio
that used to drive these speakers has bit the dust. The real beauty of this unit was that it retained the station presets during a power down
(carbon
slug tuner) and all I had to do was switch on the power. Granted it doesn't have seek or scan, which would be
nice, but I know the frequencies of the local radio stations which
is a dying art these days! There are times when I long for simplicity. See Tech Tip E17.
Construction - Here is my
original pencil sketch for building the speaker enclosures. Please verify the measurements for your installation.
I used 3/8" thick solid oak to build the enclosures and Minwax cherry
stain to match the teak. TOP
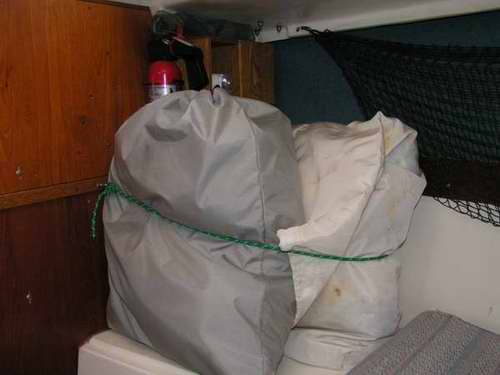
Sleeping Bag Storage - I
store a light polyester sleeping bag on the forward side of each bulkhead,
one with a pillow in an old sail bag.
They are loosely stuffed in their bag to preserve the loft and stay bone
dry to be warm at night.

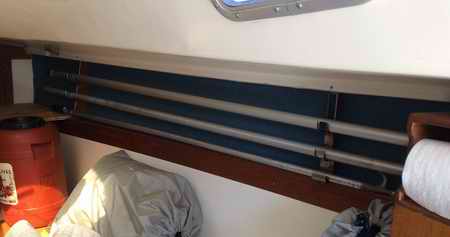 Whisker & Mooring Pole Storage (1998) - Most pocket cruisers lack proper storage for whisker, spinnaker or mooring poles. They are
always in the way. Another compromise? The design on the right has
served me well since I installed it. No more stubbing my toes on
deck! Moreover, my son always knows where to find the mooring pole,
which is usually his job. The poles have never come off their hooks, regardless
of how rough the water is and they never make noise. They also double as a handy clothes-drying
rack! Whisker & Mooring Pole Storage (1998) - Most pocket cruisers lack proper storage for whisker, spinnaker or mooring poles. They are
always in the way. Another compromise? The design on the right has
served me well since I installed it. No more stubbing my toes on
deck! Moreover, my son always knows where to find the mooring pole,
which is usually his job. The poles have never come off their hooks, regardless
of how rough the water is and they never make noise. They also double as a handy clothes-drying
rack!
Construction -
To mount the hooks I installed a (1x2)" piece of teak with the top end
wedged behind the roof
liner and the bottom end wedged behind the teak fiddle on the
ledge. The back is shaped to
match the curvature of the hull. The teak is fastened with stainless screws at the
top through the hull liner and at the bottom through the teak fiddle. The J hooks that hold the poles are made from 1"
wide stainless steel strapping that I bent into a 1700 curve
with a 1.5" inside diameter. They are fastened to the teak straps with two screws to
prevent turning. I applied vinyl electrical tape on the inside of each J
hook to protect the pole from scratching. Leave sufficient space between
the upper and lower J hooks to conveniently remove the lower pole. I
suppose you could add a third set of hooks for a fishing rod but I
thought this would make access to the narrow shelf difficult. There is nothing
wrong with installing a fishing rod holder on the port side though!
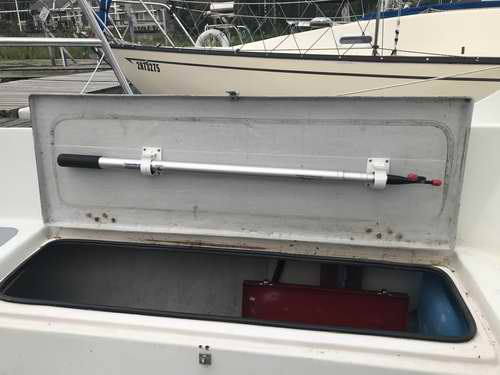
This is a pretty clever way to store a telescopic mooring pole. Right where you need it most of the time. Yup that is Panache in the background and yes you can still learn something from another boat. TOP
|