| SJ23 Tech Tip F34b, (Created 2021-09-20) Greg Overton, Bob Schimmel. | |||||||||||||||||||||||||||
|
Dyneema Standing Rigging for Goodpain |
|||||||||||||||||||||||||||
|
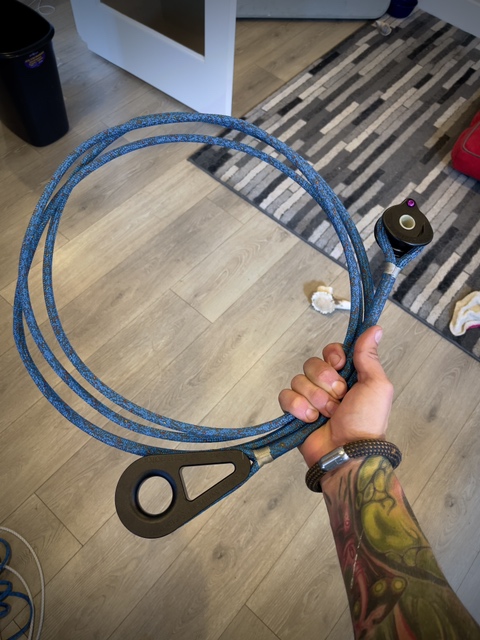
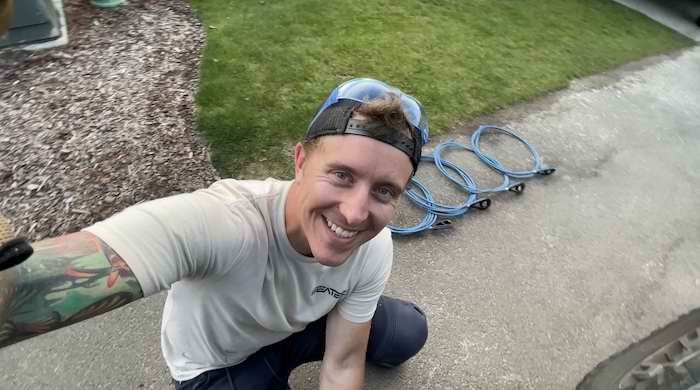
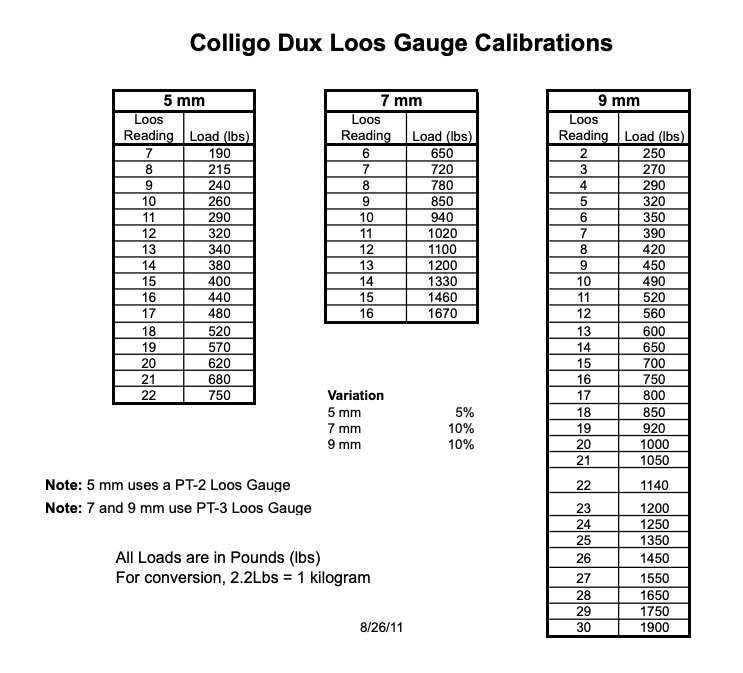
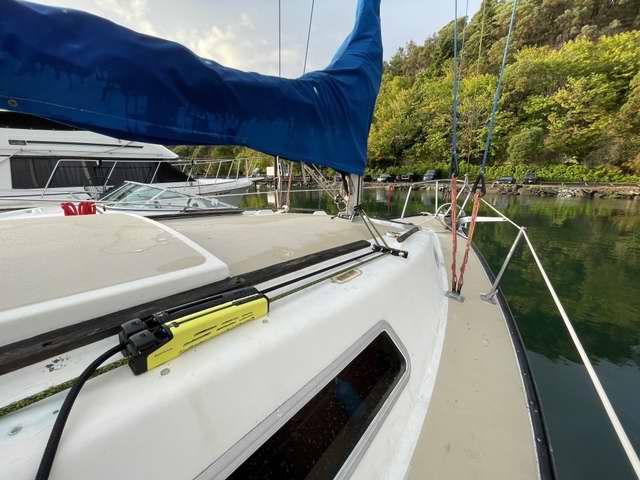
Hey there SJ23 crew! I finally got around to taking photos of our new standing rigging after we got the mast up on Goodpain. This is our progress at this point in time. I spend a lot of time around the racing community here and have some friends who work for North Sails, plus others who helped to build America Cup boats. I’ve long been convinced that Dyneema was the way to go for SJ23 rigging. I contacted John Franta, the owner of Colligo Marine, who helped me spec out rigging for Goodpain. We used 5MM Dyneema Dux (heat-stretched) covered with a Technora chafe sleeve from Premium Ropes. Covering the Dyneema is not normal practice. I have not found anyone who has fully covered Dyneema rigging with a chafe sleeve, although I’m sure it’s been done. The reason that it’s not necessary and difficult to do, is because of how compressed Dux already is. We decided to do it because we wanted graphite blue rigging. I mean,… come on,… it has to LOOK GOOD! In reality, Technora protects against UV damage and sail/sheet chafe. It could also be used to cover a length of Dyneema so a line locker can grip it. It should extend the life of the Dyneema shrouds. By the way, bare Dyneema is good for ~7-10 years according to John. Covered, as I’ve done, they should last as long or longer than the SS wire they replaced. DYNEEMA SPECIFICATIONS - In terms of sizing the Dyneema, you actually size it for the STRETCH, not the breaking strength. I noted from Tech Tip F34a that Bob chose to upgrade from 1/8” wire to 5/32” wire, so I chose to spec the Dyneema against 5/32” wire for comparison. 5mm Dux will stretch approximately 50% less under load than 5/32” (4mm) 1x19 SS wire, and has an ultimate breaking strength roughly 4 times higher (2,822 lb for SS, 10,472 lb for Dux)! The following 3 charts are from the Colligo Marine website.
BREAKING STRENGTH of 5mm DUX:
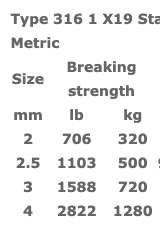
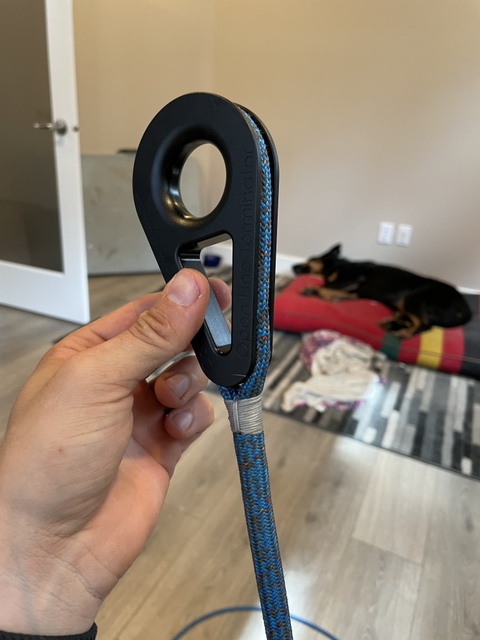
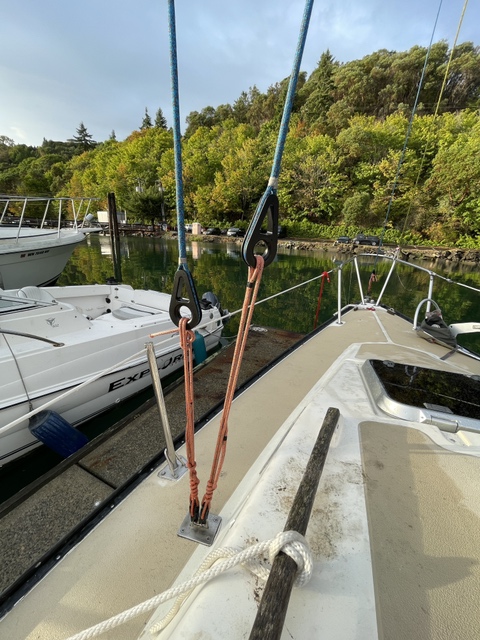
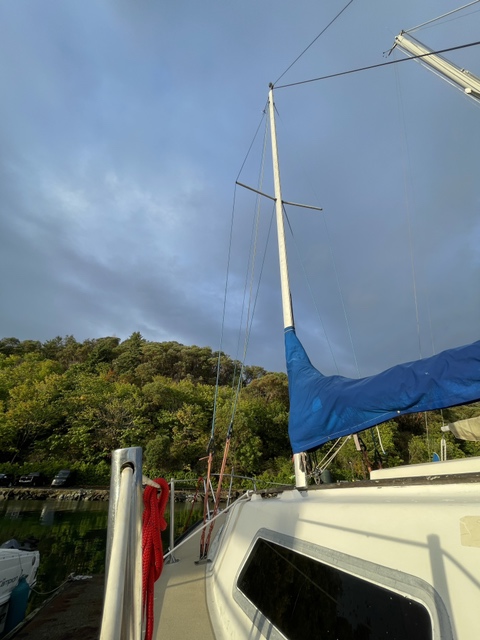
CHEEKY TANGS to CONNECT SHROUDS to MAST - Of course we had to convert all the terminations from wire to Dyneema. For the mast connections that meant using the Colligo “cheeky tangs” and using their knot-stopper terminators at the top of the chain plates. See photos below. By looking at their drawings online, I noticed that the cheeky tangs should be able to fit over the spreader bolt and that the spreaders should be able to butt up against the cheeky tangs! I removed the spreaders and mounting bolt with compression sleeve to replace the factory bolt with a longer one so the new cheeky tang connectors could fit. When I tested the assembly I felt hopeful! It’s gonna work! I straightened one end of the old bolt to remove the sleeve, wrapped the new bolt in electrical tape to electrically isolate the aluminum and stainless steel, then bent the ends of the new bolt to match the factory bends. As a side note, the bends in my original bolt were not symmetrical. I measured the angles with a digital gauge and the two sides differed by ~5 degrees. I'm blaming this on the previous owner. The new one is perfectly symmetrical.
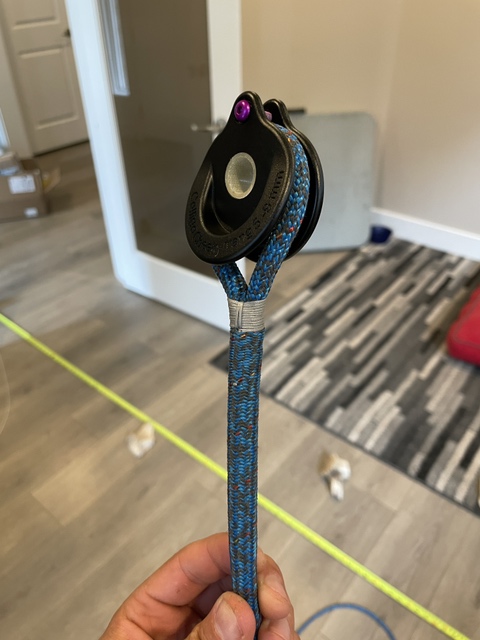
TECHNORA SLEEVE to PROTECT DYNEEMA from UV - To use the Technora chafe sleeve over Dyneema I had to make a covered eye splice instead of the standard locking splice recommended by Colligo Marine. Pulling the Technora sleeve over the eye splice was a bear. The first prototype took me 3-4 hours of swearing and sweating. I thought of abandoning my plan to cover the new rigging, but then it occurred to me that some tension might help. So I tensioned the rigging between my workbench and the tie down in my van (because I could move the van to accommodate the different lengths) and it worked like a charm. Now I was down to about 30 minutes per termination (with a total of 12 to do, two per stay).
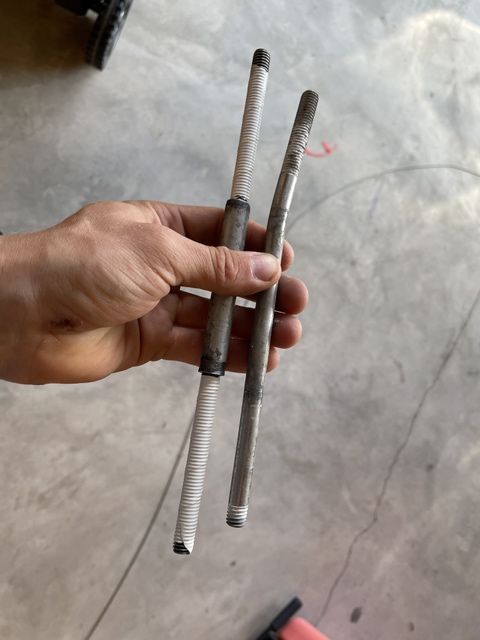
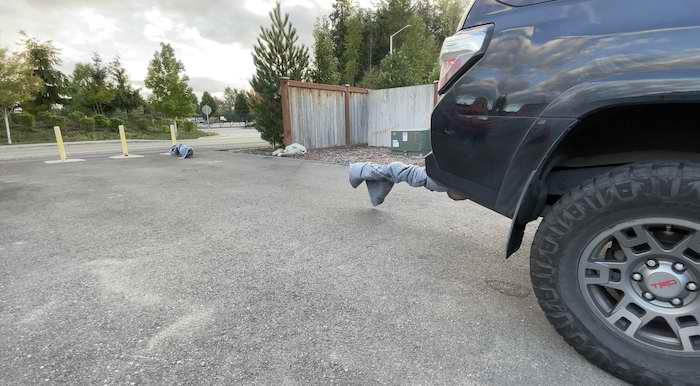
REMOVE CONSTRUCTION STRETCH - Once all six stays were complete there was one final step. Dux is pre-stretched at the factory. When it is spliced the fibres loosen and they must be tensioned again to restore the stretched length. John said that for a SJ23, based on its displacement and righting moment, the 5mm Dux was overkill. I shouldn’t have to pretension these again. But… “anything worth doing is worth over-doing,” so we hitched them up between our 4Runner and some bollards at the end of our alley. We had one spare length of Dyneema that I wanted to use as a proof test, so I hooked that one up first and pull tested it. We ended up breaking the tire loose on the 4Runner! This is a screen grab from the video showing the setup for removing the compression stretch.
All 4 shrouds stretched and ready to go on the boat.
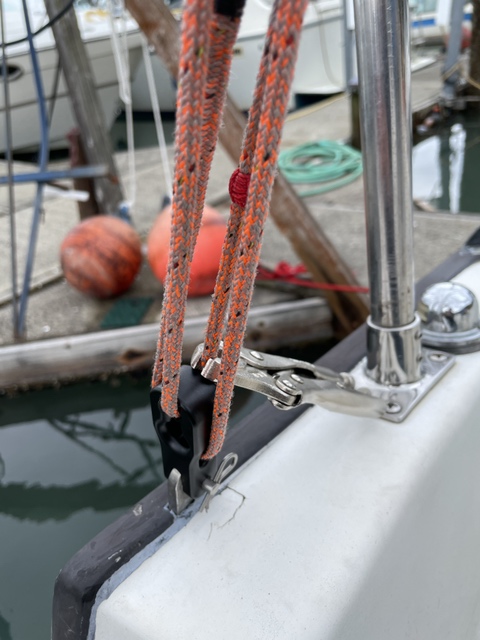
TENSION SHROUDS with LASHING LINE - A lashing of light Dyneema is used on the deck end of the shrouds, forestay and backstay to tension the standing rigging. Some people still use a turnbuckle for this application on an SJ23, and because I wanted to be able to loosen the shrouds quickly to lower the mast, I used their stopper knot lower chain plate adapter (typically used for beach cats) and 4mm Dyneema lashing line. The cool part of this conversion to Dyneema is that the length of the replacement rigging does not have to match the SS lengths. This is because you’re going to make up the overall length with a lashing, making the tolerance on a shroud length pretty large. I ended up using very long shroud lashings because I’m planning to move the chain plates to the cabin roof in the spring, as well as converting to integral composite chain plates instead of stainless steel. These further changes will reduce the length of my lashings by ~(12-14)”, so I made them about 28” long this time. In the spring, when I move the chain plates, I won’t have to make new shrouds.
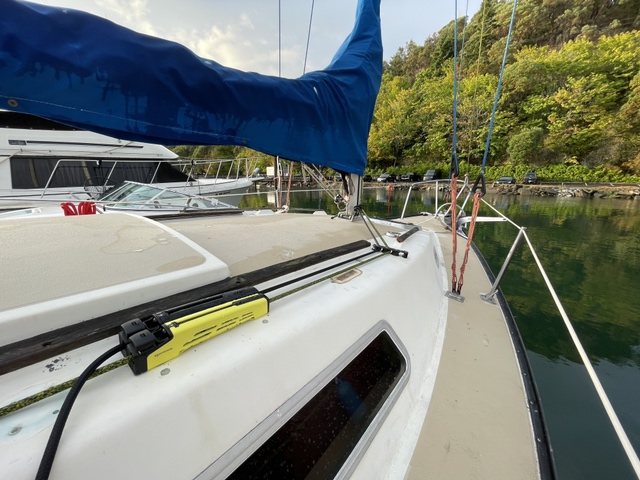
I tensioned the rigging using a Loos gauge with a conversion table from Colligo Marine.
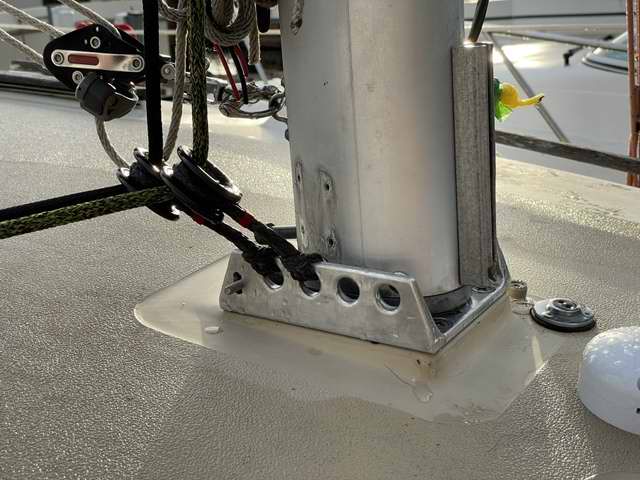
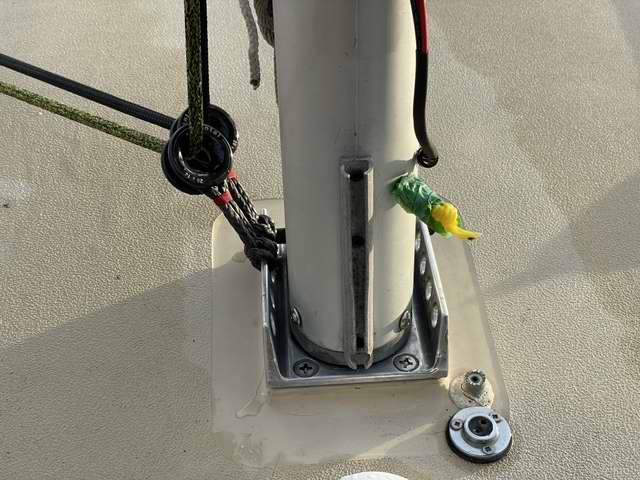
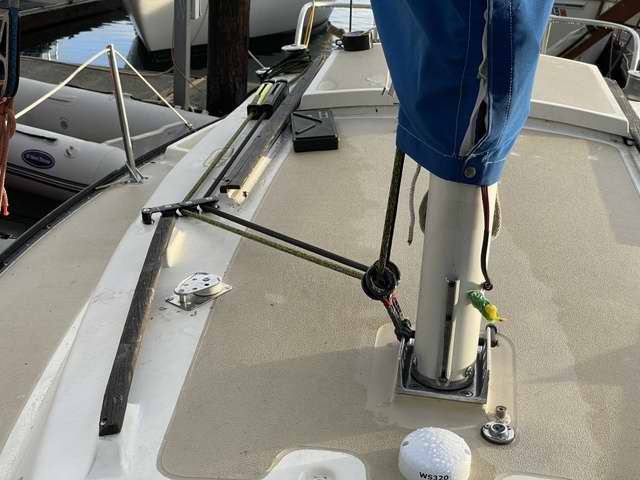
MAST HINGE PLATE -
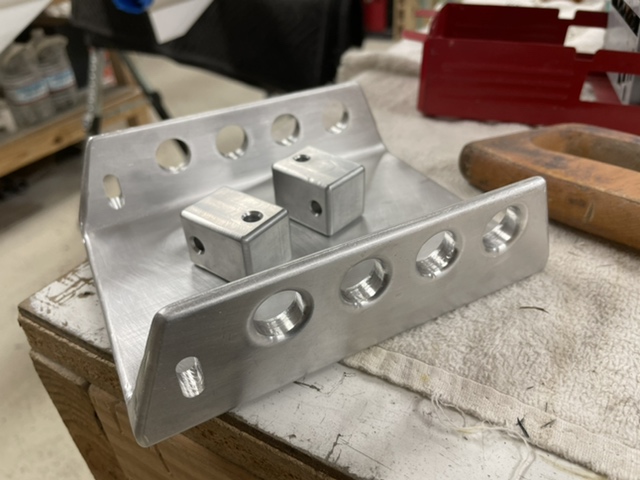
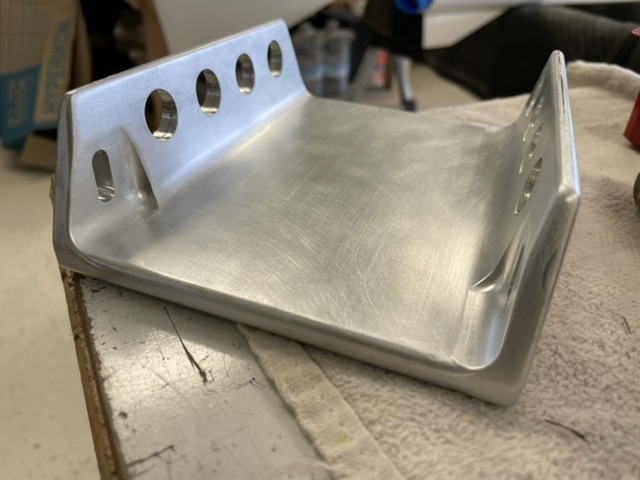
While I was at it, I replaced the mast step plate with one I machined a few months ago. I also fabricated a new gooseneck with a spare. To avoid pulling tension on bolts through the deck and to use the compression strength of the mast itself, I wanted a mast step with integral attachments for halyard fairleads. I found a piece of standard aluminum C-channel that is the perfect size. Holes were drilled through each side, and I did some end milling for sex appeal, flats for the spacers, then followed with sanding and polishing and it was ready to rock.
|
|||||||||||||||||||||||||||
|
For this reason I replaced the spreader ends with new ones drawn in CAD and printed out of carbon fiber-reinforced nylon and then filled with West resin. The spreader end is drawn to be perfectly vertical on the bottom and ~150 inward at the top, with the fairest curve possible in the ~32mm outside diameter of the spreader end. They are designed to remain attached to the shroud instead of the spreader, so I didn't use a bolt to hold it to the spreader. I whipped each end straight through the center of the shroud, which means I should be able to adjust, inspect, replace it easily. When I lower the mast, I simply unplug the end fitting from the spreader leaving it attached to the shroud in the correct place. When I step the mast, I plug the spreader onto the mast fitting and the spreader fitting into the spreader and hoist away! (pictured at right in CAD without the whipping holes drawn)
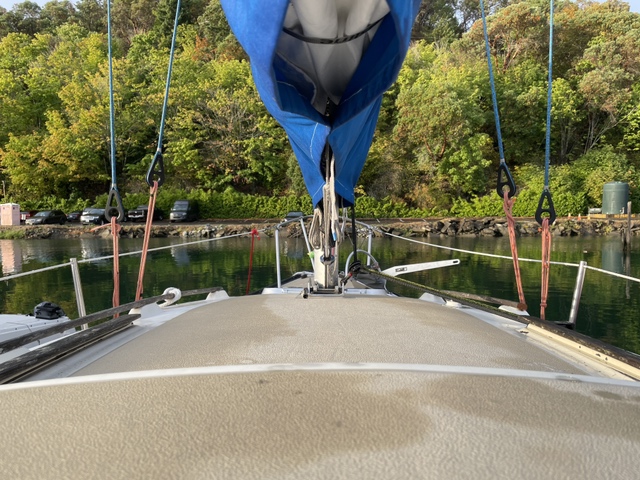
Goodpain is now equipped with Dyneema shrouds, backstay and forestay. She has several hanked on headsails using brass hanks, albeit highly polished with a Dremel Tool to eliminate burrs that can damage the Dyneema forestay. In the future the brass hanks may be replaced with soft shackles. They are a little slower to install but will yield other benefits.
To douse a jib, we install a dousing line (Tech Tip F11) to the sail when it’s rigged. It’s a 5mm covered line with a small stainless steel carabineer spliced to the end. The carabineer hooks onto the halyard shackle. From there, the line goes through a block on the foreword most hole of the toe rail, then aft through some fairleads to a cam cleat in the cockpit. It is left
loose for hoisting, then snugged up to remove most of the slack. The line just sits up along the forestay while sailing. When it’s time to douse, especially single handed, you release the jib halyard and pull the dousing line. The dousing line pulls the head of the jib down and accordions the sail down to the deck. If you leave the jib sheeted in for this, it makes a nice, neat stack pack on the side deck. |
|||||||||||||||||||||||||||
|
COST - The all in cost for the conversion to Dyneema standing rigging was about $1,200.00 US (2021). Most of that was for the new hardware required for the Dyneema. If I were to replace the just the Dyneema it would cost only $250.00 US. Overall I’m exceptionally pleased. This standing rigging has this crazy modern space age look with a traditional feel to it when you’re standing in the cockpit. I’ve load tested each piece of rigging well beyond any force they could experience aboard the boat. I went for a sail in moderate wind one evening and I must say the rigging is STUNNING under sail. It already out performs my old rigging without any tuning. Granted, I’m pretty sure my old SS rigging was factory original and was also not tuned to within a mile of spec. If anyone has any questions about this process or is interested in converting their SJ23 rigging to Dyneema, please email me. I’m happy to put you in touch with John at Colligo Marine. Fair winds, my friends. Greg Overton Go to Tech Tip P07 to see the rest of the modifications.
|
|||||||||||||||||||||||||||
|
See Tech Tip F34 - Standing Rig Maintenance & Replace. See Tech Tip F34a - 5/32" SS Rigging for Panache. |
|||||||||||||||||||||||||||
|
Return to Tech Tip Index. . . . . . . . . . . . . . . Have a Question? |
|||||||||||||||||||||||||||


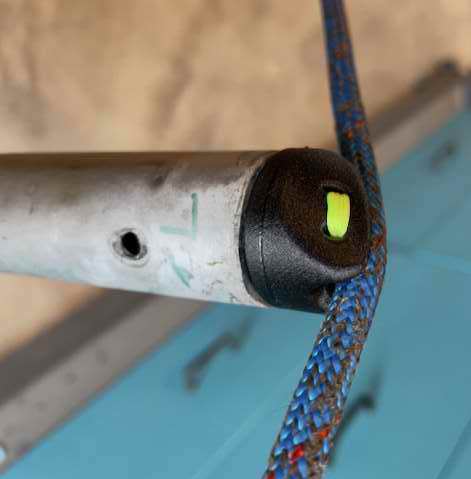
 SPREADER ENDS to SUPPORT SHROUDS - Synthetic rigging demands smooth curves over the spreader ends.