| SJ23 Project 06, (Issued 2015) Knotless Too by Bill Ward. | |
|
When I was in high school, shortly after the days of chiseling our homework on rock tablets, I was working at the YMCA as a "gopher". My parents had an eleven foot Sunflower sailboat that I generally kept on top of my car, ready to go to the lake. After work one day, as I was leaving the Y to go sailing, a co-worker stuck her head in the car window to ask about the boat. She went sailing with me. As it happens, her father also had a boat—a Venture 21 named “Knotless.” I married that co-worker five years ago. “Knotless” is long gone. When we got our San Juan 23 last Spring and needed a name for her I thought “Knotless Too” would be appropriate. Everyone has a story about how they named their boat. This is mine! Although she was in pretty good shape for a 37 year old, she needed some work. “Knotless Too”—not the co-worker! Nothing serious, since we were able to sail her the weekend we bought her. Just a bunch of things I wanted to fix and/or improve.
Note to everyone: trailer bearings are our friends. Treat them well!
I tried to do the same with “Knotless Too” and found that with the short cockpit and long cabin I couldn’t reach out far enough to get the mast vertical. So, I built some stairs to go up from the galley to the open hatch allowing me to climb up through the companionway to the deck. While the steps work reasonably well, I found out I’m not as young as used to be and the mast is just too heavy for me to step without a mechanical assist. An A frame crane, as per Tech Tip F18, is coming before the next cruise. The steps worked pretty well for un-stepping the mast and will help with stabilizing the mast as it is raised with the crane so, overall, not a wasted effort.
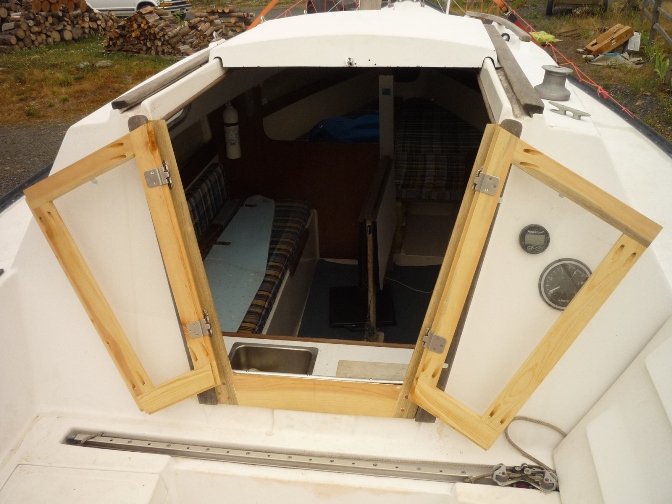
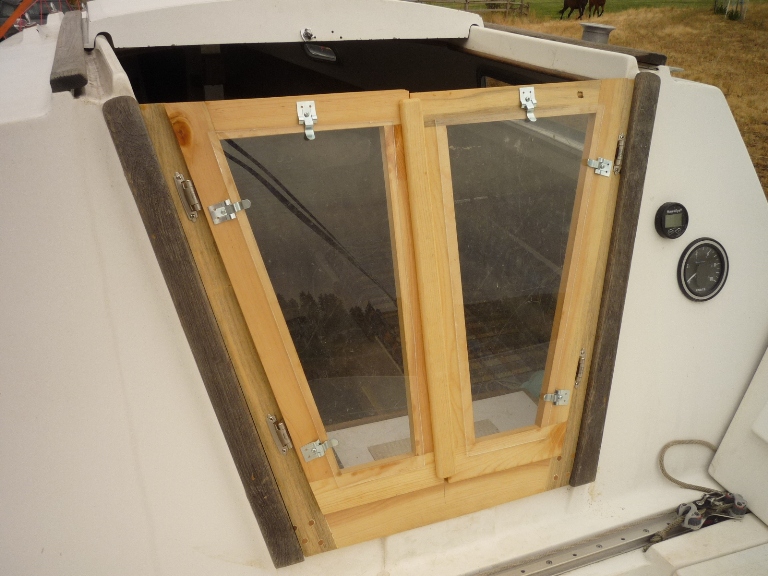
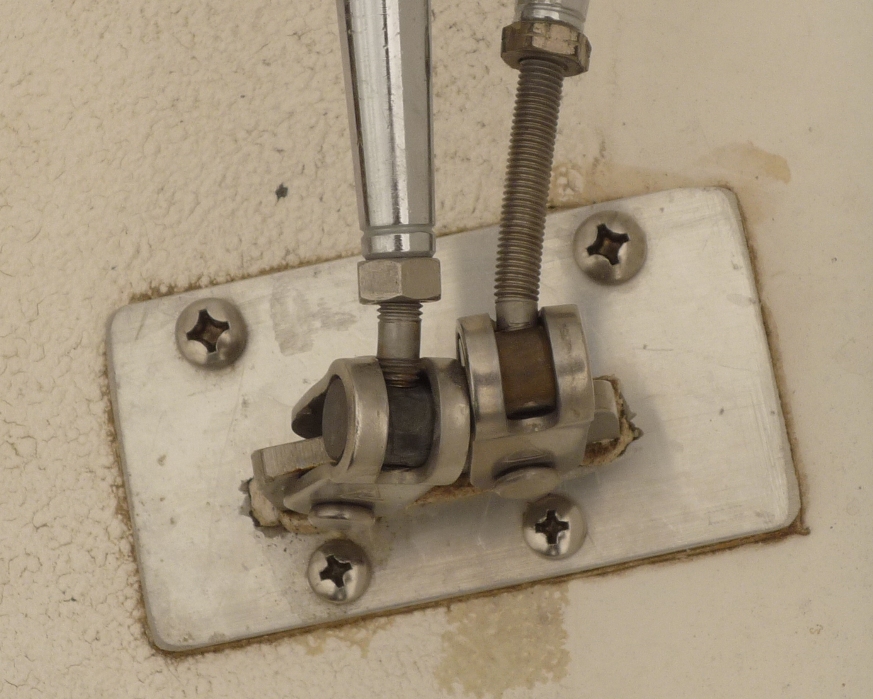
By definition, these doors are prototypes. They don’t fit quite right, but are functional and don’t have to be stored. For what it’s worth, the “prototype” batwing doors on “Celebration” were still in service when I sold the boat ten years after building them! The one piece fiberglass hatch board is used when storing the boat as it is more secure, doesn't leak and can't rot. Depth Finder - In the pictures of the batwing doors you can see the little, two inch, depth finder readout just above the knot meter. The transducer is epoxied beside the knot meter sending unit under the V berth. I had some concerns about using a shoot through the hull mounting but it seems to work just fine. Chain Plate Deck Plates - Although there was obvious leakage around the starboard chain plate, the bulkhead is still pretty solid—not perfect, but pretty solid. So I followed Tech Tip B07 to seal the chain plates and reinforce them. I removed the old sealant, cleaned it out as much as I could, and then used butyl rubber to seal them with the addition of a deck plate to hold it in position. I like using butyl rubber under deck fittings because it can be tightened down, when needed, and it seems to never run out.
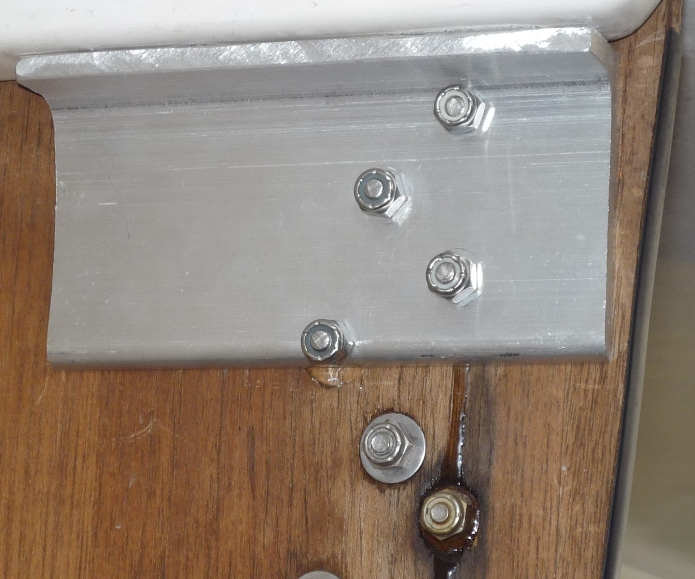
While recognizing the potential hazard of corrosion, I used aluminum for the deck plates. But I made the slot a bit over sized so there isn’t any contact between the stainless chain plate and the aluminum deck plate. Because I sail in fresh water, I felt this was an acceptable compromise and I was able to make the plates myself from some available bar stock. The two bolts closest to the chain plate actually go through to the inside, with proper care taken to dry and seal the core. The other two screws go into the header on the forward side of the bulkhead. I over drilled the holes and filled the header with epoxy (it took quite a lot!) then re-drilled to correct size. I also made a thread cutter from an extra bolt so the screws didn’t just expand and break the epoxy plug when inserted.
You can see where the epoxy dripped a little when I was filling the holes for the deck plate screws. Oops. Hey, if that’s the worst mess I ever make on a boat, I’ll die happy!
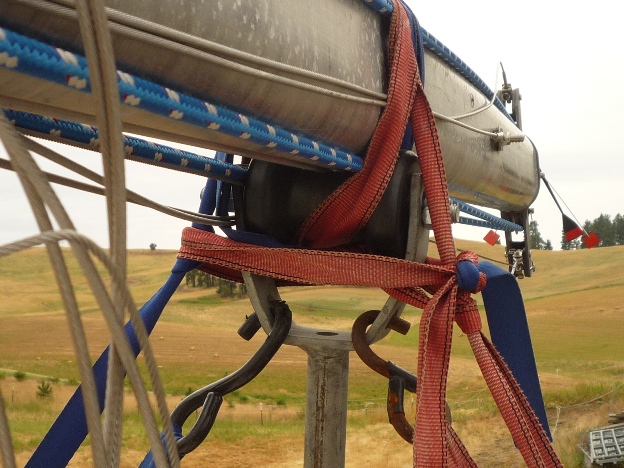
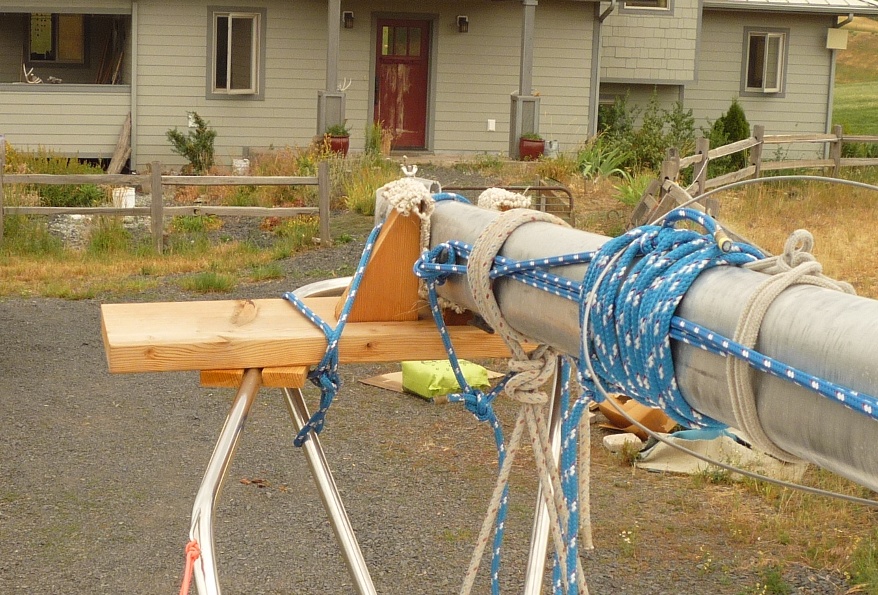
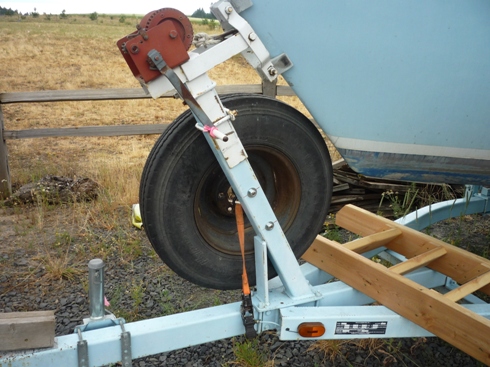
But it had a V block for the mast to rest on and it was a bear of a job to move the mast fore and aft into position sliding or lifting it over the block. So, I replaced the V block with a roller. The photo isn’t great, but it shows the idea—and the straps I use to keep the support centered.
The extra length of strap is used to tie the mast to the support for transport. Using the roller I can pick up the base of the mast on the bow and simply walk it back to the tabernacle, rolling the mast along the roller. It makes positioning the mast MUCH easier than lifting it back! It isn’t quite as slick when moving the mast forward because the support wants to lean forward and bind. I solved that problem, temporarily, by having my daughter simply lean into the support to keep it in place, tight against the straps. When I got “Knotless Too” the bottom of the mast was resting on the bow pulpit and the center was unsupported. I used Tech Tip A07 as my guide for bracing both for the pulpit and for the center of the mast.
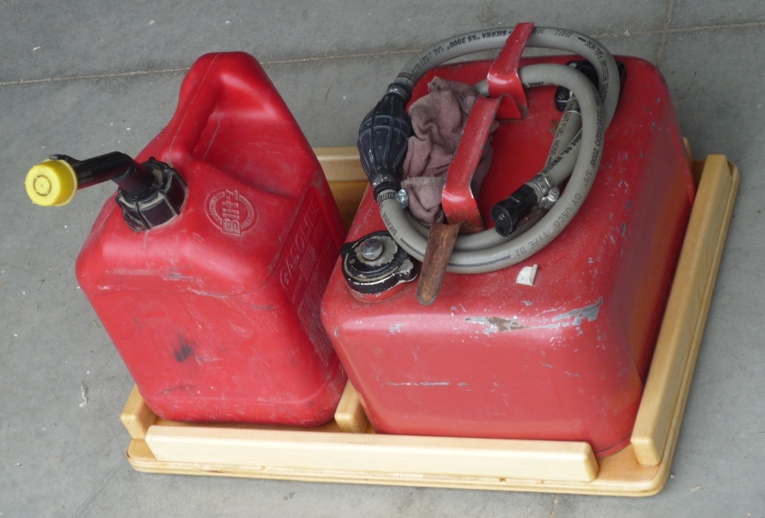
The center support pix didn’t come through, but it’s very similar to the Tip. Fuel Tank - I really don’t like storing gas down below in my unvented cockpit locker. I also don’t like having the metal gas can slide around in the cockpit. So I made a tray to hold the gas can and a spare jug of gas. When I don’t need the spare gas, a small cooler just happens to fit in the same space and is a convenient way to keep a cold beer handy in the cockpit!
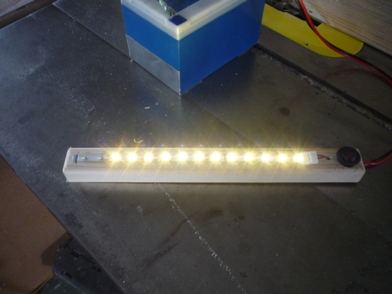
Someday I hope to add inspection hatches to the inside of the transom that could also be used for venting. I might also add vents. If either of those things happens, then the gas can(s) can be stored below when not in use. I’ll still, probably, bring the can out to the cockpit when running under power. Maybe. Running Rigging - The rope section of both halyards was very badly frayed where it is secured to the mast cleat. Both halyards have been replaced with all rope halyards using 3/8” yacht braid. I like yacht braid as it is very easy on the hands and flexible enough to minimize snarling. Since I don’t have a spinnaker I don’t have a third halyard. Only one halyard leads back to the cockpit. I’m using that one for the jib since I have to go on deck to run the bolt rope into and out of the mast, anyway. At some point I’ll run them both to the cockpit simply because I like having them there. The main and jib sheets are older, but still very serviceable. Topping Lift - I used the wire section of the main halyard to make a topping lift. The wire is pinned at the masthead in an available hole and has about 5 feet of the original rope halyard still attached to the other end. I put a turning block and jam cleat on the end of the boom. Although she came with a boom jack, I prefer the adjustability of a topping lift and the ability to swing the boom out to the side. It was easy to install and works quite well. Anchor and Rode - “Knotless Too” came with a nice Danforth anchor, perhaps a bit big for a 23 footer, but not so much as to be a problem. Besides, I like oversized ground tackle just as a matter of personal preference. She did not come with an anchor rode that amounted to anything. As I mentioned, I used to sail on the Great Lakes, Superior and Huron. I learned that having ground tackle that actually stays put is really quite important! On “Celebration” I ended up with a 35 pound CQR with 75' of 5/16" chain, backed up with 200' of ¾" triple strand anchor line for my main anchor. I also had a large Danforth with plenty of chain and rode for a secondary. I did NOT want “Celebration” to drag the hook, regardless of conditions! A San Juan 23 doesn’t need, nor has the storage, for that kind of ground tackle! But, I still don’t want her to drag the hook. Since I’m retrieving the hook by hand, as opposed to the manual windlass on “Celebration,” I just can’t have the weight of chain that I had on the C&C. But, I still want the weight of chain to pull the anchor from as low as possible. So, I rigged a compromise, one I’ve not heard of before. I attached about 10' of rope rode to the anchor. Then I have about 8' of 3/8" chain. All backed with 150' of ½" rode. The chain provides the weight needed to keep the Danforth digging at the right angle. At least, that’s the theory! I have yet to actually use the Danforth. I also have an eight pound navy anchor for my lunch hook. I use the same rode system by simply unclipping it from the Danforth and clipping it to the navy. We used it in light air over a weedy bottom last week and it worked fine. I store the rode flaked into a five gallon bucket in the port cockpit locker. Until/unless I decide it’s a bad plan, I’ll anchor from the stern so I don’t have to go forward to secure and retrieve the anchor line. For longer periods swinging on the hook I may take the rudder off so it doesn’t clang and bang; we’ll see. Battery, Navigation Lights, and House Power - When we got the boat the deep cycle battery was loose under the starboard settee and had moved forward enough to pull the leads off of the battery posts. NOT a good plan! The battery is now secured on a platform between the two forward hatches under the same settee. It is strapped in and isn’t going anywhere! I used some #10 wire (overkill, but I had it) to run up to the power panel. I also installed an auxiliary power line that can be pulled out from under the seat cushion and used to charge a cell phone, computer, etc. The line can reach into the V berth so we can power all that “stuff” while napping or sleeping. Navigation lights didn’t work, but I found out they were just dirty and corroded. After cleaning they worked! I need new lenses, someday, but was able to reinstall and seal them so they work for now. Future Projects - A boat is really a misspelled acronym for "An Endless List of Things To Do". Here is part of my list. I have to periodically remind myself that I got “Knotless Too” to go sailing, NOT to simply work on her!
|
|
|
Return to Tech Tip Index... . . . . . . . . . . . . . Have a Question? |
|
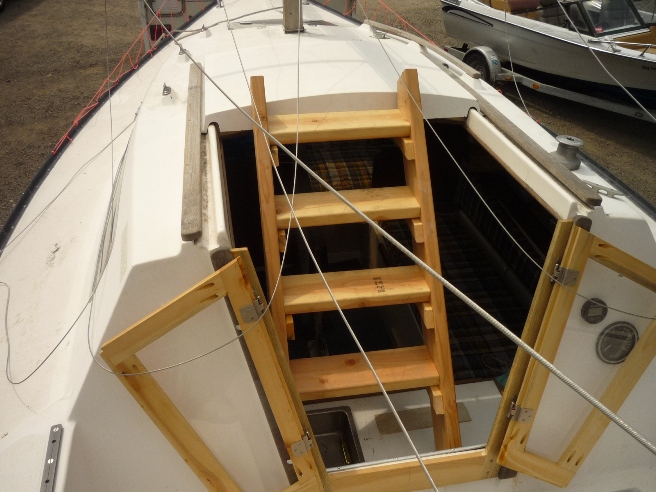 Steps to Assist in Stepping the
Mast -
Steps to Assist in Stepping the
Mast -