| SJ23 Tech Tip B25, (Updated 2004-08-09) Bob Schimmel | |
|
Stem Head and Tack Flange Fitting. |
|
 The
SJ23 standing rigging chain plates and stem head fitting are built very robust to
support the mast. In fact there's enough strength designed into them to lift the entire hull from all four fittings. This was a requirement for the manufacturing
process as the hulls were slung from these fittings to move them inside the factory. It should
be obvious that this strength is of great benefit out on the
water. The stem head fitting is bolted to the stem with three 1/4"
bolts where it simply cannot give. Short of the hull sliding over the
edge of the world, it will probably never let go! The
SJ23 standing rigging chain plates and stem head fitting are built very robust to
support the mast. In fact there's enough strength designed into them to lift the entire hull from all four fittings. This was a requirement for the manufacturing
process as the hulls were slung from these fittings to move them inside the factory. It should
be obvious that this strength is of great benefit out on the
water. The stem head fitting is bolted to the stem with three 1/4"
bolts where it simply cannot give. Short of the hull sliding over the
edge of the world, it will probably never let go!
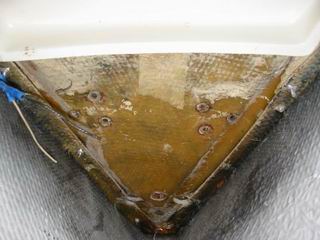
The flange for attaching the jib tack is welded to the back of the stem head fitting with excellent quality welding and the end of the flange is through bolted to the bow cap and deck with a 1/4" bolt. While the fitting is very robust, upon close inspection I discovered that the tack flange flexes quite easily. I discovered this when I had the fitting off the hull to replace my bow cap. See Tech Tip B12. While I was mindlessly bending it by hand one day I found that it flexed quite easily, much to my surprise. In fact it flexed about a 1/16" from rest. My strength doesn't even come close to the force of the working jib in a 10 knot breeze. To understand the extent of this I flexed it with a 12" wrench and discovered that I could easily deflect it 1/4." I didn't flex it beyond that, thinking the bend might become permanent.
Given the flexible flange there are two short comings in the mounting technique of the stem head fitting;
SOLUTION - Install a strap between the end of the flange and a stem bolt. Since the anchor locker is an extremely difficult and tight hole to crawl into it is essential that the strap you are about to make can easily slip into place, the first time. I suppose there are variations of this strap that can do the job but the difficulty of sliding into the anchor locker means that it really should work the first time.
Once in place the tack horns on the flange will be absolutely rigid making it impossible to lift. Go ahead and use it to step the mast.
NOTE: The tack horns shown in the stem head image above are bent down about 100 from horizontal to keep the jib attached. If you intend to bend these with the fitting still bolted on the bow, pry them down with a long bar or other leaver. Don't use a hammer. The impact blows will damage the fibreglass deck.
|
|
| CAUTION: Many
people temporarily attach the hoisting lines to the tack hooks to step the mast,
leaving the stem head fitting free to attach the forestay. This is a
very dangerous practice as the weld may let go, possibly ruining the rest of
your day! Despite the fact that the stem head fitting is welded very well,
you are straining the joint across its weakest dimension. Just because you
got away with it all these years is no reason to continue this dangerous
practice! I addition, the diagram in the SJ23 manual (Tech
Tip h06) shows attaching a line to the fore
deck mounted cleat to pull the mast up. This is also a very dangerous
practice as the cleat bolts may pull right through the deck, again ruining your
day! Neither of these is a strong fitting. Check under the deck
to confirm this for yourself. THE SAFEST PROCEDURE is to temporarily attach your lifting line to the forestay hole in the stem head fitting:
|
|
|
Return to Tech Tip Index. . . . . . . . . . . . . . . Have a Question? |
|
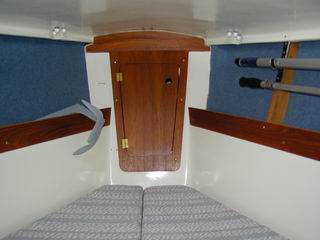 INSTALLATION
- Panache is not equipped with a deck anchor locker as described in
INSTALLATION
- Panache is not equipped with a deck anchor locker as described in