| SJ23 Tech Tip D07, (Updated 2023-05-03) Bob Schimmel. | |||||||||||||
|
Outboard Gear Shift Extender. |
|||||||||||||
|
We've all been there, sliding bow first into a marina slip with an expensive, shiny
hull beside you and nobody on the dock to catch your boat.
What makes this task difficult on an SJ23 is the
time consuming reach down to the side of the outboard for the gear
shift lever and tweaking the throttle on the upturned tiller, hoping you
twist it in the correct direction. This is exactly when you should be looking forward while
steering, for which you should be standing to see over the cabin. There are two problems with this approach: many people are not capable of maintaining a straight
course when turned around and for others it is a mobility
issue to turn around. Its a contortion they simply can't do. If you are going stern first into the slip this job is relatively easy with the good visibility that direction affords but the thought of crunching the rudder into the dock keeps me from doing this.
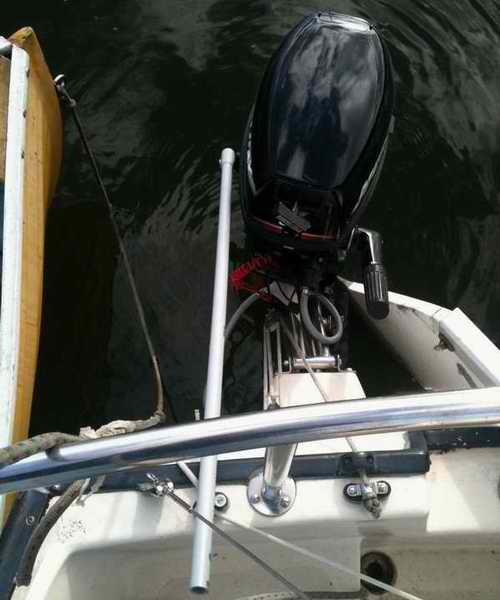
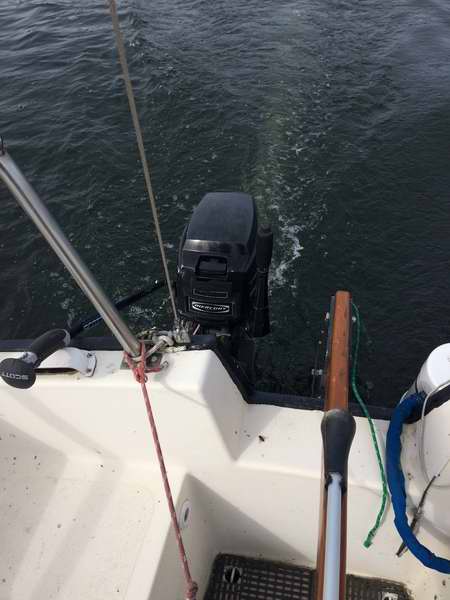
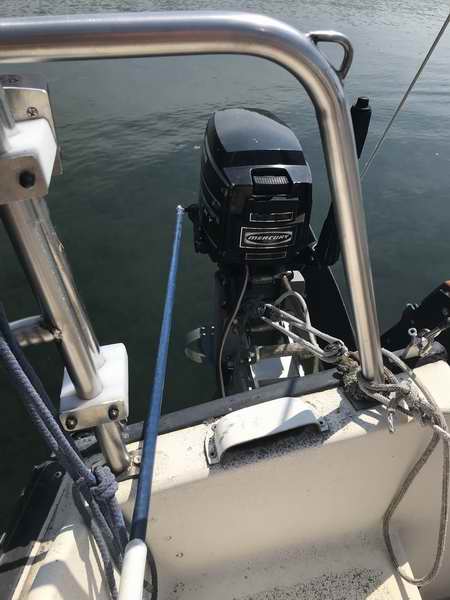
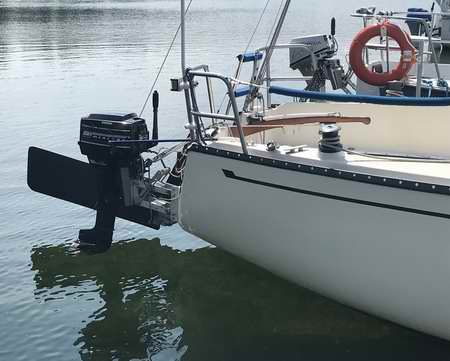
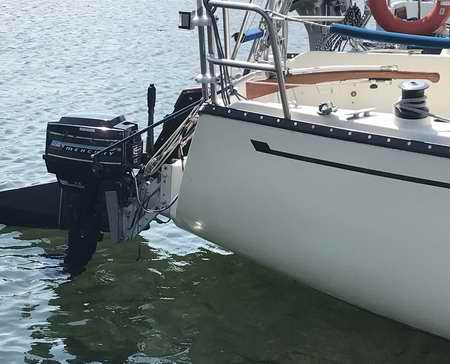
DOCKING - When docking solo with the outboard at idle I move into the slip ever so slowly in a slight angle toward the finger. I gently nudge the bow against the spine of the dock, then rotate the outboard a bit to push the stern against the finger. This will pin the boat against the finger, allowing me to step on the dock to snub the mooring lines before Panache starts to move. This manoeuvre is usually a piece of cake by shifting the outboard in and out of gear with the throttle at idle. Sometimes it is easier said than done. This is one manoeuvre where you don't want a following wind! Oh, one more thing, remember to set the spring lines on your boat. They are the most effective lines to stop the fore aft motion of the boat, keeping it off the dock. SHIFTER - What makes the docking process simple is if you can easily adjust the shifter and throttle. Shown here is one person's DIY solution installed on a SJ23 MKII. He attached a 3/4" PVC tube to a screw bolted through the top of the gear shift lever, thereby extending the shift control up to the cockpit. The design has enough play to permit raising/lowering, tipping and about 100 of rotation of the outboard due to the loose joint. So simple and yet so effective at minimizing the most frustrating part of docking. Now this is a civilized way to shift an outboard and offers the best bang for your buck. THROTTLE - Yamaha and some other manufacturers make a throttle lever extension that slips over the existing throttle lever, raising the throttle lever to transom height. This makes it easier and quicker to adjust the throttle. This control isn't for everyone and Panache's outboard bracket has too much up/down movement to make this extension useful. You still have to reach down there to start and stop the outboard though. Oh well. Hmmm, maybe I could add start & stop switches to the stick and include a safety slider to prevent accidental operation? Nah, not worth it. Notice the multi-purchase easy outboard lift copied directly from "another famous 23' yacht." Such cheekiness! Also a full pushpit and split backstay. PANACHE INSTALL (2010) - Having installed and used a similar shift extender made from an aluminum ski pole, I have since shortened it so it protrudes less into the cockpit than shown below. I was unknowingly pushing the pole back with my hip, shifting the outboard to neutral, just when I needed some push for the final approach into the slip. This was confusing when I found myself floating towards my neighbour in the slip. As a guide, I shortened the pole so when the outboard is in reverse, the end is 4" inboard of the transom. Neutral and forward gears will be further forward. The bonus is that I can flip the pole up and behind the pushpit to rotate the outboard for servicing from the cockpit.
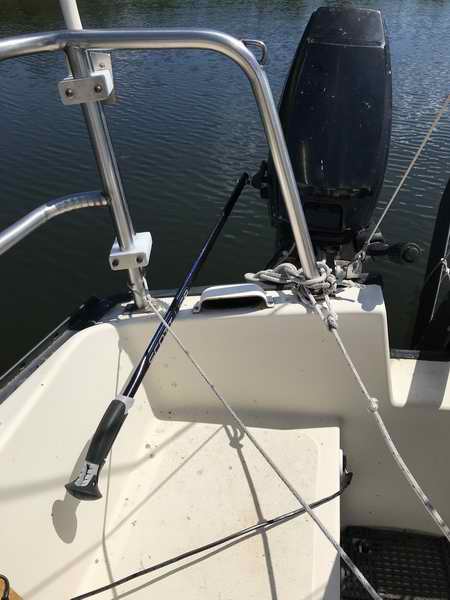
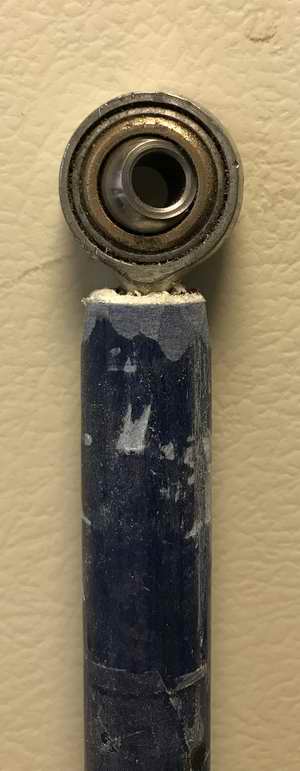
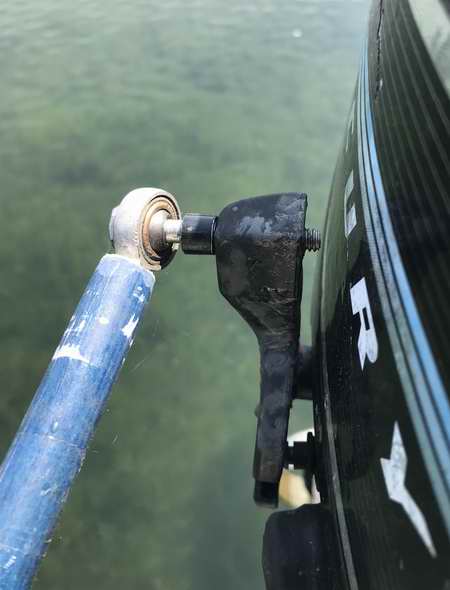
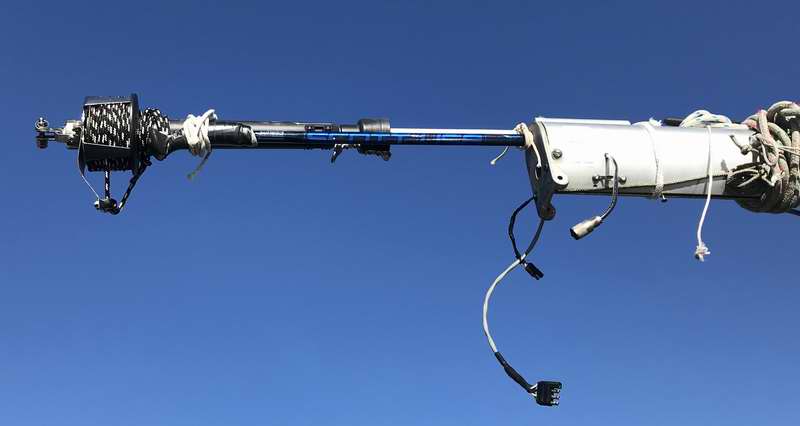
Rod End Fitting (2023) - As good as the gear a shift extender is, the outboard could rotate only +50 with the slight play in the joint. If I rotated the outboard beyond 50 it broke the Merc shift lever, which isn't sold anymore. Grrrr. I could have increased the play in the joint but then the action wouldn't be as sensitive. For this reason the end of the blue fibreglass ski pole received a rod end fitting that increases the rotation of the outboard to +300. This minimized the risk of breaking the Merc shift lever. It is now possible to push the stern sideways to the finger as the last action when docking. Read docking description above. In addition, the pole should be able to lay over the toe rail with the outboard tilted up, thereby keeping the cockpit seating clear. That being the case, I may leave it there permanently. With the previous aluminum ski pole, lowering the outboard sometimes pulled the outboard shift lever to forward when the handle snagged on the transom while the outboard was lowered. The new fibreglass does not have a handle that can snag on the transom. Ah the "hassles" of berthing in a slip compared to the freedom of hanging from a mooring. But then its a tad difficult to walk to shore from a mooring! Its also a lot easier to do repairs from a dock.
CONSTRUCTION - The rod end fitting is screwed into the end of the fibreglass pole that was previously filled with G-Flex epoxy. Cap the pole end to seal it tight, drill a couple of 1/8" holes across the pole ~3" up from the end, inject epoxy with a syringe, tape the holes shut, leave it standing in a warm corner while you sip a rum as it cures.
CONCLUSION - This new outboard gear shift extender is definitely an improvement, especially in the tight confines of motoring in a narrow slip.
The aluminum ski pole has been repurposed to support the furler when the mast is down. It saves a lot of time at the ramp. |
|||||||||||||
|
FOOTNOTE - I realize you can buy a factory remote control for an outboard that can be bolted to the side of the cockpit. They are really convenient to use and I wish it was available for my 1976 Merc 75. Problem is, the power boat type control lever is intrusive to sail handling since the sheets will tangle on the lever. If the lever could be removed, like for an inboard diesel engine, I would be tempted to install a system. Oh the blessing of looking forward while controlling the outboard. See Tech Tip D11.
PowerTiller II
- Here is an alternate outboard remote control installed on the tiller. I haven't felt the need to add their
control system to my tiller because I don't have the space. But it looks slick. |
|||||||||||||
|
Return to Tech Tip Index. . . . . . . . . . . . . . . Have a Question? |
|||||||||||||
 Docking can be daunting and if
the wind pushes your boat sideways it leaves little time to
stop the motion of the boat. The last step is to jump on the dock
with mooring lines in hand.
Docking can be daunting and if
the wind pushes your boat sideways it leaves little time to
stop the motion of the boat. The last step is to jump on the dock
with mooring lines in hand.
