| SJ23 Tech Tip F17, (Updated 2023-03-28) Bob Schimmel, Norris Palmer. | |||||||||
|
Step the Mast Using the Boom.
(With Related Issues) |
|||||||||
| The job of raising or lowering the mast is fraught with
enough hassles and dangers to fill your boots! I'm sure that everybody
has a story or two to tell. Since I don't need to add to my collection
of stories, I built an A-Frame as a fool proof method of raising the
mast. See Tech Tip F18.
In the mean time, what follows is a reprint from the original San Juan 23 manual, STEPPING THE MAST, (with some additional warnings and good suggestions from several club members). INTRODUCTION: The SJ23 manual assumes the boat is fresh out of the factory and takes the owner through the assembly procedure of installing the rigging the first time. Since there are no new SJ23s these days, I have eliminated the assembly instructions but you can read them online as Tech Tip H06. Therefore, the following mast stepping procedure assumes that all standing rigging is correctly installed and securely attached to the mast. However, before raising the mast, closely inspect all fittings for damage and ensure that every one of them is securely fastened and locked to the mast. If a cotter pin looks mangled, replace it with a new one. DON'T REUSE OLD COTTER PINS. Use vinyl electrical or rigging tape over a sharp item. And finally, fully understand the mast stepping procedure BEFORE the mast goes up (or down) and review your procedure with your helper before a turnbuckle is loosened. Safety first.
The black text in the description below is copied directly from the SJ23
manual. The italicized blue text
are my comments to add information or clarify Clark's 1970s "language". I understand it,
but many people today are confused with it! Bob
Schimmel. |
|||||||||
|
STEP THE MAST (Instructions from the SJ23 Manual)
|
|||||||||
|
|||||||||
|
NOTE: The issues listed below are not mentioned in the manual and should be
taken into consideration to protect the rigging and hull against
damage.
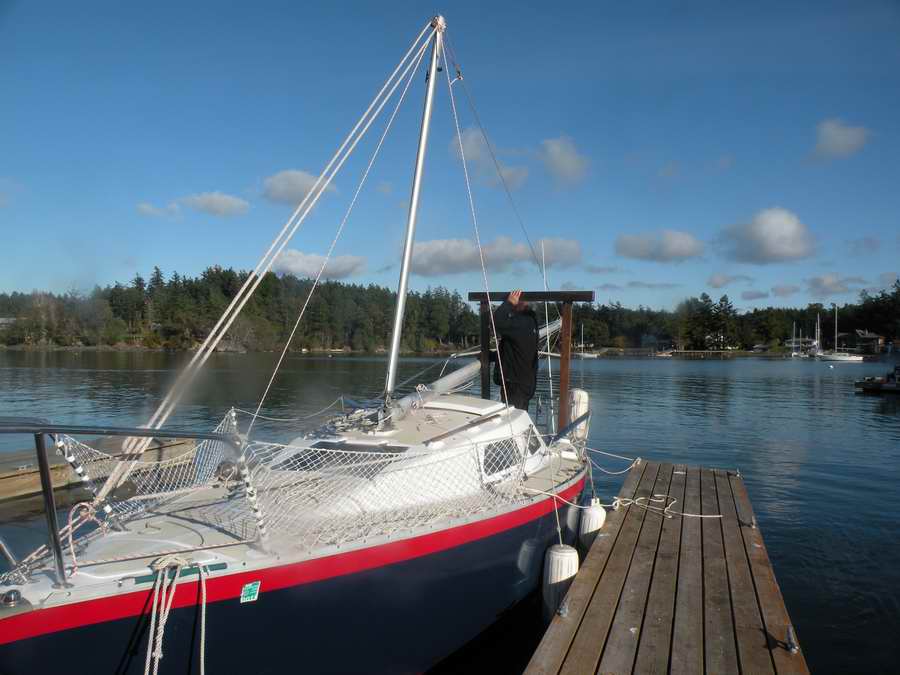
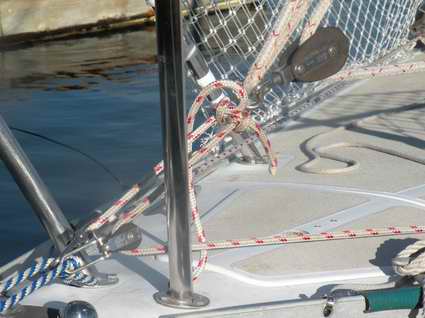
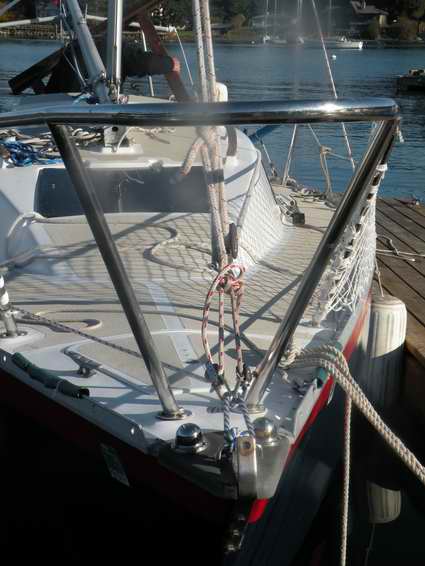
STEP THE MAST ON LAND OR ON WATER - There are two fields of thought here. If you step the mast on land, you have a solid platform to work from and you can retrieve a dropped item but you have to do a lot of ladder climbing. If you step the mast on the water, the floating hull rocks as you move around, it is "difficult" to retrieve a dropped item but you can conveniently step from the dock to the boat. One of the reasons why I once stepped the mast on the water is because I wanted to know what problems I would encounter. There are many people who don't own a trailer and have to step the mast on water for maintenance. Having said all this, I prefer the stability of the boat on the trailer and the ease of recovering a dropped tool. I have reduced the number of times I climb the ladder or stumble along the deck by wearing a tool apron. TAPE THE SHROUD TOGGLES - The toggles on the bottom of each shroud turnbuckle MUST stand up prior to (and during) mast stepping. If a toggle lays sideways, (pointed to the toe rail or to the cabin), it will jam and the bottom of the turnbuckle will bend as the rigging is tightened. Eventually the toggle will crack and break. Check this out before the stick falls down!!! To prevent this problem, wrap tape or line around the toggles to ensure they always stand up so the turnbuckles lay fore/aft. If you want to get technical about this, a turnbuckle and a toggle are similar to a universal joint, which can flex only about 200 without binding. LOOSEN THE SHROUD TURNBUCKLES - The turnbuckles MUST be loosened about 3/8" prior to lowering the mast to prevent damaging the shrouds, the bulkheads or creating a deck leak at the chain plates. This is because the foot casting on the mast protrudes slightly aft. This protrusion raises the mast ever so slightly as the mast is stepped, stretching the rigging and/or pulling the chain plates up through the deck. The shrouds can stretch only a teeny amount and have their limit. The previous owner on my boat never released the turnbuckles and this neglect pulled the chain plates up, a little bit each year. It took about 15 years to pull all the mounting bolts 3/8" up through the plywood bulkheads. I should add that during this period, the cabin was damp due to poor ventilation. This contributed to softening the plywood bulkheads which made this migration through the wood possible. I have since dried the boat; Tech Tips 06 and C07, and repaired the bulkhead holes using the WEST system. My rigging survived all this quite OK, but if you just can't seem to tighten your rigging properly due to having run out of thread, check the chain plates and bulkhead before the stick falls down!!! Now you know why the chain plates leak water. Seal them with Sikaflex. This stuff is so tenacious it just doesn't let go. MINIMIZING MAST SIDE MOVEMENT - Side movement is probably the greatest contributor to creating water leaks at the hinged mast step. The foot of the mast fits snug in the step and any sideways movement of the mast will torque the fitting off the deck to crack the deck seal. It is the helper's job to control sideways movement. If you use the boom or a spinnaker pole, as the manual suggests, either of the techniques shown here can keep the mast centered. Failing that, your helper can nudge the boom sideways a bit to keep the mast centered over the hull. This takes little effort and the person is in a safe place, outside the drop zone. Alternatively you can use an A-frame as described in Tech Tip F18. An A-frame is a good way to ensure the lift is dead center over the hull. In addition to an A-frame you can use temporary shrouds to eliminate side swing. The combination of using an A-frame with temporary shrouds can make stepping the mast a one-man job. TOP |
|||||||||
|
Return to Tech Tip Index. . . . . . . . . . . . . . . Have a Question? |
|||||||||
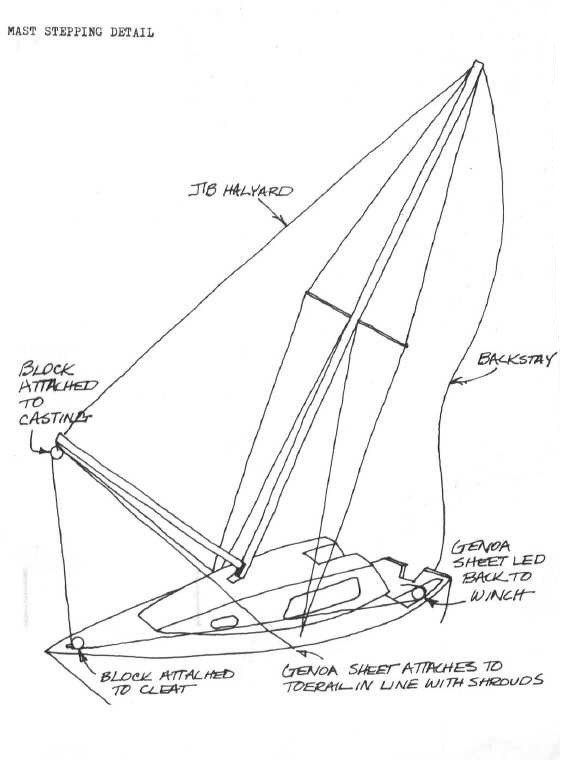
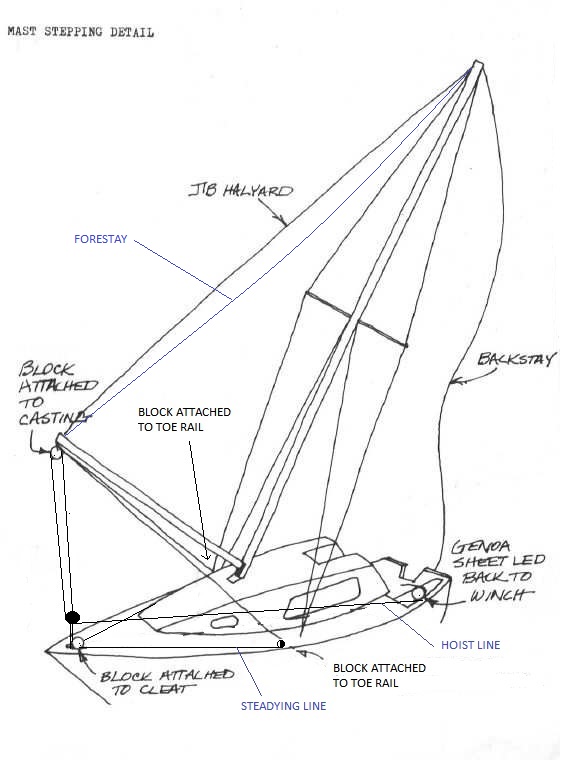 FORESTAY - You may as well latch the forestay to the end of the boom so it doesn't clutter the deck. When latched to the boom it also backs up the halyard and positions the turnbuckle where it is needed for fastening to the deck once the mast is standing.